FLIP TARP
CRAMARO TS S.r.l. – 37044 COLOGNA V.TA (VR) - VIA QUARI DESTRA, 71/G TEL. +39 0442/411688 / FAX + 39 0442/411690
E-MAIL [email protected] WEBSITE: http://www.cramaro.com - Manual no. MFT002-EN-ED07 – date 02/05/2017
Page 14
•
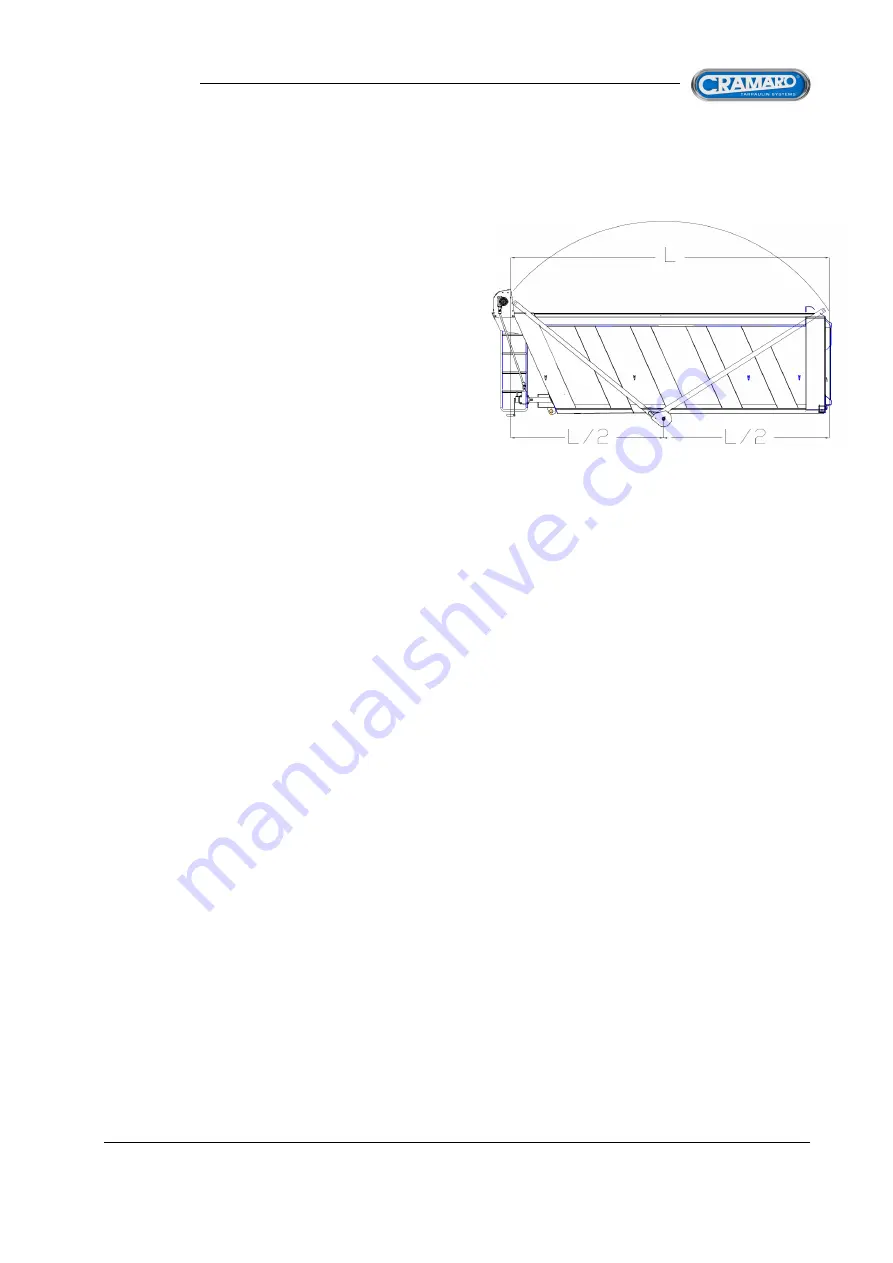
POSITIONING AND FIXING THE SIDE ARMS
Fig. 6
The side arms are not
very difficult to position. Once you have measured
the distance between the tarpaulin housing
and the front portion of the container, just divide this
measurement
and position the plate acting
as a fulcrum for the tarpaulin operating arms halfway along
the measurement.
The option of adjusting the length
of the arms (only the lower
portion of the arms comes as standard) will make it fairly
easy to position the arms themselves.
IMPORTANT: The fulcrum must be positioned as low as possible and parallel to the container
PLEASE NOTE When the tarpaulin is not used, leave it in the unrolled position (covered container); less
stress is applied on the springs, which ensures greater durability.
PRE-TENSIONING THE SIDE ARMS
The side arms are usually pre-assembled as far as their lower portion is concerned and with the tensioning
springs inserted, connected and ready to operate when the assembly is completed.
However, in relation to the kind of assembly and geometrical features of the container (length, height, etc.), the
pre-tensioning of the springs carried out by the manufacturer is probably not enough to ensure the tarpaulin
works properly.
Therefore, before completing the assembly of the tarpaulin and therefore permanently attaching the upper
portion of the rotating arms in their operating operation, check whether the springs are well-tensioned to ensure
the arms move smoothly during their whole stroke.
To adjust the tension of the springs, take out the upper portion of the arms and use the special nut at the top of
the lower arms (the ones connected to the container). Turn it clockwise or anticlockwise to increase or reduce
the restoring force of the arms. An additional adjustment is provided by the chain located on the lower part. By
attaching it in the highest hole, the restoring force increases, while it decreases in the lowest hole.
After completing the assembly of the sheet, check again whether the springs are well-tensioned to ensure the
arms move smoothly during their whole stroke. If not, adjust the control chain again as described above.


