www.costway.com
www.costway.com
Installation Steps / Installationsschritte / Étapes d’assemblage
/ Pasos de Instalación / Passi di installazione / Kroki montażowe
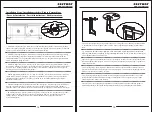
1. Measure the length of the sink, insert the extension tube and the upper/lower crossbar into the tube as
shown in the figure, and tighten it clockwise according to the required size until the product is stable and
not loose. (Twist counterclockwise to loose for telescopic movement)
1. Messen Sie die Länge der Spüle, führen Sie das Verlängerungsrohr und die obere/untere Querstange
wie in der Abbildung gezeigt in das Rohr ein und ziehen Sie es im Uhrzeigersinn entsprechend der
erforderlichen Größe fest, bis das Produkt stabil und nicht locker ist. (Gegen den Uhrzeigersinn drehen,
um die Teleskopbewegung zu lösen)
1. Mesurez la longueur de l’évier, insérez le tuyau télescopique et la barre supérieure/inférieure dans le
tuyau comme indiqué sur la figure, et serrez dans le sens des aiguilles d’une montre selon la taille requise
jusqu’à ce que le produit soit stable. (Tournez dans le sens inverse des aiguilles d’une montre pour le
desserrer et obtenir un mouvement télescopique)
1. Mida la longitud del fregadero, inserte el tubo de extensión y la barra transversal superior / inferior en
el tubo como se muestra en la figura, y apriételo en el sentido de las agujas del reloj según el tamaño
requerido hasta que el producto esté estable y no suelto. (Gire en sentido antihorario para aflojar el
movimiento telescópico.)
1. Misurare la lunghezza del lavandino, inserire il tubo telescopico e la traversa superiore / inferiore nel
tubo come mostrato in figura, e serrare in senso orario secondo la misura richiesta fino a quando il
prodotto è stabile e non allentato. (Ruotare in senso antiorario per allentare per il movimento telescopico)
1. Zmierz długość zlewu, włóż rurę teleskopową i górny / dolny pręt do rury, jak pokazano na rysunku, i
dokręć zgodnie z ruchem wskazówek zegara do wymaganego rozmiaru, aż produkt będzie w pełni
stabilny. (Obróć w kierunku przeciwnym do ruchu wskazówek zegara, aby poluzować rurę i
wyregulować długość).
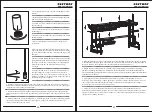
2. Connect the left/right support leg with the support piece using the screws and nuts provided according
to the direction shown in the figure, and use a hex wrench to tighten until the product is stable and not
loose.
2. Verbinden Sie das linke/rechte Stützbein mit dem Stützstück mit den mitgelieferten Schrauben und
Muttern gemäß der in der Abbildung gezeigten Richtung und ziehen Sie es mit einem Inbusschlüssel fest,
bis das Produkt stabil und nicht locker ist.
2. Reliez le support de pied gauche/droit à la pièce de support à l’aide des vis et des écrous fournis selon
la direction indiquée dans la figure, et serrez à l’aide d’une clé hexagonale jusqu’à ce que le produit soit
stable et non desserré.
2. Conecte la pata de soporte izquierda / derecha con la pieza de soporte usando los tornillos y tuercas
provistos de acuerdo con la dirección que se muestra en la figura, y use una llave hexagonal para apretar
hasta que el producto esté estable y no suelto.
2. Collegare la gamba di supporto sinistra / destra con il pezzo di supporto utilizzando le viti e i dadi
forniti secondo la direzione mostrata nella figura e utilizzare una chiave esagonale per serrare fino a
quando il prodotto è stabile e non allentato.
2. Podłącz lewą / prawą podpórkę do wspornika za pomocą dostarczonych śrub i nakrętek zgodnie z
kierunkiem pokazanym na rysunku i dokręć kluczem imbusowym, aż produkt będzie stał stabilnie.
14
15

