10
620917311
L.
Using the spray bottle, spray the inside of the two halves of the auger tube, the auger, the two halves of
the chute assembly and the undersides of the right and left covers. Allow to air dry.
M.
Reassemble the two halves of the auger tube and place back into its mounting. Holding the auger by the
upper shaft end, insert into the guide tube. Make certain that the auger slips into it drive pin. Chute as-
sembly will not assemble properly if the auger is not seated on its drive pin. Reassemble the upper au-
ger and chute assembly onto the auger and lock down by snapping the bail onto the upper housing. Re-
install the tower cover with the thumb screws.
N.
Reinstall the covers. Put the right cover on first before you close the left cover.
65
69
66
74
77
73
75
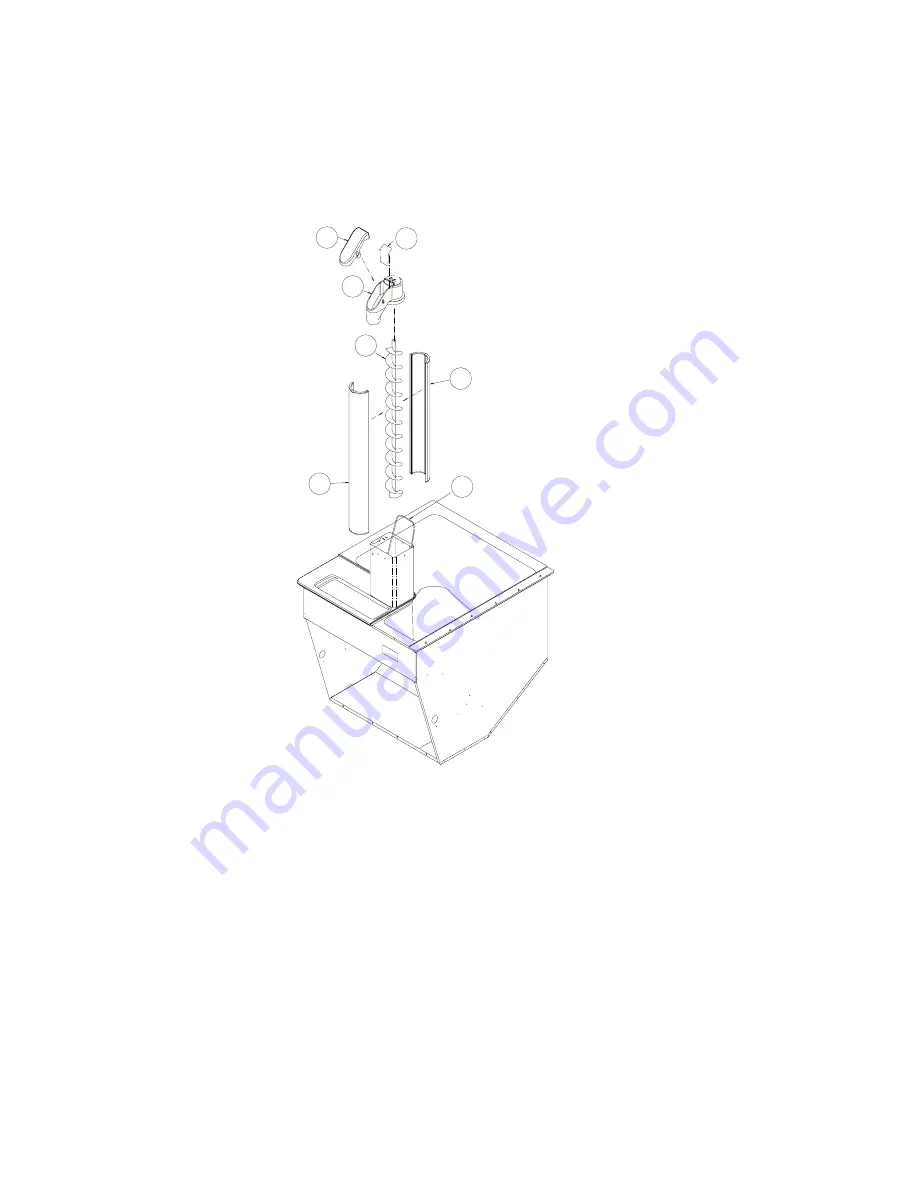
FIGURE 4. AUGER ASSEMBLY
AUGER ASSEMBLY BREAKDOWN
1. For cleaning, the auger assembly is constructed for simple not tools required breakdown. First remove the
tower cap (item 69) by removing the 3 knurled screws.
2. Once the tower cap is out of the way you will see a wire retainer (item 77). By placing your fingers on the
backside of the ice chute (item 65) with your thumbs pointing upward, place the thumbs on the retainer wire
and with a slight upward movement push the wire retainer towards the rear of the unit. The retainer should
pop out of the saddle and swing backwards.
3. At this point, you should be able to pull up on the ice chute and remove it from the assembly. You will notice
that the ice chute is made up of three pieces. That is the ice chute, the ice chute cover and the auger gate
which is respectively (Items 65, 66, and 69). Take not so that when reassembling the ice chute, the auger
gate cradles in the ice chute with the short tang side up.
4. The auger (Item 73) can now be removed by just grasping it and pulling up. Notice that the bottom of the au-
ger has a depression in the form of a D pattern. When replacing the auger, it will be necessary to rotate the
auger after insertion in the tube to engage the motor shaft.


