8
3
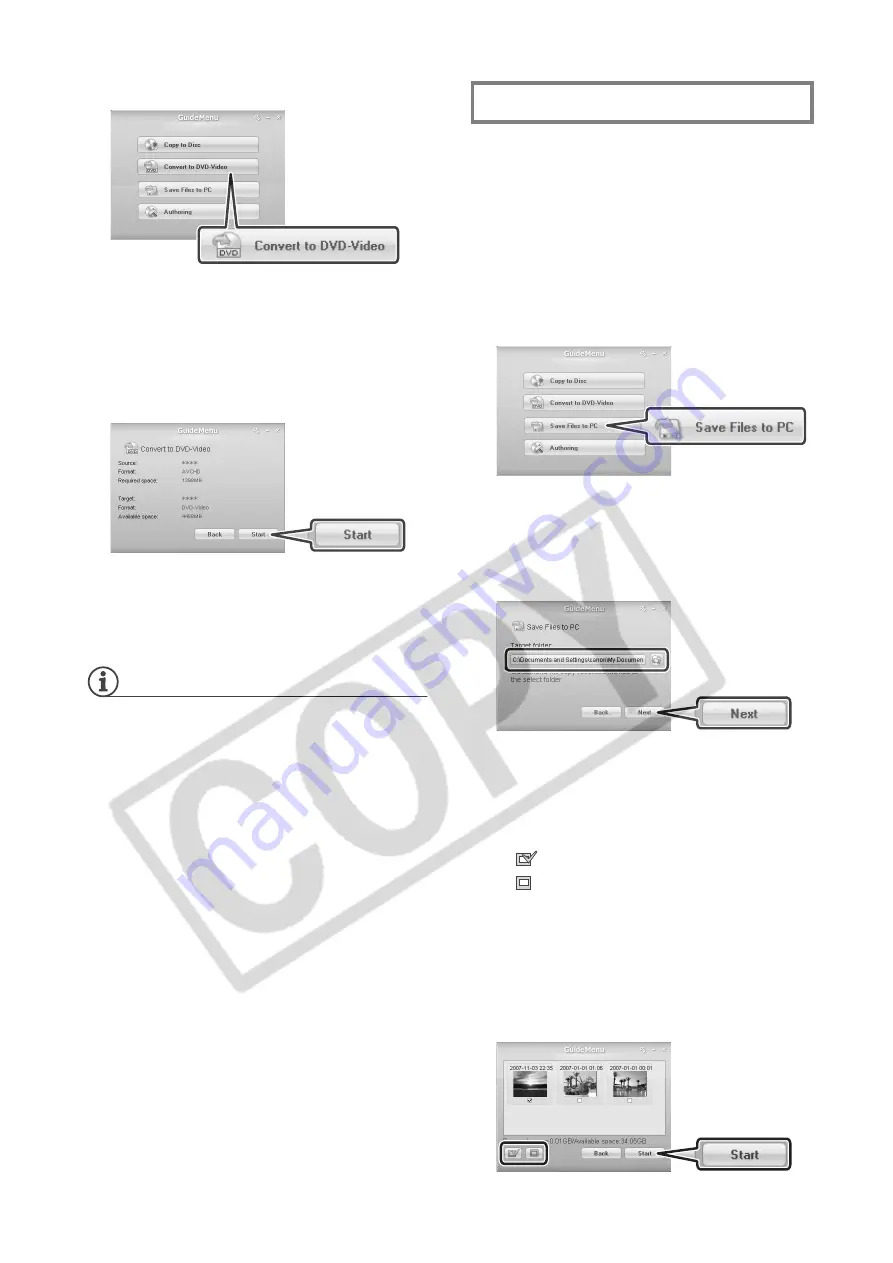
Click [Convert to DVD-Video].
4
Select the computer’s DVD drive
as the target device and click
[Next].
5
Verify that the information is
correct and click [Start].
6
When the disc conversion and
copy is completed successfully,
click [OK].
NOTES
• Depending on the length of the
recordings on the source disc, the
conversion process may take some
time.
• When recordings are converted into
DVD-VIDEO specifications, several
scenes will be merged into one scene.
• When a disc recorded in VR mode
(standard definition) is converted to
DVD-VIDEO specifications, all the
scenes will have the same aspect ratio
(16:9 or 4:3) as the first scene on the
disc.
Transfer the movies you recorded from
a disc to the computer’s hard disk and
save them as backup files.
1
Camcorder: Insert the disc
containing the scenes you want to
backup.
Insert a finalized disc.
2
Click [Save Files to PC].
3
Select the folder where you want
to save the files and click [Next].
Select a folder on the computer’s
built-in hard disk.
4
Select the scenes you want to
save and click [Start].
• You can also click on the following
buttons.
: Select all scenes at once.
: Remove the checkmarks from
all selected scenes at once.
• If there are less than 3 GB of
available hard disk space, the
backup operation will not start.
• It may take some time to display
all the scenes’ thumbnails.
Backing Up your Video Recordings
Summary of Contents for Application Disc Ver.1
Page 1: ...Version 1 PUB DIM 823...
Page 13: ...PUB DIM 823...


