10
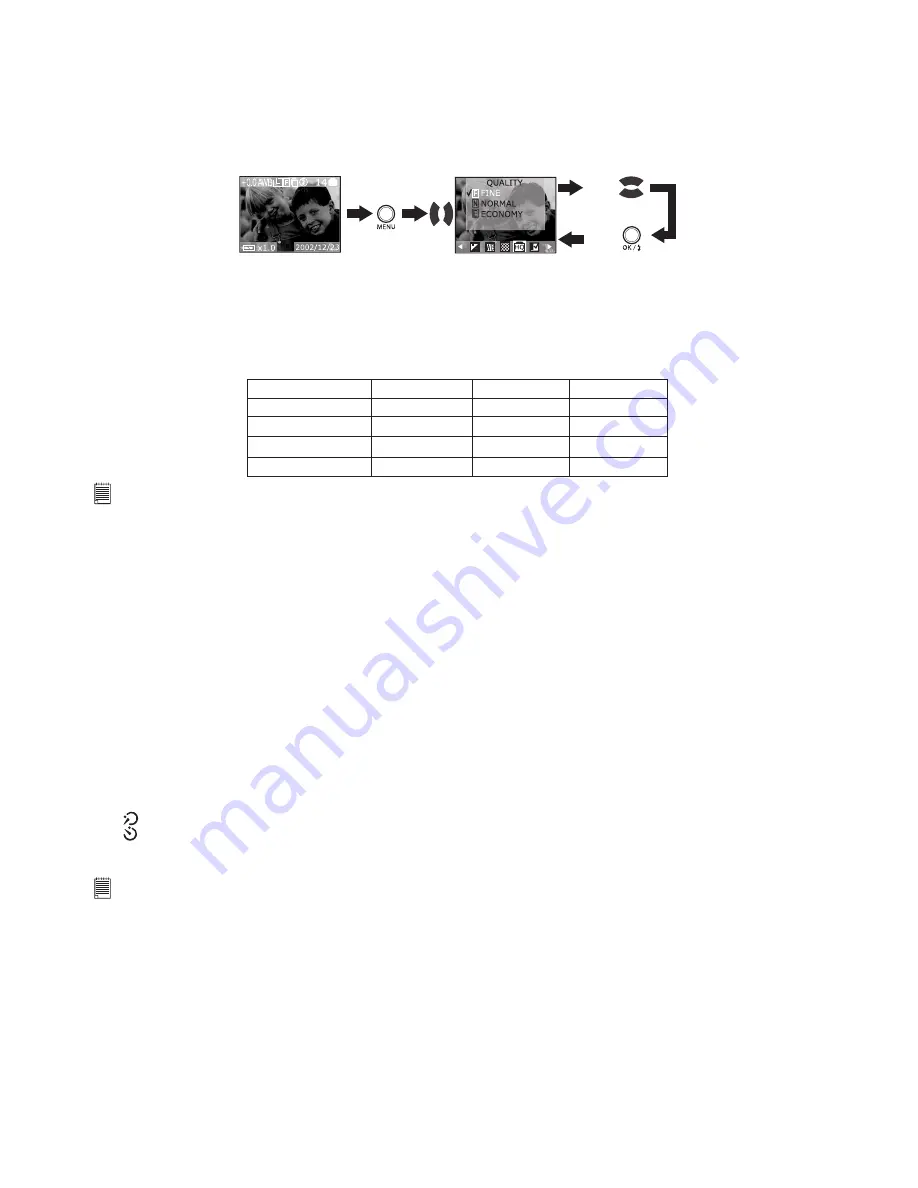
• Setting the Picture Quality
Picture quality depends on the JPEG file compression that the camera applies when the picture is taken.
Higher resolution and less compression make better quality which occupies more memory space. Smaller
size pictures and normal quality are easier to email while larger size and fine quality are better for
printing.
1. Set the Mode selector to Auto or Manual.
2. Turn on the camera.
3. Press the Menu button, and then use the Right or Left button to select “QUALITY”.
Press
Press
Press
4. After the above operation, press the Menu button to exit.
Fine
only 5X compression, best quality.
Normal
8X compression, better quality.
Economy
12X compression, basic quality.
Here are the approximate numbers of pictures you can expect the camera to hold at each setting based on
the 16MB internal memory.
L 2272 X 1704
M
1
2048 X 1536
M
2
1600 X 1200
S 640 X 480
Fine
Normal
Economy
9
15
22
12
19
26
20
31
41
111
143
200
NOTE:
• Scene complexity affects a picture’s file size. For example, a picture of trees in autumn has a larger file size than a
picture of blue sky at the same resolution and quality setting. Therefore, the number of pictures you can store on a
card may vary. The number of pictures on the LCD screen is for reference only.
• The 2272 X 1704 resolution is interpolated by firmware, while the maximum resolution of the sensor itself is only
2048 X 1536. Interpolation refers to the process of averaging pixel information when scaling an image. Used in digital
cameras to produce an image resolution greater than the resolution of the device’s CCD array. Basically, an integrated
circuit chip in the digital camera generates new data by taking the dots the digital camera actually sees, and calculating
where the dots in-between would most likely fall, using an algorithm to “guess” the colour of the new dots by averaging
the colour of adjacent dots.
• Please notice that if the interpolated resolution 2272 X 1704 has been selected, the camera will automaticaly reset to
2048 X 1536 when it is turned off.
• Setting Self-timer
Your camera is designed with a self timer function which will allow you to take pictures with the 2 or 10
seconds built-in timer. It only applies to the next picture. Please place the camera on flat surface or use the
tripod for the Self-timer function.
1. Set the Mode selector to Auto or Manual.
2. Turn on the camera.
3. Press the Self-timer button to cycle through the Self-timer settings until the one you want is shown on
the LCD screen.
No icon - Turns Self-timer off (default setting).
- 2 SEC. indicates a countdown of two seconds.
- 10 SEC. indicates a countdown of ten seconds.
4. Press the Shutter button to take a picture, the Self-timer LED will flash in red and start to countdown.
The self-timer turns off automatically after recording a picture.
NOTE:
The Self-timer feature is not available in continuous pictures mode.
• Zoom in and out
Your camera is designed with a 3X digital zoom option. This feature lets you “zoom” in on the central area
of a photo and photograph only the enlarged portion of the picture.
1. Set Mode selector to Auto or Manual mode.
2. Turn on the camera.
3. Press Up/Down button to zoom in/out the subject before taking a picture.


