background image

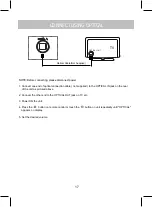
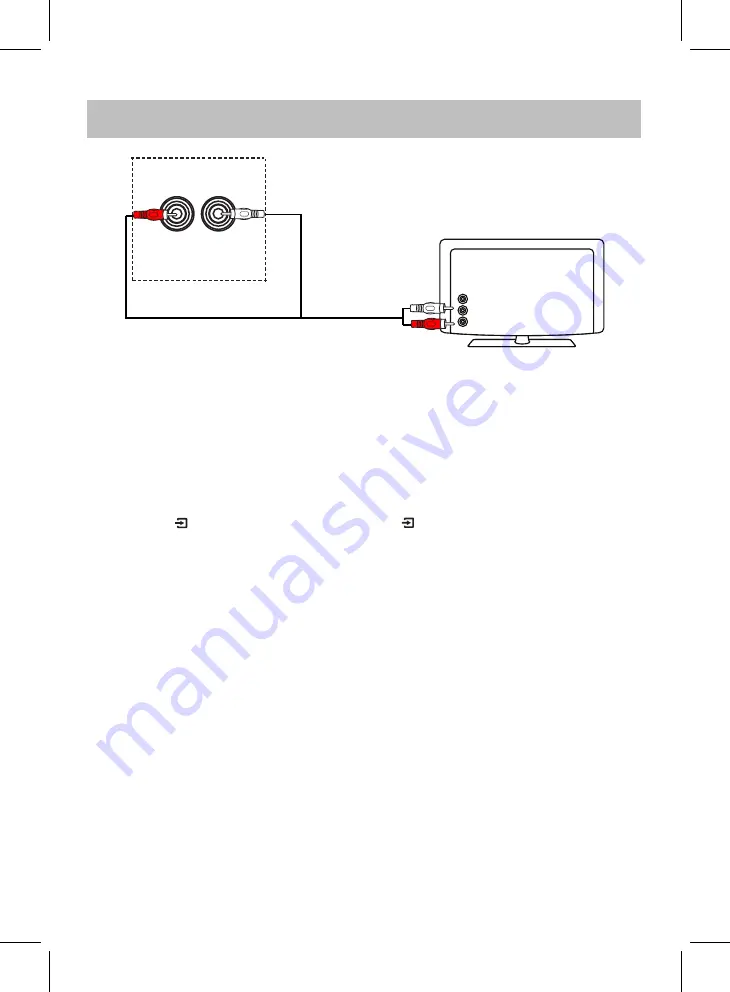
Audio Out Jacks of

TV/DVD/VCR/DVR

R

L

R

L

CONNECT TO TV (ANALOG)

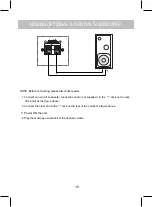
NOTE: Before connecting, please disconnect power.

White

Red

4. Play the audio or video as usual and set the desired volume.  

TV audio is selected and will play through the unit.

TV

2. Power ON the unit. 

1. Connect as the figure above.

TV 

TV AUDIO IN

White

Red

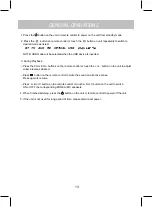
3. Press the         button on remote control or touch the        button on unit repeatedly until " TV " 

appears on display.

18

Audio Cable(Not Supplied)

Summary of Contents for WMS-DVDZ3

Page 1: ...MODEL WMS DVDZ3 SB A B C PAIR INSTALLATION AND OPERATION MANUAL PLEASE READ INSTRUCTIONS CAREFULLY AND KEEP FOR FUTURE REFERENCE WMS DVDZ3 A B C PAIR...

Page 2: ...CING AND MOUNTING PARTS INCLUDED WITH MAIN UNIT INTRODUCTION 3 FEATURES REMOTE CONTROL GENERAL OPERATIONS ADDING OPTIONAL EXTERNAL SUBWOOFER BATTERY INSTALLATION REMOTE CONTROL CONNECT USING HDMI SPEC...

Page 3: ...ED WITH MAIN UNIT HDMI ARC on rear panel Thank you for choosing a Connexx product We hope you will find the instructions in this owner s manual clear and easy to follow If you take a few minutes to re...

Page 4: ...to read all operating instructions carefully Please note that these are general precautions and may not pertain to your unit 1 Read these instructions All the safety and operating instructions should...

Page 5: ...uctions Slots and openings in the cabinet and in the back or bottom are provided for ventilation to ensure reliable operation of the product and to protect it from overheating These openings must not...

Page 6: ...n NTSC If incorrectly set to PAL the TV picture may roll vertically In this case set the TV system to NTSC Notes on Copyright It is forbidden by law to copy broadcast show broadcast on cable play in p...

Page 7: ...placing in a tight space without ventilation heat generated from the unit could produce a potential heat hazard 2 Mounting Rough opening cut out about 140mm about 140mm about 140mm about 140mm WMS DV...

Page 8: ...utton 7 Source touch button 8 PAIR touch button 9 Zone B touch button 10 Next touch button 11 Play pause Station recall touch button 12 Volume down touch button 13 Power on off button 14 USB port 15 A...

Page 9: ...HDMI OUT ARC TV AUDIO IN EXT IR 1 2 3 4 5 6 7 8 1 VIDEO OUT jacks 2 HDMI OUT ARC jack 3 ANTENNA jack 4 TV AUDIO IN jacks 5 EXT IR jack 6 OPTICAL IN jack 7 EXTERNAL SUBWOOFER connector 8 Power speaker...

Page 10: ...LUE BLACK A RIGHT 10A FUSE WHITE BLACK B LEFT BLUE A RIGHT GRAY B RIGHT VIOLET BLACK C RIGHT GRAY BLACK B RIGHT ORANGE A LEFT ORANGE BLACK A LEFT GREEN C LEFT VIOLET C RIGHT GREEN BLACK C LEFT SPEAKER...

Page 11: ...6 7 8 9 10 11 12 13 14 15 16 17 18 19 20 21 22 23 24 25 1 Power on off button 2 PAIR button 4 Zone A button 3 REP repeat button 5 Zone B button 6 Source button 7 Fast forward Up button 8 Previous Left...

Page 12: ...it and the remote control the remote control may not operate properly When direct sunlight an incandescent lamp fluorescent lamp or any other strong light shines on the remote Battery Precaution 1 Sli...

Page 13: ...mote control or touch A B or C button on the unit to switch ON or OFF the corresponding ZONE A B C speakers Press button on the remote control to mute the sound on all active zones Press again to resu...

Page 14: ...old the or button on front of the unit or press and hold the TUNE or TUNE button on remote control then release the button to search the previous or next available FM 4 Touch the or button on front of...

Page 15: ...s in BT pairing mode WMSDVDZ3 Press the VOL VOL buttons on the remote control or touch the or button on the unit to adjust volume level as desired During playback 6 If you want to connect with other B...

Page 16: ...ower 1 Connect one end of subwoofer connection cable not supplied to the Jack on the rear of the unit as the figure above 2 Connect the other end to the Jack on the rear of the unit as the figure abov...

Page 17: ...n the rear of the unit as pictured above 2 Connect the other end to the OPTICAL OUT jack on TV etc NOTE Before connecting please disconnect power Optical Cable Not Supplied 5 Set the desired volume 4...

Page 18: ...Play the audio or video as usual and set the desired volume TV audio is selected and will play through the unit TV 2 Power ON the unit 1 Connect as the figure above TV TV AUDIO IN White Red 3 Press th...

Page 19: ...ck through the MAIN TV by HDMI only HDMI will appear on display press the ARC appear on display Audio Return Channel button on remote control to transmit the audio from the MAIN TV to the unit and pla...

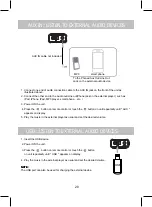
Page 20: ...TO EXTERNAL AUDIO DEVICES 4 Play the music in the external player as usual and set the desired volume 1 Insert the USB device NOTE The USB port can also be used for charging the external device 3 Powe...

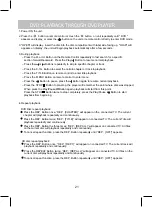
Page 21: ...and continuously Press the REP Button once REP CHAPTER will appear on the connected TV The current Press the REP Button twice REP TITLE will appear on connected TV The current Title will Press the RE...

Page 22: ...T C T C T C 01 03 1 2 3 4 5 6 7 8 9 10 11 12 13 14 15 16 PLAY CLEAR PROGRAM PLAY CLEAR PROGRAM 6 DVD CD Program playback connected TV The TT Title CH Chapter and establish time selection menu will pop...

Page 23: ...minutes five 5 On or Off SCREEN SAVER the HDMI relution 5 If PASSWORD is selected To release the lock and set reset the rating level When PASSWORD is selected and highlighted press the Button to enter...

Page 24: ...e language of the on screen menu available language or set it off 2 If AUDIO LANG Audio Language is selected using the Direction and Buttons to set the priority of the 3 If SUBTITLE LANG Subtitle Lang...

Page 25: ...r of the disc to the outer edge of the disc Never wipe in circular motions Discs should be stored in their cases after each use to avoid damage Do not expose discs to direct sunlight high temperatures...

Page 26: ...ce incorrect The connected device is not in playback mode Volume in minimum position power cable not connected Raise volume level by pressing the VOL Volume button Play the music movie in the connecte...

Page 27: ...ERFERENCE CAUSED BY UNAUTHORIZED MODIFICATIONS TO THIS EQUIPMENT SUCH MODIFICATIONS COULD VOID THE USER S AUTHORITY TO OPERATE NOTE Specifications subject to change without notice 1 The device may cau...

Page 28: ...www riverparkinc com 2017 RIVERPARK Inc V 081917 C...

Reviews: