INSTALLATION GUIDE
11/9/12
3DHD VISION SYSTEM
8
MARKETING COMMUNICATIONS
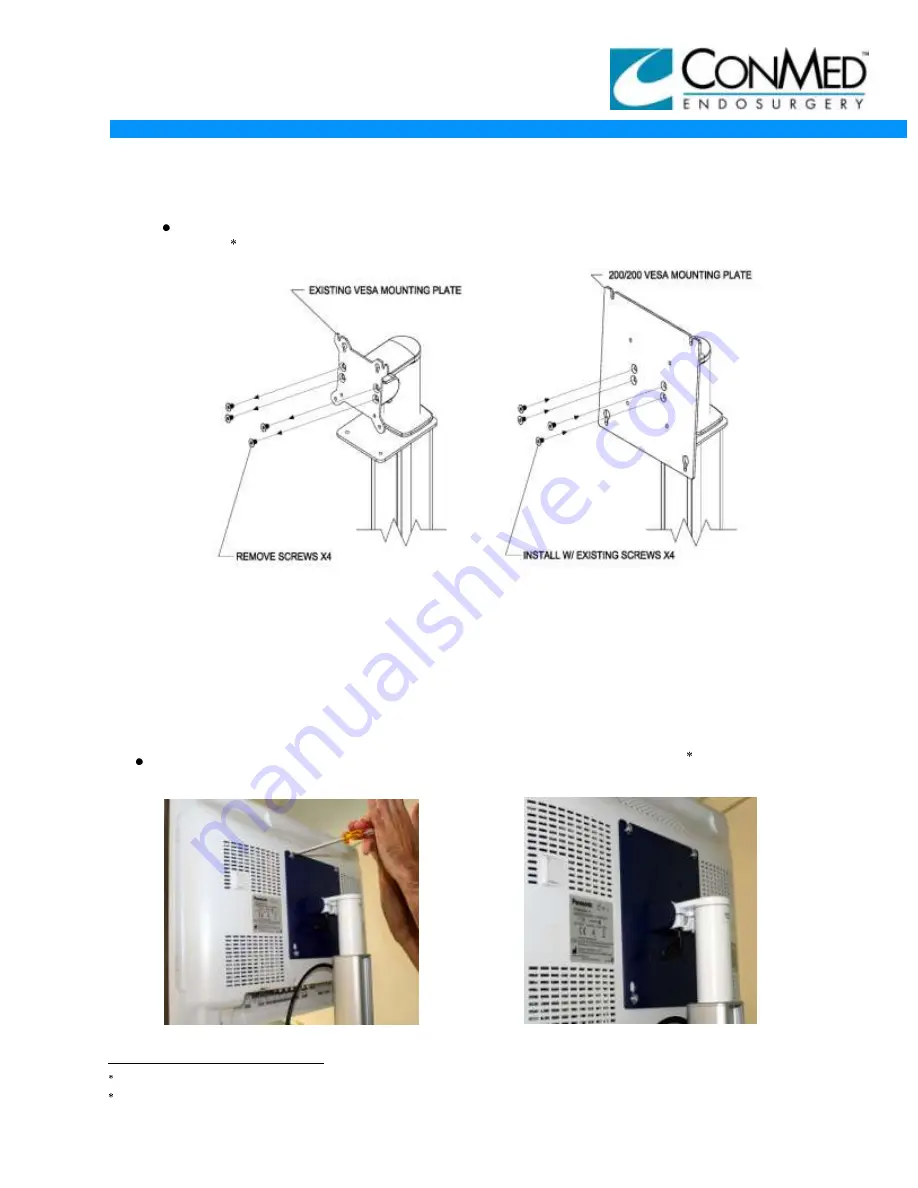
Remove existing vesa mounting plate from the cart and install 200/200 Vesa
Plate as shown below in
Figures 21 and 22.
Figure 21
Figure 22
200/200 VESA MOUNTING* PLATE INSTALLATION
1. Remove the four (4) existing screws from the front of the existing tilt / swivel VESA
mount* plate, and remove the existing VESA mounting* plate. See
Figure 21
.
2. Using the four (4) existing screws, install the 200/200 VESA mounting* plate to the
existing mounting holes provided on the cart. See
Figure 22
.
Once the 200/200 Vesa Plate* as been installed, place Panasonic monitor video
display on bracket as shown in
Figures 23 and 24.
Figure 23
Figure 24
Vesa Mounting is a trademark of Video Electronic Standards Association.
Panasconic is a registered trademark of Panasonic Corporation Japan.


