background image

37 

REMOTE VXM4 SETUP

REMOTE VXM4 SETUP

Only the ADMIN user can configure a VXM4 remotely. With the exception of network settings
and certain display options, any of the VXM4 settings can be changed.

ENTERING SETUP

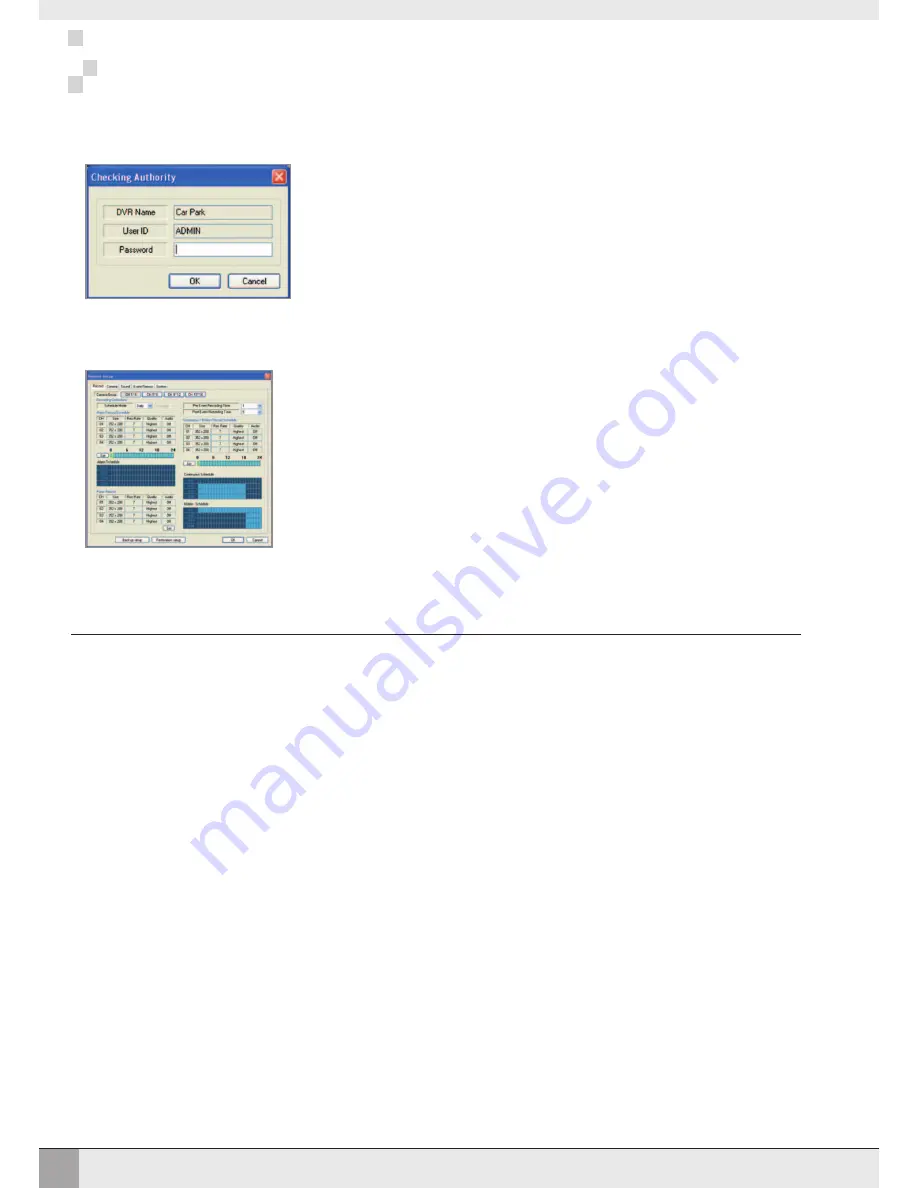
Click the 

SETUP

button, enter the correct password for the ADMIN user and click OK

LOADING AND SAVING

The remote setup screen is displayed and the VXM4 settings can be changed as necessary.

Click OK to save all changes and return to the main remote client screen. Any changes made
will take effect immediately

To backup a VXM4 setup to a local file, click ‘Backup setup’. A backup file is saved on the local PC.

To restore a VXM4 setup, click ‘Restoration setup’ and select the required file to upload from the browser window


Summary of Contents for VXM4-4

Page 1: ...MPEG4 4 Channel Digital Recording System User Manual VXM4 4 VXM4 4...

Page 2: ...h 8 Archiving 11 Telemetry Control 10 Shut down 10 Configuring the VXM4 System Setup 12 Display 12 OSD 12 Monitor 13 Camera 14 Camera Title Covert 14 Colour Setup 14 PTZ Setup 15 Motion Sensor 15 Soun...

Page 3: ...modes 31 Saving to AVI file 32 Viewing events 32 Telemetry control 32 Audio monitoring 33 Audio talkback 33 Triggering alarms 33 Connection status 33 Remote client playback controls 33 Searching for...

Page 4: ...ck any of the air vents on the DVR Adequate protection against lightning strikes and power surges must be installed to prevent damage to the DVR Any safety warnings on the DVR and in these instruction...

Page 5: ...motely triggered over the internet COMPREHENSIVE RECORDING SETUP Recording can be scheduled alarm activated or motion activated For each type of recording frame rates image quality and audio recording...

Page 6: ...to display individual channels in live display and playback page 6 page 7 Also used to enter numeric passwords for the various login screens SHUTTLE WHEEL Used to quickly adjust playback speed and dir...

Page 7: ...CONNECTIONS All outputs can be used at the same time if more than one main monitor connection is required SPOT MONITOR OUTPUT AUDIO INPUTS OUTPUTS Up to 4 audio inputs and one audio output can be conn...

Page 8: ...y set by the VXM4 depending on connection type Connect one or more monitors to the VXM4 using the COMPOSITE VGA or S VIDEO connections Connect power to the VXM4 The VXM4 checks for proper power connec...

Page 9: ...e exception of the sequence mode In this mode the sequence symbol is displayed and each channel is shown in full screen for a set period of time default 3 seconds before switching to the next channel...

Page 10: ...vement of the timeline cursor increases or decreases the time by 15 minutes The currently selected time is displayed above the calendar Press ENTER to begin playback from the selected time The default...

Page 11: ...n be used as normal To stop playback and return to live view mode press the RETURN button EVENT SEARCH The VXM4 event log stores events such as motion and alarm activated recording video loss etc To s...

Page 12: ...ll other events Video loss remote connection etc are displayed for the chosen date range EVENT SEARCH continued Highlight START and press ENTER to display the event log for the criteria selected To pl...

Page 13: ...ected highlight the START button and press ENTER The VXM4 displays a list showing the exact information to be archived and the total archive size If the ORIGINAL SIZE is larger than the available spac...

Page 14: ...ase or increase the preset number Press PAUSE to program the preset or ENTER to call an existing preset To control focus and iris press PTZ again The left and right CURSOR KEYS adjust focus the up and...

Page 15: ...operator can choose the colour MENU TRANSPARENCY During menu setup the live view can be seen behind the menu screen Changing this value determines whether the live view is more higher value or less lo...

Page 16: ...long the full screen popup is displayed after an alarm input If the alarm condition continues the popup screen is displayed constantly MOTION POP UP MODE When set to ON motion detection will cause the...

Page 17: ...to 11 characters can be set using the virtual keyboard CAMERA CAMERA TITLE CAMERA COLOUR SETUP Brightness contrast tint and colour can be adjusted for each individual channel Highlight which channel t...

Page 18: ...will have no effect on PTZ control CAMERA MOTION SENSOR SENSITIVITY Between 1 Lowest and 10 Highest and determines the degree of motion required before recording is activated AREA SETUP Choosing this...

Page 19: ...rns orange Press ENTER to change from selected to deselected or vice versa Repeat the above sequence as necessary to mask off or include other areas of the image Once the detection area has been defin...

Page 20: ...NEL Specify which one of the 4 AUDIO INPUTS is routed to the AUDIO OUTPUT NETWORK AUDIO TX When set to ON live and playback audio is transmitted to a remote PC connection NETWORK AUDIO RX When set to...

Page 21: ...mote connections using Internet Explorer or other web browsers NETWORK SPEED Specifies the maximum bandwidth that the VXM4 can use during a remote connection WEB SERVER PORT The port number that the V...

Page 22: ...that the ADMIN user password is changed as soon as possible To add users highlight ADD and press ENTER The new user details can be added using the steps outlined above More Information about user mana...

Page 23: ...ware updates may be released periodically to enhance system performance and add extra features The operator can upgrade the firmware using a USB memory stick FACTORY DEFAULT If settings have been chan...

Page 24: ...utput Behaviour settings OPERATION The selected alarm output can be enabled or disabled TYPE Can be set to high Relay turns on or low Relay turns off MODE Can be either TRANSPARENT the output is activ...

Page 25: ...etermines whether motion detection on any of the selected channels will sound the buzzer HDD EVENT Determines whether a hard drive event sounds the buzzer EVENT SENSOR EMAIL NOTIFICATION Determines th...

Page 26: ...g time of 4 days under normal operation if the RECORD TIME LIMIT is set to 2 days the percentage of HDD used will never exceed 50 To setup the recording behaviour of the VXM4 highlight RECORD MENU and...

Page 27: ...TY Four different picture recording qualities can be set for each channel AUDIO If audio devices are connected to the VXM4 any audio channel can be assigned to any of the video channels During playbac...

Page 28: ...ER The cursor changes to orange to show the start position Use the CURSOR KEYS to stretch the orange cursor across and down to select all channels between 18 00 and 00 00 Press ENTER highlight MOTION...

Page 29: ...ing can be used in conjunction with continuous motion recording For example the VXM4 could be configured to record continuously at a low frame rate set in timer motion setup and then increase to a hig...

Page 30: ...with the VXM4 into your PC s CD ROM drive The install process will begin automatically and display the following screen Click Next to continue Click Next to begin installation The VXM4 remote client...

Page 31: ...ust VXM4 settings remotely DROP DOWN LIST to select a VXM4 connection CONNECT button DISCONNECT button DISPLAY buttons to choose 1 4 9 or 16 screen display SEQUENCE button MANUAL SWITCH button FULL SC...

Page 32: ...e and choose Add Group Enter a name to easily identify the connection group and click OK The new group is created ENTER VXM4 DETAILS Details for up to 4 VXM4s can be added to the Factory 7 group Click...

Page 33: ...remote client software during live display In Connection retries choose the number of times the remote client will attempt to connect before giving an error Finally click ADD to save all the details T...

Page 34: ...display To run a sequence select single screen mode and click the SEQUENCE button Click SEQUENCE again to return to normal viewing mode The MANUAL SWITCH button shifts the positions of all channels b...

Page 35: ...e and buttons to adjust Additional telemetry controls can be accessed by clicking the PTZ button Telemetry presets can now be programmed and called remotely Example To start pattern tour 1 running on...

Page 36: ...can talkback to the VXM4 During talkback audio is routed through the AUDIO OUT connector on the rear of the VXM4 To talkback click and hold the TALKBACK button and speak normally in to the microphone...

Page 37: ...ates are selected the TIMELINE changes to show the status of recorded footage for that particular date CONTROLLING PLAYBACK During playback use the DISPLAY buttons to switch from single quad 9 split o...

Page 38: ...PC hard drive The remote client shows the current status of the archiving process BACKUP PLAYER To view archives already created on the local PC hard drive click the BACKUP PLAYER button Click to choo...

Page 39: ...od is displayed Select an event click Go to timeline and then click OK Click u to begin playback from the selected date and time PRINT AN IMAGE During playback a still image can be printed on the loca...

Page 40: ...r the ADMIN user and click OK LOADING AND SAVING The remote setup screen is displayed and the VXM4 settings can be changed as necessary Click OK to save all changes and return to the main remote clien...

Page 41: ...using Windows Media Player BACKUP PLAYER To view archives backed up from a VXM4 double click the player file Click to choose which archive file to playback Playback of the archive file begins The con...

Page 42: ...e VXM4 is recognised on the local network If not work through the above steps again but also check that the CAT 5 patch lead is OK 3 At this point the connection to the VXM4 can be tested locally Inst...

Page 43: ...the public static IP address of your router and the port number in this case will be 6100 The username and password must match those set up on the VXM4 SETTING UP MULTIPLE VXM4s ON ONE ROUTER The setu...

Page 44: ...ver must be the IP address of the ISP s 1st DNS server 2nd DNS server must be the IP address of the ISP s 2nd DNS server DDNS server leave set as DDNS DVRLINK NET Note if the ISP s DNS servers are not...

Page 45: ...erminal of any attached telemetry devices Connect RS485D to the or B terminals ALARM INPUTS Connect voltage free contacts from PIRs beam break detectors etc to the GND terminal and INX terminals of ch...

Page 46: ...lanced BNC 1 0Vpp composite 75ohm unbalanced auto termination 4 RCA line level unbalanced 1 0Vpp composite 75ohm unbalanced 15 pin D SUB 1024 x 768 60Hz 4 pin mini din Y C 1 4 Adjustable Dwell Time N...

Page 47: ...44 NOTES NOTES...

Page 48: ......

Reviews: