


75
Step 6: First method: WPS button
Press the WPS button on the front panel of the router. The WPS LED will
blink to show that the router has begun searching for the client.
Second method: WUI virtual button
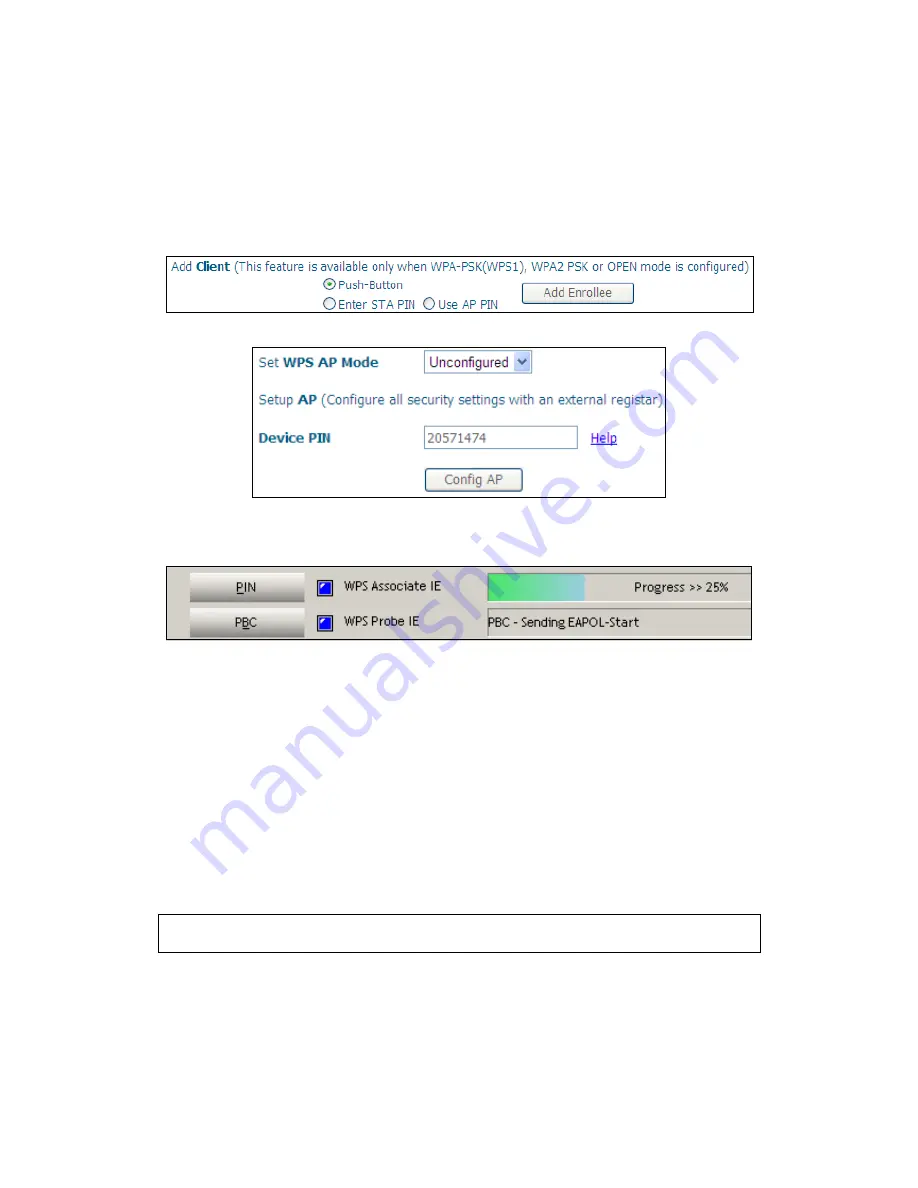
Select the Push-Button radio button in the WSC Setup section of the
Wireless Security screen, as shown in A or B below, and then click the
appropriate button based on the WSC AP mode selected in step 2.
A - For Configured mode, click the Add Enrollee button.
B - For Unconfigured mode, click the Config AP button.
Step 7: Go to your WPS wireless client and activate the push-button function.
A typical WPS client screenshot is shown below as an example.
Now go to Step 8 (part IV. Check Connection) to check the WPS connection.
IIIb. WPS – PIN CONFIGURATION
Using this method, security settings are configured with a personal identification
number (PIN). The PIN can be found on the device itself or within the software.
The PIN may be generated randomly in the latter case. To obtain a PIN number for
your client, check the device documentation for specific instructions.
The WPS PIN configuration is described in the procedure below. It is assumed that
the Wireless function is Enabled and that the router is configured as the Wireless
Access Point (AP) of your wireless LAN. In addition, the wireless client must also be
configured correctly and turned on, with WPS function enabled.
NOTE:
Unlike the push-button method, the pin method has no set time limit.
This means that the router will continue searching until it finds a client.
Step 6: Select the PIN radio button in the WPS Setup section of the Wireless
Security screen, as shown in A or B below, and then click the appropriate
button based on the WSC AP mode selected in step 2.
A -
For Configured mode, enter the client PIN in the box provided
and then click the Add Enrollee button (see below).
Summary of Contents for VG-8050
Page 1: ...VG 8050 Wireless Router Access Point User Manual Version 1 1 January 12 2013 261097 011 ...
Page 7: ...6 1 2 Application The following diagram depicts the application of the VG 8050 ...
Page 16: ...15 ...
Page 30: ...29 5 3 1 IPv6 Autoconfig ...
Page 45: ...44 A maximum of 100 entries can be added to the URL Filter list ...
Page 52: ...51 5 9 UPnP Select the checkbox provided and click Apply Save to enable UPnP protocol ...
Page 64: ...63 Enter a certificate name and click Apply to import the CA certificate ...
Page 86: ...85 7 1 SIP Basic Setting 7 1 1 Global Parameters A common parameter setting ...
Page 87: ...86 7 1 2 Service Provider This screen contains basic SIP configuration settings ...
Page 90: ...89 7 2 2 Service Provider Configure your settings based on your service provider ...
Page 118: ...117 ...
Page 119: ...118 Step 3 When the screen refreshes click the ConfigAP button ...
Page 120: ...119 Step 4 Open the Network folder in Vista and look for the BroadcomAP icon ...
Page 124: ...123 To add a WAN connection go to G2 WAN Connections ...


