


74
II. NETWORK AUTHENTICATION
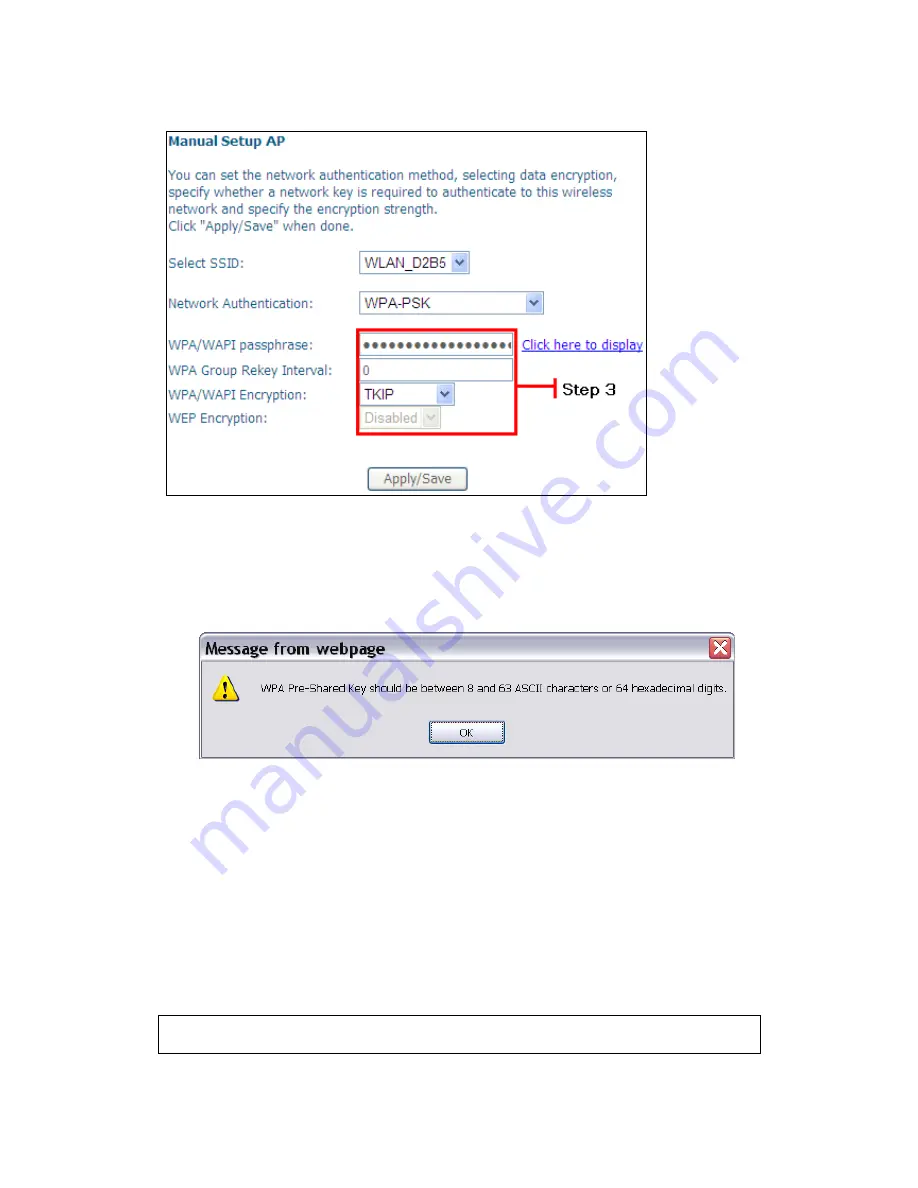
Step 3: Select Open, WPA-PSK, WPA2-PSK, or Mixed WPA2/WPA-PSK network
authentication mode from the Manual Setup AP section of the Wireless Security
screen. The example below shows WPA2-PSK mode.
Step 4: For the Pre-Shared Key (PSK) modes, enter a WPA Pre-Shared Key. You
will see the following dialog box if the Key is too short or too long.
Step 5: Click the Save/Apply button at the bottom of the screen.
IIIa. PUSH-BUTTON CONFIGURATION
The WPS push-button configuration provides a semi-automated configuration
method. The WPS button on the rear panel of the router can be used for this
purpose or the Web User Interface (WUI) can be used exclusively.
The WPS push-button configuration is described in the procedure below. It is
assumed that the Wireless function is Enabled and that the router is configured as
the Wireless Access Point (AP) of your WLAN. In addition, the wireless client must
also be configured correctly and turned on, with WPS function enabled.
NOTE: The wireless AP on the router searches for 2 minutes. If the router stops
searching before you complete Step 7, return to Step 6.
Summary of Contents for VG-8050
Page 1: ...VG 8050 Wireless Router Access Point User Manual Version 1 1 January 12 2013 261097 011 ...
Page 7: ...6 1 2 Application The following diagram depicts the application of the VG 8050 ...
Page 16: ...15 ...
Page 30: ...29 5 3 1 IPv6 Autoconfig ...
Page 45: ...44 A maximum of 100 entries can be added to the URL Filter list ...
Page 52: ...51 5 9 UPnP Select the checkbox provided and click Apply Save to enable UPnP protocol ...
Page 64: ...63 Enter a certificate name and click Apply to import the CA certificate ...
Page 86: ...85 7 1 SIP Basic Setting 7 1 1 Global Parameters A common parameter setting ...
Page 87: ...86 7 1 2 Service Provider This screen contains basic SIP configuration settings ...
Page 90: ...89 7 2 2 Service Provider Configure your settings based on your service provider ...
Page 118: ...117 ...
Page 119: ...118 Step 3 When the screen refreshes click the ConfigAP button ...
Page 120: ...119 Step 4 Open the Network folder in Vista and look for the BroadcomAP icon ...
Page 124: ...123 To add a WAN connection go to G2 WAN Connections ...


