


13 Colortrac SmartLF Gx+ Range Installation and Operating Manual
PAS176 P/N: P005530 Colortrac Ltd © 2010
3.3 Motorised Thick Media (MTM)
All SmartLF Gx+ scanners can accept media up to 0.08
” (2mm) in thickness.
Gx+ T (MTM) scanners accept documents beyond this thickness up to a
maximum of
0.8” (20mm).
LOADING A THICK DOCUMENT
DO NOT PRESS THE OR BUTTONS DURING SCANNING, AS
THIS WILL STOP THE SCANNER IMMEDIATELY
AUTO PAPER LOAD IS ACTIVE FOR Gx+ THICK MEDIA OPERATION
BUT TEMPORARILY DISABLED WHEN USING THE OPEN LID (NEXT)
OR CLOSE LID (PREV) BUTTONS.
RETURNING SMARTLF MTM OPTION TO STANDARD THICKNESS MODE
The scanner is now returned to standard thickness mode. Note that pressing OPEN or CLOSE during scanning will
stop the scanner and is equivalent to pressing the STOP button.
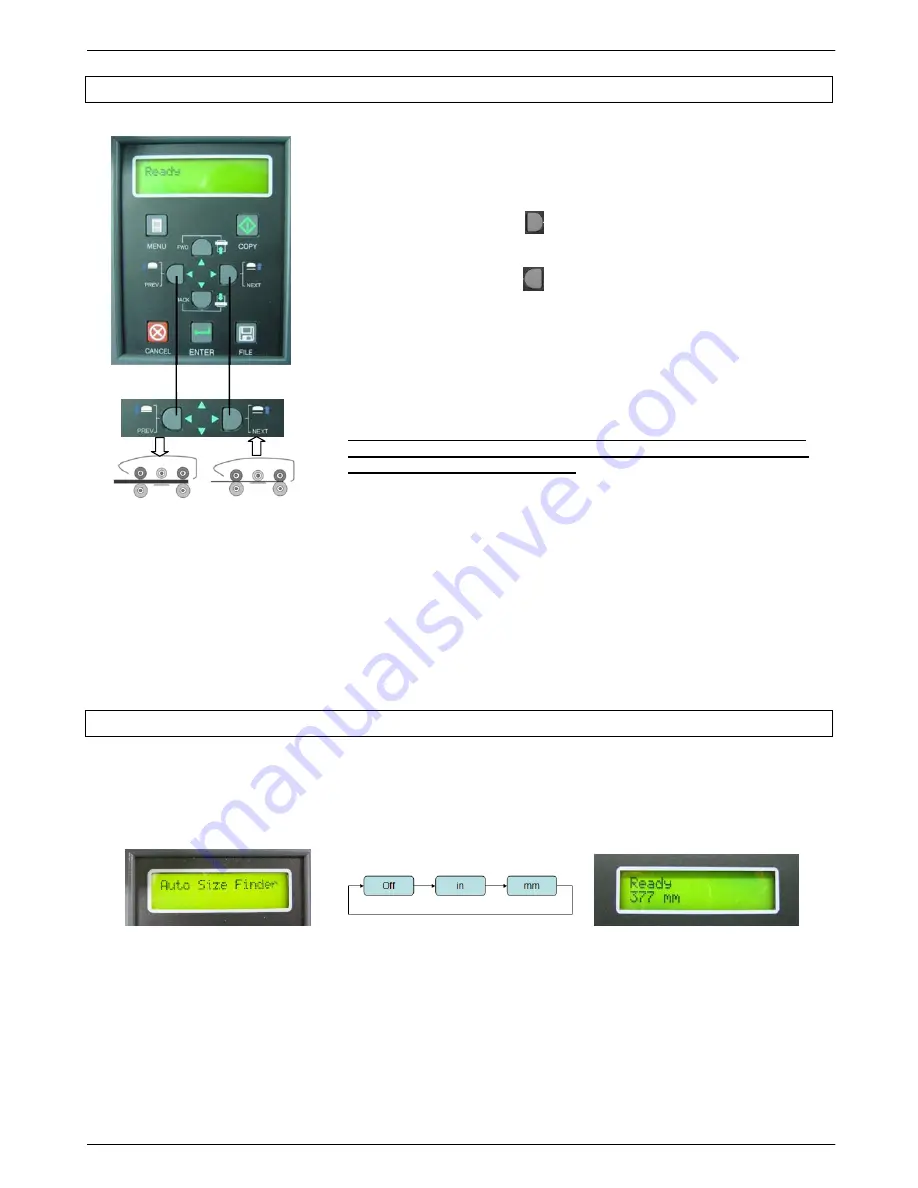
3.4 ASF (AUTO SIZE FINDER)
ASF detects and displays the width of a loaded document as part of the document loading process. It works in
combination with the scanner software.
Configuration - ASF is factory set to off. Use the control panel on the scanner to select mm or inch measurement units
or to turn off this feature. Turning off ASF does not increase document load time.
Colortrac software uses scanner ASF when the document size setting is set for automatic or auto-size. Fixed or user-
input document sizes in the software will override ASF. The scanner will still display the actual paper size if ASF is
switched on. CopySmart software does not use ASF.
Document Position
– Place documents
side-justified in the scanner
. Documents placed in the centre of the scanner
must be scanned using fixed or user-input document sizes only.
Operation and Scanner Maintenance - Check the displayed size to see if it looks correct. If the size is less than or
greater than the document width then the scanner roller and glass may be dirty. Re-normalise the scanner (Chapter 4)
after cleaning if the problem persists. If the size is shown as 0.0 the document has exceeded the scanner optical scan
width and a manually input size must be used.
a. Press and hold the button to open the lid until the
document gap is greater than the document thickness.
b. Insert the thick document
c. Press and hold the button to close the lid onto the
document until the motor noise stops automatically.
d. Now scan your document using the mouse, F9 or the
SCAN button. It is advisable to slow the scanner down
when scanning thick media.
a.
Ensure that the scanner is not scanning or a document is being fed through the scanner
b.
If a document is still in the scanner, support it while pressing the OPEN button and lift out the document
rather than using the FWD or REW buttons. This prevents the weight of the overhanging document levering
the trailing edge and causing it to be damaged or possibly damaging the scanner as it exits the rollers.
c.
Hold down the CLOSE button to lower the lid until the motor noise stops automatically.


