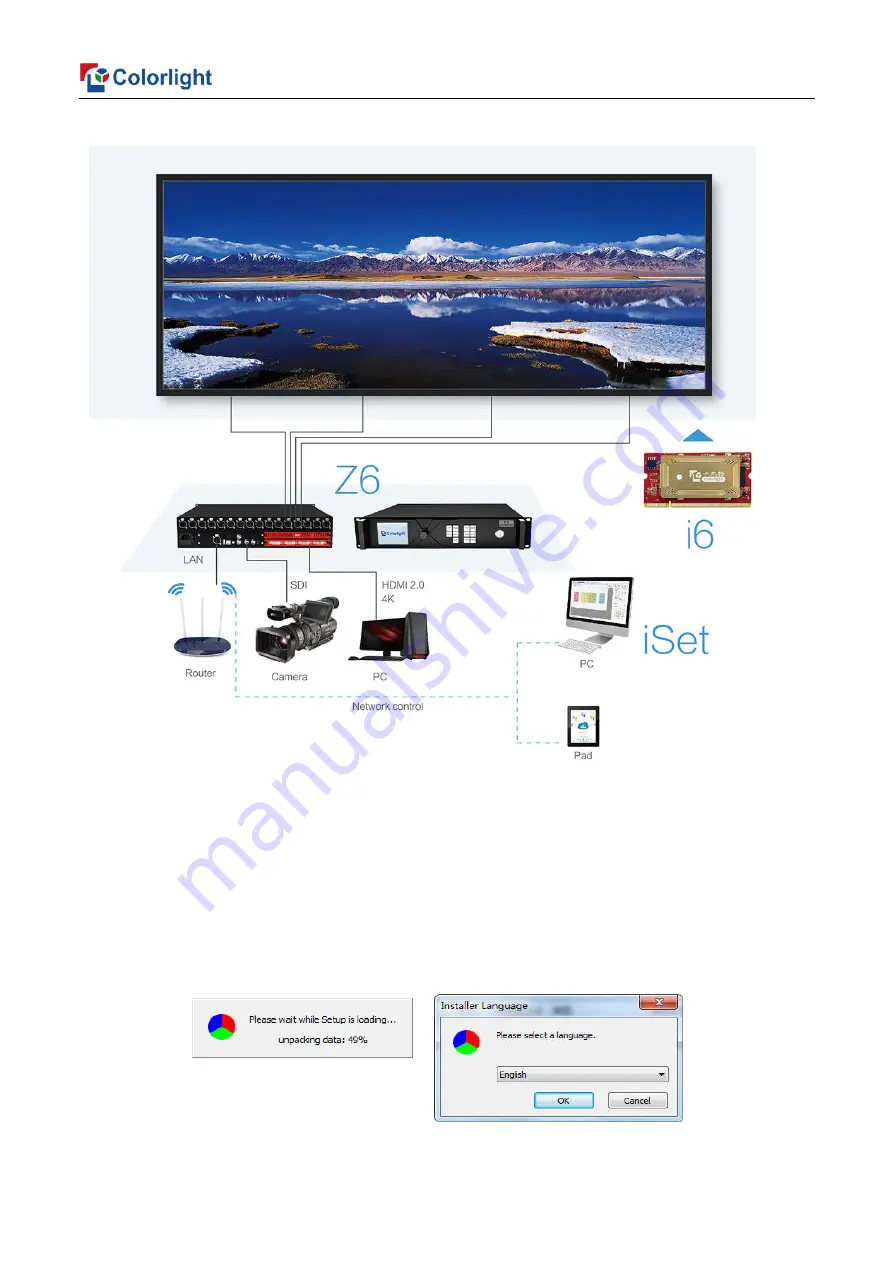
background image

3 Signal Connection 

4 LEDVISION Installation 

Please download the installation package of the LEDVISION software from Colorlight’s official 

website, and complete the installation according to the diagrams shown below. 

① Run the software package, and select 

[English]

 for installer language. Click 

[OK]

 to move on.

Summary of Contents for Z6 Super Controller

Page 1: ...Z6 Super Controller...

Page 2: ...6 5 2 2 Screen Parameters Setting 13 5 2 3 Connection Parameters Setting 14 6 LCD Operation Instruction 16 6 1 Operational Motion Instruction 16 6 2 Main Interface 17 6 3 Operation Instruction 17 6 3...

Page 3: ...ls Maximum Width Height 8192 pixels The input images can be spliced and scaled according to the screen resolution Support PIP function the location and size can be adjusted freely Support splicing and...

Page 4: ...4 DVI inputs Output Interface 1 Gigabit Ethernet 16 Neutrik Gigabit Ethernet outputs Controlling Interface 1 100M Ethernet 100M Ethernet Control port communication with PC or access network and can be...

Page 5: ...e download the installation package of the LEDVISION software from Colorlight s official website and complete the installation according to the diagrams shown below Run the software package and select...

Page 6: ...omponents according to your own computer status click Install to complete After the installation is complete you are ready to use LEDVISION 5 Parameter Configuration Please make sure the correctness o...

Page 7: ...iver Cards respectively the software will automatically acquire the receiver card quantity of each network port of the sender Please check corresponding cable if the numbers of receiver card are incon...

Page 8: ...gnal Source When the input signal source of Z6 is normal the upper right of the software interface will display the input signal information auto acquired via the software At the moment users can sele...

Page 9: ...ge View Area select the image that needs to be scaled set X Y width and height of it in Main Image or you can click the white box in the bottom right corner of the image and drag it with the mouse fin...

Page 10: ...ing interface check Clipping set X Y width and height then click Save to complete Splicing Select DVI signal source in Input Signal Area click Set to enter the splicing interface there is only one spe...

Page 11: ...e output modes of main image and PIP in Output Mode users can select specific PIP mode based on the requirement and conduct the operation like move scaling clipping and splicing on the main image and...

Page 12: ...or set up the control area of each net port respectively X Y Width Height click Save 3 EDID Set sender resolution the first one is the default as current resolution Click the dropdown button to displ...

Page 13: ...gateway 5 Art Net Realize the function of intelligent dimming control users can adjust brightness RGB color temperature and select test mode according to actual demand First select the channel of bri...

Page 14: ...r resolution Z is depth of field DOF is generally set to 4 points or 8 points should not be set up too large otherwise it may cause the viewer to feel dizzy Right row row start point of each port 7 Ot...

Page 15: ...Setting Observe the display screen single cabinet is an unit and if all cabinets themselves could display normally it is normal status even the picture between cabinets is not continuous please ignor...

Page 16: ...ct with the LED screen engineers 5 2 3 Connection Parameters Setting Users don t need to set up the control area of each net port respectively but to the connection relationship between the receiving...

Page 17: ...side 128 128 as an example Click the receiver receiving card one by one according to actual connecting line until the last one for this network port loads Connection Pattern Aiming at the LED screen...

Page 18: ...ng receiving card after confirming 6 LCD Operation Instruction 6 1 Operational Motion Instruction Knob OK Press the knob OK under main interface to enter operation interface of menu Rotate the knob to...

Page 19: ...status of network port Sixth row Product type the IP of Z6 6 3 Operation Instruction Press the knob OK to enter the operation interface of main menu and it includes 11 operation instructions Display...

Page 20: ...u can press the knob OK to reset the value of color temperature as 6500 in the option of Reset to Default Black Press the knob OK to switch on off LED screen Better Gray Press the knob OK to turn on o...

Page 21: ...splicing then press the knob OK to enter submenu of Splicing Setting Continue pressing the knob OK to enter the splicing interface of DVI 4 you can set width and height of splicing unit via the knob t...

Page 22: ...te the knob to select output setting then press the knob OK to enter submenu of Output Setting Continue rotating the knob to select Main or PIP1 or PIP2 press the knob OK to enter the output setting i...

Page 23: ...ith each other Lock to Input is necessary to ensure the synchronization of video display Rotate the knob to select Lock to Input then press the knob OK to enter submenu of it In the submenu press the...

Page 24: ...y obtain an IP address or set manually Enter the setting of Network Setting press the knob OK to turn on off DHCP or press the knob OK to enter manual IP setting you can set up IP address subnet mask...

Page 25: ...23...

Page 26: ......

Reviews: