Page
27
of
39
SubliXpress Plus
Adding Jobs
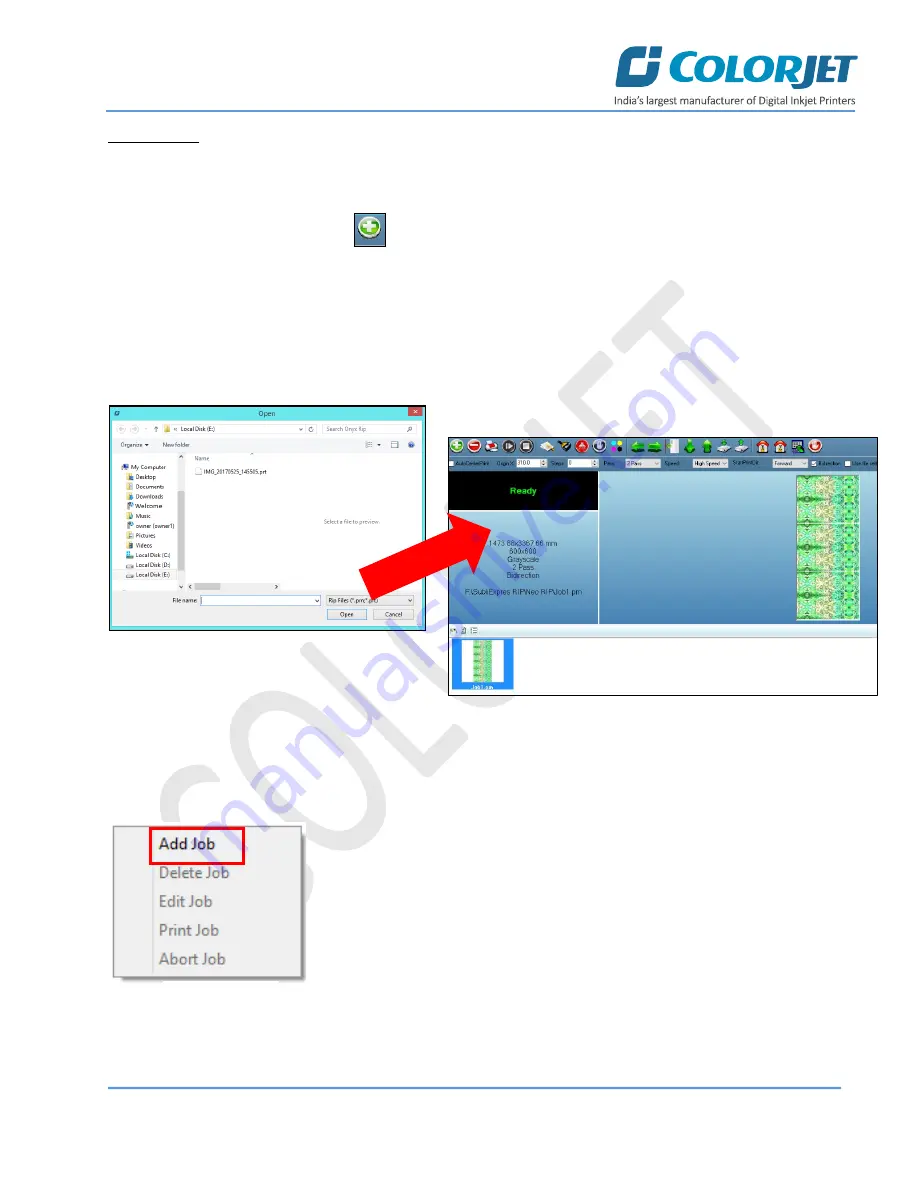
There are two ways to add jobs in the Job List area viz. the Add Job button and right click on the Job List area.
Follow these steps to add jobs in the Job List area:
Step 1
:
Click
on the
Add Job
button
on the
Quick Access Toolbar
. The
Open
window appears on the
screen.
Step 2
:
Navigate
to the location where the ima
ge file with extension “
.prt
” and “
.prn
” is stored (Refer to Fig 3
4
).
Step 3
:
Click
on the
Open
button to add the file into the
Job List
area, as shown below:
Fig 34: Adding the Job
Once a file has been added its information such as file path, size, resolution, and number of passes can be viewed
in the Job Information area. User can also add a job simply by right clicking on the Job List area and selecting the
Add Job
option from the context menu, as shown below:
On selecting the
Add Job
option, the
Open
window appears and follow the
above-mentioned steps to add more jobs.
Note
: To delete the selected job,
click
on the
Delete job
icon on the
Quick Access
Toolbar
.
Fig 35: Adding Job
On Clicking
The selected image appears in the Job List area, as shown
below:


