background image

Optional Songbird Feature


The optional songbird feature (Code Alarm part # SB1 and labor required) allows you to program songs

and tones to your system (i.e. Setting a different tone for Lock activation and unlock activation).


Turning Songbird On:

 Press and release the  TRUNK icon  button on the remote control, then press and hold

the LOCK icon button on the remote control within 2 seconds.   The SB1 speaker will give notification that
Songbird has be turned ON.


T

urning Songbird  Off:

 Press and release the TRUNK icon button on the remote control, then press and

hold the UNLOCK icon button on the remote control within 2 seconds.  The SB1 speaker will give
notification that Songbird has be turned OFF.


Setting Songbird Tones:

 Press and release the TRUNK icon button on the remote control, then press

the OPT button on the remote control within 2 seconds.  Press the LOCK icon button on the remote
control or UNLOCK icon button on the remote control to scroll through the different tones.


While in this mode the TRUNK icon button on the remote control will change the length or version of the

tone.


Press the OPT button on the remote control to select the desired tone and exit programming.

Please see your sales associate for details on Song Bird or any other Code Alarm accessory.

Replacing Remote Control Batteries

2-way LCD Remote Control:


The AAA alkaline battery inside the 2-way LCD remote control should last approximately 1 year under

normal use.  When the batteries become weak you will notice the remote control range (the distance
from the vehicle the remote control will work) deteriorate and the BATTERY icon on the LCD remote
control will show.

1.

Slide the small release tab on the back of the remote control to the unlock position.

2.

Gently slide the battery cover off of the remote control.

3.

Remove the old AAA battery, observing the +/- symbols on the battery,
and replace with a new AAA battery.

4.

Gently slide the battery cover on to the back of the remote control and lock the release tab in
place.

5.

Test operation of the remote control.

1-Way Six Button Remote Control:


The two (2) 3 volt lithium batteries (model CR2025) inside each remote control should last

approximately 1 year under normal use.  When the batteries become weak you will notice the remote
control range (the distance from the vehicle the remote control will work) deteriorate and the small LED
on the remote control will dim.  To replace the remote control batteries:

1.

Using a small (#1) phillips screwdriver, remove the screw on the back of the remote control.

2.

Gently unsnap the halves of the remote control apart.

3.

Slide the 2 lithium batteries out of the circuit board, observing the +/- symbols on the batteries
and replace with new lithium 3 volt batteries (model CR2025).

4.

Gently snap the halves of the remote control back together and reinstall the phillips screw on
the back of the remote control.

5.

Test operation of the remote control.

11

Summary of Contents for CA-545

Page 1: ...ost vehicles However due to the configuration of some vehicles some functions AND OR SAFETY PRECAUTIONS may not apply Please see your installing dealer for more information Owner s Manual CA 670 Remote Vehicle Control System Deluxe Vehicle Security and Remote Start System with Two Way Confirming LCD Remote Control ...

Page 2: ...unning via remote vehicle start Using the safety red handled control switch Preheating or Precooling the vehicle s interior Turning on the rear window defroster optional Using the quick stop feature Using Your Remote Vehicle Starter continued 6 Operating the 2 4 hour start up timer mode Operating the temperature start mode Using Your Remote Vehicle Starter continued 7 Operating the daily start tim...

Page 3: ...and hold the UNLOCK icon button for 1 second The parking lights will flash indicating the system is disarmed and has unlocked the doors if equipped and connected Disabling Enabling Confirmation Chirps 1 Turn the ignition key ON then OFF 2 Within 10 seconds push and release the valet override button 3 times 3 The system will sound 2 times to disable confirmation chirps or 1 time to enable confirmat...

Page 4: ...this feature is enabled on your system pressing and holding the UNLOCK icon button and the OPT button on the remote control simultaneously will activate an optional feature This feature can be programmed for a wide range of functions like power window or sunroof automation please consult your installing dealer to determine functionality of your system Using the Progressive Car Finder Feature 2 way...

Page 5: ...e safety red handled control switch allows you to temporarily disable the remote vehicle starter feature this is especially helpful when having your vehicle serviced or valet parked To disable the remote start move the safety red handled control switch to the OFF position Preheating or Precooling the Vehicle s interior Before exiting the vehicle set the temperature controls to the desired setting ...

Page 6: ...seconds press the OPT button on the remote control four 4 times The parking lights will flash and the system will sound 4 times indicating the 2 4 hour start up timer mode has been activated The vehicle will start every 2 or 4 hours and run for the preset time limit 5 10 15 or 20 minutes and then shutdown This will continue for 48 hours unless the 2 4 hour start up timer is cancelled To begin the ...

Page 7: ...and hold the emergency override button 3 The blue dashboard mounted LED will light solid indicating that the system is in valet mode When valet mode is activated the dash mounted status LED will light solid and all security functions will be disabled To disengage valet Mode 1 Turn the ignition key to the ON position 2 Press and release the emergency override button 3 The blue dashboard mounted LED...

Page 8: ...o indicate which mode is selected Page Call Out From within the vehicle press and hold the emergency override button for 4 seconds the LCD remote control will emit a beep tone to indicate that someone is calling you to the vehicle Countdown Timer The LCD remote control is equipped with a countdown timer for situations where an alert tone may be needed to remind you of something important The count...

Page 9: ...LCD Remote Control Functions TRUNK TRUNK 9 ...

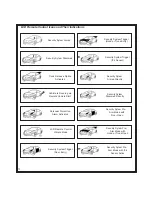
Page 10: ...ection Alarm Activated LCD Remote Control Vibrate Mode Security System Trigger Door Entry Security System Trigger Hood or Trunk Entry Security System Trigger IT s Sensor Security Sytem Armed Silently Security Sytem Disarmed Silently Security Sytem Pre Arm Mode with Door Open Security Sytem Pre Arm Mode with Hood or Trunk Open Security Sytem Pre Arm Mode with IT s Sensor Active 10 ...

Page 11: ...ttery inside the 2 way LCD remote control should last approximately 1 year under normal use When the batteries become weak you will notice the remote control range the distance from the vehicle the remote control will work deteriorate and the BATTERY icon on the LCD remote control will show 1 Slide the small release tab on the back of the remote control to the unlock position 2 Gently slide the ba...

Page 12: ...ersonal code Default digit is 1 4 Within 5 seconds turn the ignition key OFF then ON 5 Within 5 seconds press the emergency override button the number of times corresponding to the second digit of your personal code Default digit is 1 6 Within 5 seconds turn the ignition key OFF then ON 7 If entered correctly the security system will turn off 8 Turn the ignition key to the OFF position Programming...

Page 13: ...duct be found to be defective during the warranty duration CODE will repair or replace the system or any part of the system that CODE agrees is defective without charge to the retail consumer purchaser of the system during the first year of the warranty period After the first year of the warranty period has expired CODE will repair or replace the system or any part of the system that CODE agrees i...

Page 14: ...ng two conditions 1 This device may not cause harmful interference and 2 This device must accept any interference received including any interference that may cause undesired operation Warning Changes or modifications not expressly approved by the party responsible for compliance could void the user s authority to operate the equipment ...

Reviews: