89
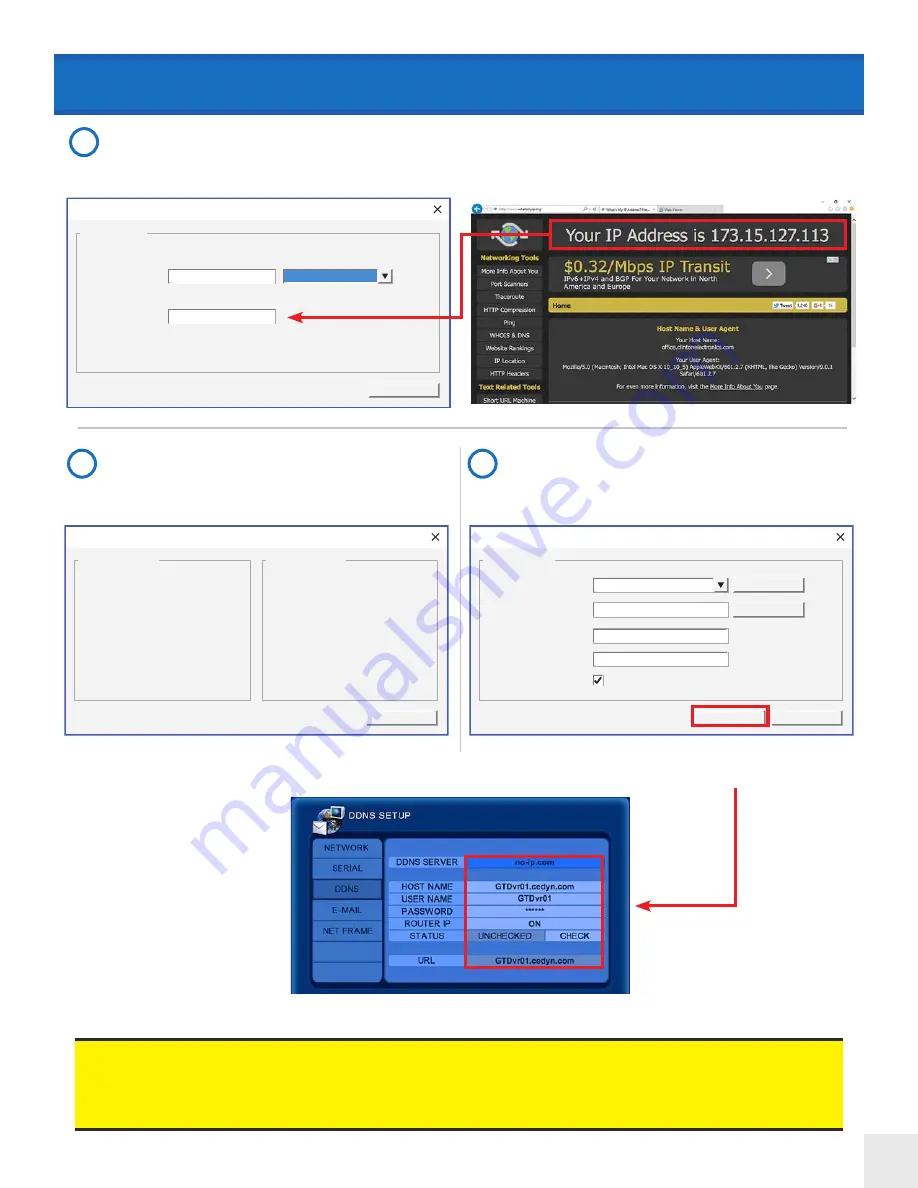
No-IP Setting : Add Host
Host Name :
Host Information
Next
IP Address :
cedyn.com
GTDvr01
173 . 15 . 127 . 113
No-IP Setting : Finish
User Name :
E-Mail :
First Name :
Last Name :
Postal Code :
GTDvr01
John
Smith
61111
Host Name :
IP Address :
GTDvr01.cedyn.com
173.15.127.113
Account Information
Account Information
Ok
DDNS Setup
DDNS Select :
DDNS User Name :
DDNS Password :
DDNS Host Name :
DDNS Information
Home
Create Account
Clear
Apply
Router-IP Mode
no-ip.com
GTDvr01
******
GTDvr01.cedyn.com
Verify that all the information on this window is
correct and click
Ok
to confirm.
Create a desired Host Name. Select
cedyn.com
from the Dropdown Menu (this is the free service offered by Clin-
ton Electronics, other options may involve mothly fees). Enter the public IP Address that the DVR is connected to.
This is different than the IP Address of the DVR. If you are unsure of the public IP, visit:
http://whatsmyip.org
5
4
The DDNS account info will be displayed automat-
ically. Click the check for Router-IP Mode. Click
Apply.
This DDNS info will be pushed to the DVR after Apply is
clicked.
6
DDNS Setup
• If the DVR is connected to a router, the Web and SMS ports used in the DVR must be forwarded in the router to
the DVR’s IP address using TCP and UDP protocol.
• If the web port has been changed from the default of 80, it must be entered after the DDNS Host Name with a
colon : and then the port number. Example: http://GTDvr01.cedyn.com:81


