background image


8 Nord soUNd MaNaGer 

|  21

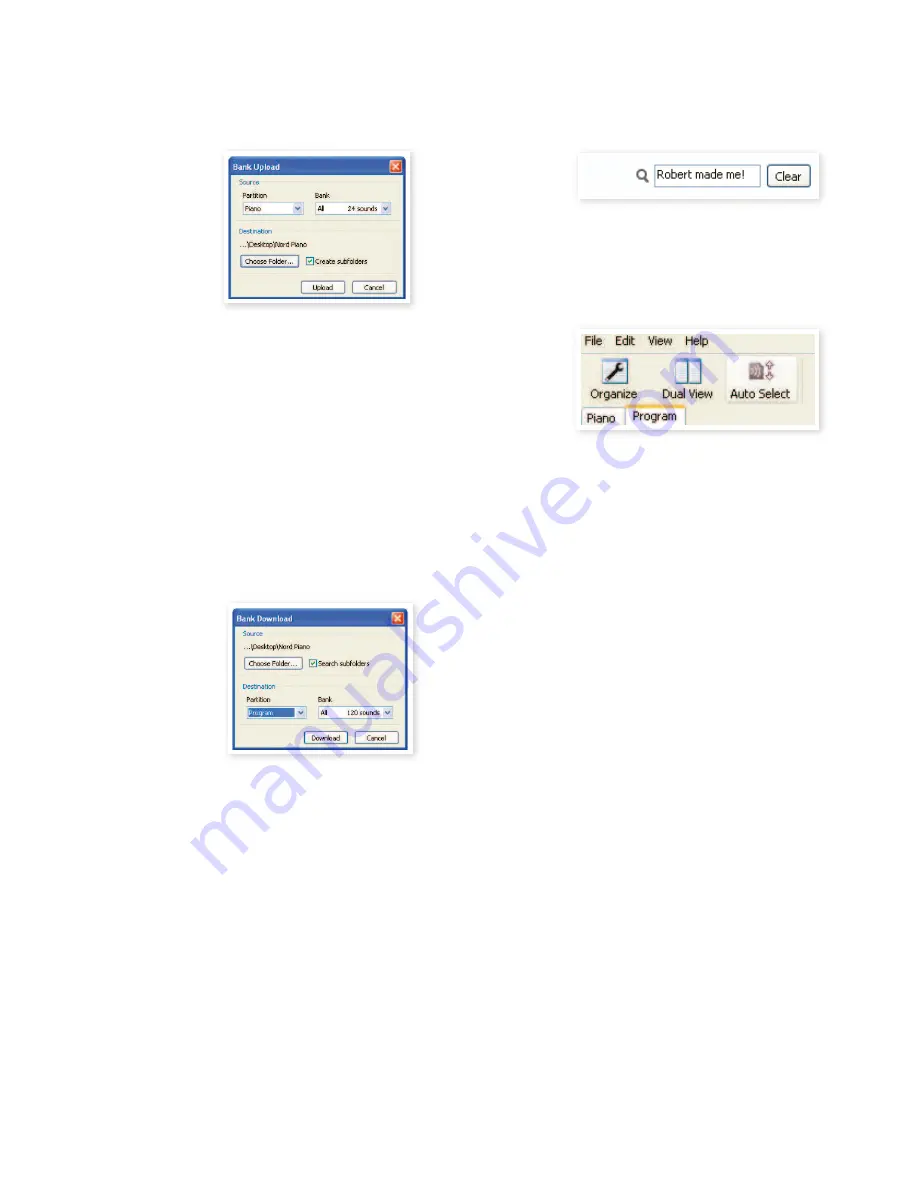
Click on the Bank Up tool, or select the File/Bank Upload menu 
command (Ctrl-Shift-U). Verify that the source bank is correct and 
browse to the desired destination folder on the computer hard 
drive.

You can also select All at the bottom of the bank list drop down. This 
will upload the entire content of the partition to the computer hard 
drive.

If the Create Subfolders option is checked, a folder structure - partition/
bank/sounds - will automatically be created in the destination folder.

Download sounds to the Nord Piano

Click on the Bank Down tool, or select the File/Bank Download 
menu command (Ctrl-Shift-D).

Verify that the destination bank is correct and browse to the de-
sired source folder on the computer hard drive.


When you click on Download a dialogue appears to inform you 
that the content of the destination bank in the Nord Piano will be 
replaced with that of the source ile. 

If you select All in the destination bank drop down, you can replace all 
the sounds in a partition with those on a folder structure on the hard 
drive. If Search Subfolders is active, you can browse to the top folder 
of a structure as the parent of the source iles.

Organize the program partition

By using drag and drop, you can organize the content of the Program 
partition with its 120 programs.

Make sure that Organize is turned on in the View menu.

Select and drag a program from the destination location to the 
desired location. 

If you drop a sound on a free location, the sound will be moved from 
the source location. If you drop on a location that is occupied, the two 
sounds will trade places.

Select a program and press the Ctrl-key on the computer key-
board. If you now drag this selection, the Program will be copied 
and pasted at the destination instead of just being moved. 

Search Box

By entering one or several characters in the Search Box, you can 
ilter out the content that is presented in the lists.

This provides you with a quick way to ind duplicate programs, etc.. 

Auto Select

By clicking on the Auto Select icon in the toolbar, you toggle the Auto 
Select function on or off. 

When Auto Select is turned on and you scroll through the Pianos or 
Program lists using the computer keyboard arrow keys, the sounds will 
automatically be selected in the Nord Piano.


Double-clicking on a Piano or Program will also select it in the 
Nord Piano.

Summary of Contents for Nord Piano 88

Page 1: ...User Manual Nord Piano OS Version 1 x Part No 50312 Copyright Clavia DMI AB Print Edition 1 2...

Page 2: ...ng lash with the arrowhead symbol within an equilateral triangle is intended to alert the user to the presence of uninsulated voltage within the products en closure that may be of suficient magnitude...

Page 3: ...ne 16 Global Transpose 16 MIDI Menu 16 MIDI Channel 16 Local Control 16 Control Change CC Mode 16 Program Change Mode 16 Send Ctrl 16 Dump One 16 Dump All 17 Sound Menu 17 Pedal Noise level 17 String...

Page 4: ...r these settings after the power is turned off All of the 120 programs in the Nord Piano can be used to store your own settings To make sure you don t accidentally overwrite programs you want to keep...

Page 5: ...gs are played When this functionality is turned on using the Nord Piano s acoustic pianos all notes you play will affect each other to reproduce the won derful acoustics that occurs inside an acoustic...

Page 6: ...t is also used together with the Up Down buttons when you want to change a setting in the System MIDI or Sound menus If you press and hold Shift while turning a knob the parameter value will be presen...

Page 7: ...rocessed with the Piano s effects or appear at the Piano s left and right output jacks USB Connection The USB connection is used for the Nord Piano to communicate with a personal computer in order to...

Page 8: ...s travel on certain pianos The left pedal is the soft pedal also known as the Una Corda When you press this pedal all the notes you play will be slightly lower in vol ume and also have a slightly more...

Page 9: ...you select it Memory Protection If you are happy with an edit that you have made you should probably save or Store the program But before you can do this we need to turn off the Memory Protect functio...

Page 10: ...he Transpose button and use the Up and Down buttons to transpose the Nord Piano in semitone steps The range is 6 semitones A transposition can be stored in a program M The pianos have a inite note ran...

Page 11: ...when you operate the sustain pedal on a acoustic or electric piano will be recreated The Nord Triple Pedal is dynamic you can control the level of the noise by the force you use when you operate the s...

Page 12: ...ting for each menu item is shown in the LCD The LCD will also display values and settings when you change any of the functions on the panel Press and hold shift while turning a knob to display its val...

Page 13: ...stic grand pianos Upright Upright pianos E Piano Electric Pianos tines and reeds E Grand Electric grand pianos Clavinet Clavinets Harpsi Harpsichords M The type of a piano has been determined by the B...

Page 14: ...nd or upright piano You will also hear all the strings resonate if you press the sustain pedal and play some notes Press the String Resonance button repeatedly to toggle the String Resonance on or off...

Page 15: ...Flanger effect is mono in mono out The phaser effect produces a characteristic sweep effect commonly used with electric piano sounds The phaser effect is mono in mono out The Chorus effect simulates...

Page 16: ...trol Change CC Mode This setting speciies how the front panel s knobs and buttons are han dled in the MIDI communication with MIDI Control Change messages You can select if the panel controls should e...

Page 17: ...vel Sets the level of the String Resonance feature that can be turned on for selected acoustic pianos Range 6 dB 0 dB default Pedal Menu Piano Pedal Select the functionality of the sustain pedal you h...

Page 18: ...h the contents of the Piano and the Program parti tions These are accessed from the tabs conveniently labeled Piano and Programs If no Nord Piano is connected to the computer pages icons and memory lo...

Page 19: ...s will select the chosen sound in the Manager list to be instantly accessible on the Nord Piano Upload This will upload the selected sound from the Nord Piano to the com puter hard drive to a folder o...

Page 20: ...lectric pianos can not be added to the grand bank the grand s cannot be dropped in the clavinet bank etc 1 Using the Toolbar or Menu command Click on the Sound Down icon in the toolbar The same comman...

Page 21: ...ders is active you can browse to the top folder of a structure as the parent of the source iles Organize the program partition By using drag and drop you can organize the content of the Program partit...

Page 22: ...eleted Space command from the File menu M Flashing LEDs in the Piano Type and Model section indicates that the piano that the current Program tried to use is not available in the Flash memory Select a...

Page 23: ...gin after you have clicked Open and conirmed your intentions in the dialogue All the content of a connected Nord Piano will then be irrevocably replaced by the content of the backup ile Clean Deleted...

Page 24: ...t Info This area may contain error information about broken corrupted or rejected iles if e g something has happened with a particular piano in the Nord Piano Footer Area The footer area is located at...

Page 25: ...System Exclusive Individual or all Programs can be transmitted and received as a System Exclusive dump Nord Piano with a sequencer Connections 1 Connect the MIDI Out on the Nord Piano to the MIDI In o...

Page 26: ...of Nord Piano The display will inform you when the transmission has been completed Receive MIDI SysEx dumps Here is how to receive a MIDI SysEx Dump 1 Connect the MIDI Out on the transmitting device t...

Page 27: ...1 127 After Key s Touch Channel X X X X Pitch Bender X X Control Change O O Program Change True O 0 127 O 0 127 System Exclusive O O System Song Pos Common Song Sel Tune X X X X X X System Clock Real...

Page 28: ...Loc 23 Local 16 Local Control 16 M Master level 12 Memory Protect 9 16 MIDI Channel 16 MIDI Controller list 26 MIDI In 7 MIDI Indicator 12 MIDI Menu 16 MIDI Out 7 Model 13 Monitor In 7 Mono 14 P Panic...

Page 29: ......

Reviews: