6
E
n
g
li
s
h
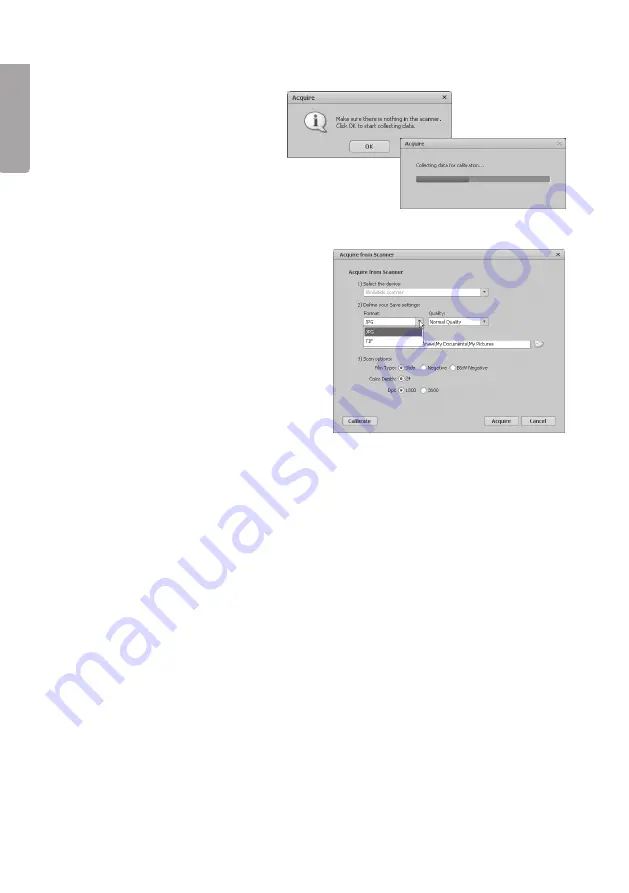
4. Click
OK
to perform a calibration (check first that there are no slides in
the scanner during calibration).
5. The Acquire from Scanner window
appears. Choose settings:
Format
- choose JPG or TIF (JPG is
more widely used. TIF gives higher
quality but the files are much larger).
Quality
- choose Low, Normal, High or
Highest.
Save to this location
- click the folder
icon and specify the folder where you
want to store the images.
Film Type
- choose the relevant film
type, Slide, Negative (colour),
B&W Negative (black and white).
Color Depth
- choose the colour depth you want, 24 or 48 bits.
Dpi
- resolution (dots per inch), 1800 or 3600.
Calibrate
- click to calibrate the scanner, the click OK.
Note!
During calibration
the scanner must be empty, ie there must not be a slide in the scanner.
Acquire
- click to scan an image.
Bear in mind that the file size varies depending on the settings:
Example settings: JPG and 1800 Dpi
Quality: Low, about 0.4 MB
Normal, about 0.6 MB
High, about 1 MB
Highest, about 6 MB
6. When you have chosen the settings, the scanner is ready to be used.


