6
Preliminary checks
Make sure that the air supply is not connected to the nailer. Do not put any nails in the air
nail gun until directed to do so in the following procedure.
1.
It is essential that the air nail gun is lubricated before each use. Use the CLARKE Air Line
Oil provided with your nailer to lubricate the safety yoke and trigger mechanism. Do
not use detergent oils or any oil that contains artificial additives these may cause the
nail gun to malfunction.
2.
Place 2 or 3 drops of oil in to the air intake twice a day when the nailer is being used.
3.
Check all of the nailers screws for tightness.
Connecting the air supply to the nailer
Make sure that you are wearing eye protectors before connecting the air supply.
4.
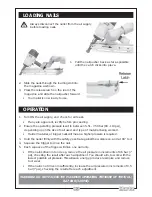
Push the hose from the compressor on to the nailer. The collar on the hose connector
will slide forward and click in place.
5.
Refer to the air compressor instruction book for the starting procedures of the compressor.
Set the compressor output to 5.5 Bar (80 psi).
6.
Check that the nailer does not leak air.
Checking the safety mechanism
7.
Hold the nailer in mid-air pointing downwards, and pull the trigger.
•
The nailer should not operate. If it does the safety mechanism is faulty. Do not use
the nailer. Return it for repair to the place of purchase
8.
Release the trigger and with your finger off the trigger, press the safety yoke against a
scrap piece of timber.
•
The nailer should not operate. If it does the safety mechanism is faulty. Do not use
the nailer. Return it for repair to the place of purchase.
Checking operation of the nailer
9.
Press the safety yoke against a piece of scrap timber and pull the trigger. The nailer
should operate. If it does not return it for repair to the place of purchase.
With the air nail gun off the work piece, pull the trigger and then press the safety yoke
against the workpiece.
•
The air nail gun should NOT operate. If it does return for repair to the place of
purchase.
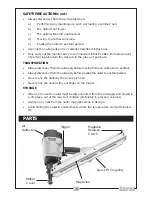
PREPARATION FOR USE
Screw the quick fit air intake coupling to the
nailer as shown on the right.
Summary of Contents for Contractor CFN34
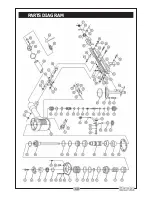
Page 10: ...10 PARTS DIAGRAM...


