background image

8

Parts & Service: 020 8988 7400 / E-mail: [email protected] or [email protected]

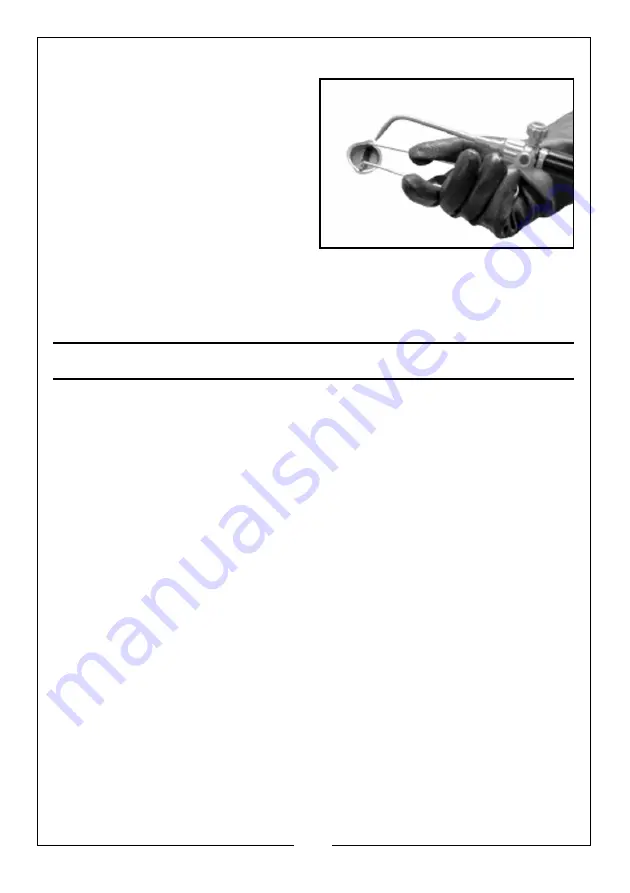
LIGHTING THE TORCH (FIG 9)

Open the torch acetylene valve 
approximately one half turn and 
ignite using the supplied spark igniter.

Open the torch valve until the flame 
stops excessive smoking and leaves 
the end of the nozzle tip about 3mm, 
then reduce slightly to bring the 
flame back to the tip. 

Open the torch oxygen valve until a 
bright inner cone appears in the 
flame.

The point at which the feathery edges of the flame disappear and a sharp 
inner cone is visible is called the “Neutral Flame”.

BASIC WELDING PROCEDURES

Gas welding is a method of joining similar metals by heating the adjacent 
surfaces to melting point with an oxyacetylene flame and allowing the two 
parts to fuse together with a filler metal being required on materials 5mm thick 
or more. The resulting weld is as strong as the parent metal.

All metal to be joined should be thoroughly cleaned before welding. Oil, 
grease, rust, scale or other impurities affect the weld quality and the tensile 
strength. Metal of 5mm and over should be bevelled before attempting to 
weld and when bevelled edges are to be joined. A filler rod of the same 
material must be used.

The table below is a guide only showing recommended, oxygen and 
acetylene pressures relating to the size of the material to be welded etc.

If a too larger tip is used and the flame is softened, the tip heats up 
unnecessarily and is often accompanied by a popping noise which splatters 
the weld puddle. Too hot a flame burns the steel and too small a flame is not 
big enough to get the job done.

WELDING ROD

Welding rods are available in various sizes with the most common being 
1.6mm, 2.4mm and 3.2mm. They are also available for welding mild steel, cast 
iron and aluminium.

The size of rod will be determined by the type of weld, the metal thickness and 
the amount of filler metal required.

Summary of Contents for 6000670

Page 1: ...ORIGINAL INSTRUCTIONS GC0917 iSSUE 2 USER INSTRUCTIONS WELDING KIT MODEL CGW1 PART NO 6000670...

Page 2: ...is product is guaranteed against faulty manufacture for a period of 12 months from the date of purchase Please keep your receipt which will be required as proof of purchase This guarantee is invalid i...

Page 3: ...Ensure that lighting is placed so that you will not be working in your own shadow 10 ALWAYS keep children away All visitors should be kept a safe distance from the work area especially whilst welding...

Page 4: ...y before lighting up this will help prevent incorrect mixing of gases NEVER use oxygen to blow off work or clothing Pure oxygen supports combustion and a spark can ignite oxygen saturated clothing NEV...

Page 5: ...hing the acetylene regulator Red NOTE The acetylene connections are all left handed whilst the oxygen connections are all right handed ATTACHING THE HOSES FIG 2 Connect the hoses complete with flashba...

Page 6: ...ulator knobs are opened fully turned anticlockwise carefully using cylinder key slowly open both cylinder valves in turn starting with the oxygen one ADJUSTING THE OPERATING PRESSURE FIG 5 When adjust...

Page 7: ...hold in position with a 11mm open ended spanner Adjust the nozzle position by turning to the desired position using an 11mm open ended spanner on the nozzle connector CUTTING Remove the welding nozzle...

Page 8: ...ore The resulting weld is as strong as the parent metal All metal to be joined should be thoroughly cleaned before welding Oil grease rust scale or other impurities affect the weld quality and the ten...

Page 9: ...onsumes all oxygen in the welding area which leaves an uncontaminated weld area and a weld of maximum strength An oxidizing flame is rarely used A carbonizing flame is used mainly for flame hardening...

Page 10: ...oving the puddle it is helpful to lean the nozzle at an angle of approx 45 away from the direction you want the puddle to move EXERCISE 2 Place two pieces of 3 2mm steel together as shown Make the pud...

Page 11: ...Once the torch movement and puddle control are mastered you will be able to make vertical horizontal and flat welds with confidence BRAZING Brazing differs from welding because the two pieces of metal...

Page 12: ...ndant flux must be used otherwise the molten rod will not stick to the metals being joined Silver brazing is a little faster than bronze brazing This is because silver melts at a much lower temperatur...

Page 13: ...hich is not mixed with acetylene flows to cut the steel after the metal is sufficiently preheated CUTTING NOZZLES Cutting nozzles are available in a wide range of sizes the correct size being determin...

Page 14: ...en the steel becomes red slowly depress the cutting lever to release the oxygen stream to cut through the steel 4 Slowly move the torch in the direction of the cut The correct speed is accompanied by...

Page 15: ...Cause Remedy Welding tip popping Tip is operated at too low heat Nozzle too large Tip too close to work Increase pressures consult tip table page 13 Use next smallest size nozzle Move tip further fro...

Page 16: ......

Reviews: