background image


VTM1

English

Using the 

G

eneral 

S

etup page:

1.  Press

 the

 SETUP button on the remote control.

 The DVD Setup menu opens.


2.  Press   


or   to select

 the


G

eneral 

S

etup page,

 then the list opens.


3

.


Press    or    to select 

from the following options: TV DISPLAY - ANGLE MARK - OSD LANG


5.

CAPTIONS and SCREEN SAVER.


4.


Press ENTER to open the list, then press

     or     to choose the setting. Press ENTER again to confirm.


Press the SETUP button on the remote control. The DVD Setup menu opens. 


Press    or    to select the Speaker Setup page, then the list opens.

Press SETUP to exit th

is

 setup menu.

Using the 

S

peaker 

S

etup page:


1. 


 2

.


3.

  Press    or    to select from the following options: DOWNMIX - DUAL MONO and DYNAMIC.  


Customizing DVD settings

VTM1   

   12

01-12-201


6.


4.  Press ENTER to open the list, then press     or     to choose the values. Press ENTER again to confirm.


5.  Press SETUP to exit this setup menu.

Using the 

Preference

 page:


Note: This setting is only available in STOP mode or when a disc is not loaded in your player

         1. Press the SETUP button on the remote control. The DVD Setup menu opens. 


2. Press     or    to select the Preference page, then the list opens.

3. Press


or    to select 

from the following options: TV TYPE - AUDIO - SUBTITLE - DISC MENU

PARENTAL - PASS WORD and DEFAULT.


4. Press

 ENTER to open the list, then press

     or     to choose the setting. Press ENTER again to confirm.


5. Press SETUP to exit this setup menu.

Note:         This icon indicates that it is locked. You cannot change the Parental Control Level rating

.

                  This icon indicates that it is unlocked. You can change the Parental Control Level rating

.

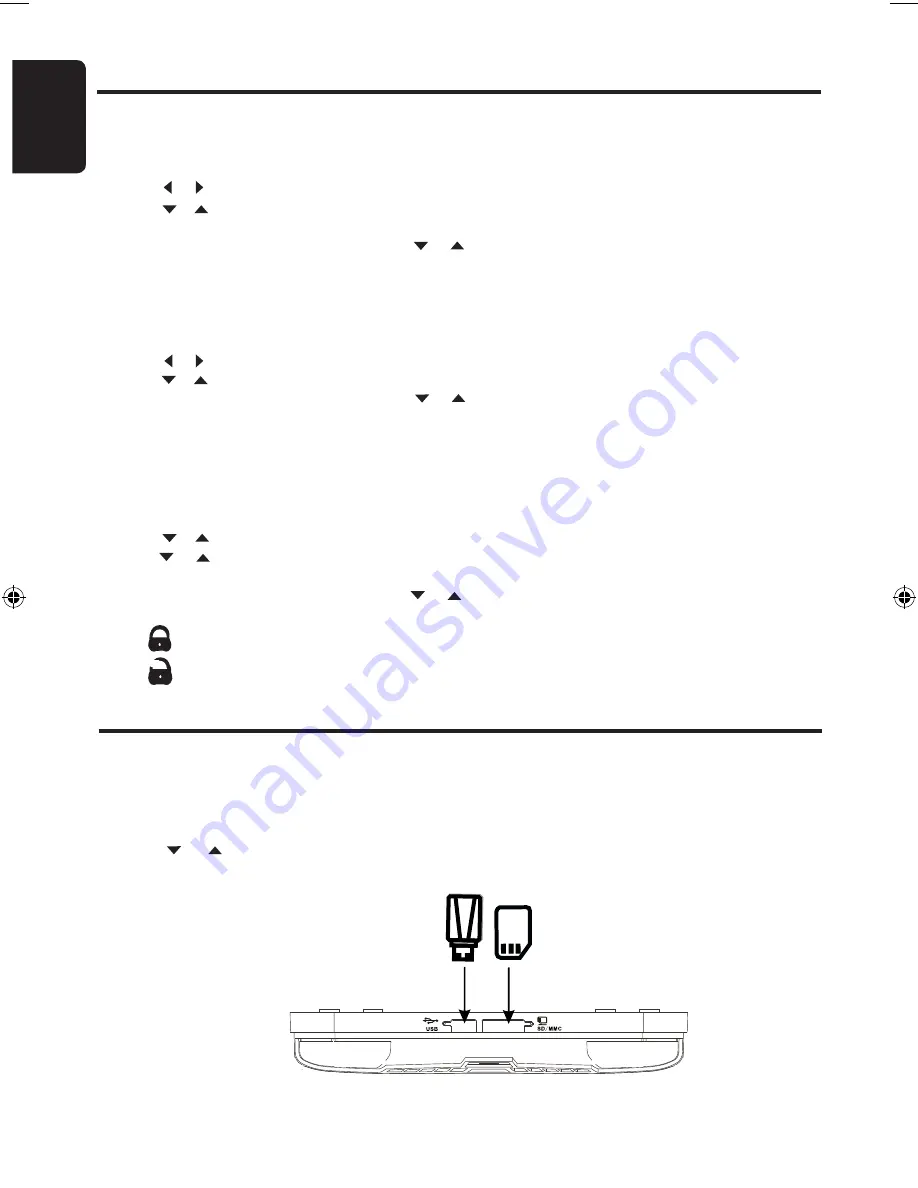
USB Stick and SD Memory Card use


USB Stick


SD or MMC Card


Playing USB or SD/MMC Devices


1. Insert the USB Stick or SD/MMC Card into the appropriate socket on the VTM1 as shown.


2. Using the SRC button on your Remote Control select DVD-IN mode, then press and


hold the


SRC


    button for >2 sec. The VTM1 will read the contents of your memory device and display its contents.


3. Press      or      to navigate through this menu and press ENTER to make your selection.


Note: USB products such as Portable Hard Drives (FAT 32) and MP3 Players are not supported

.


Summary of Contents for VTM1

Page 1: ...OHM107VD English 10 2 TFT LCD Roof Mount Monitor with DVD Player USB 2 0 and SD MMC Ports VTM1...

Page 2: ...get the most from its features and functions We suggest you keep this manual in a safe place as it can be a valuable tool in helping you to understand its operation and fully enjoy your multimedia sy...

Page 3: ...air vent Please note that its normal working temperature is from 5 C to 50 C If the internal temperature of the vehicle is extremely high a short cooling down period is necessary before operating the...

Page 4: ...ted via your Remote Control Disc Playback This DVD player can play the following formats About CD Extra discs A CD Extra disc contains a total of two recorded sessions The first is an Audio session th...

Page 5: ...D screen DVD PLAYER CONTROLS FUNCTIONS Play Pause Item Name Function or control 1 Power Press to turn the OHM107VD On or Off 2 Setup Press to access the setup menu to modify the DVD player settings 3...

Page 6: ...Stereo during playback 9 Up Down Left Right Press to navigate in a DVD Menu MP3 AVI Menu and change settings values in the Arrows and ENTER Display Menu 10 Reverse Press to Fast Reverse playback at 2x...

Page 7: ...on DVD or Track on CD 24 Stop Press to stop playback press PLAY or ENTER button to start playing at the last position Press STOP button twice to fully stop playback Press PLAY or ENTER button to star...

Page 8: ...j e c t t h e d i s c 5 0 9 P r e s s t o e n t e r T r a c k N u m b e r s d i r e c t l y o r f o r c h a n g i n g s o m e s e t t i n g s 6 P r e v i o u s P r e s s t o g o t o t h e P r e v i o...

Page 9: ...Notes 1 Some DVDs only allow access to this function through the DVD menu 2 This is not available for AVI files on any media Basic DVD Operation Turning on the subtitles and changing the subtitle lan...

Page 10: ...le Item Name 1 Power Press to turn the OHM107VD On o 2 Setup Press to access the setup menu to 3 Mute Press to turn the Sound On or Off 4 Eject Press to Eject the disc 5 0 9 Press to enter Track Numbe...

Page 11: ...ption for DVD play You can select ON or OFF General setup page SCREEN SAVER Protects the screen if it paused about 5 minutes You can select ON or OFF Speaker setup page DOWNMIX Applies to Dolby digita...

Page 12: ...he DVD Setup menu opens 2 Press or to select the Preference page then the list opens 3 Press or to select from the following options TV TYPE AUDIO SUBTITLE DISC MENU PARENTAL PASS WORD and DEFAULT 4 P...

Page 13: ...a disc it may become jammed in your player causing serious damage and requiring product servicing Do not use discs that have large scratches are misshapen cracked etc Use of such discs may cause malf...

Page 14: ...the remote control s IR windows Player operates erratically Loose connections Check and tighten all connections Picture Skips Occasions Disc is dirty or scratched Clean or replace the disc Blurred pi...

Page 15: ...to 50 C SPECIFICATIONS Storage Temperature 20 C to 70 C Note Specifications and design are subject to change without notice for further improvement Name of Parts Quantity Player 1 Remote Control CR202...

Page 16: ...f the VTM1 using the RCA lead supplied Portable video devices can use this port 7 AUX AV Input 2 Connect to accessories installed in the vehicle such as dash mounted video players TV tuners 8 AUX AV O...

Page 17: ...9 Attach the DVD player to the metal mounting plate using the CM 4x10 screws 10 Reconnect the terminal of the battery Notes Remember to connect the red wire to the ACC of the ignition switch Or the ba...

Page 18: ...locking sound is heard 4 Aim the IR Remote Control directly at the DVD player then press any button to operate Notes Use the remote control only inside the vehicle Tinted windows will effect the signa...

Page 19: ...VTM1 19 English Notes...

Page 20: ...OHM107VD English Clarion Co Ltd All Rights Reserved Copyright 2010 Clarion Co Ltd Printed in China www clarion com...

Reviews: