


© 1999-2017 Citrix Systems, Inc. All rights reserved.
p.26
https://docs.citrix.com
2. Verify that the replacement SSD is of the correct type for the platform.
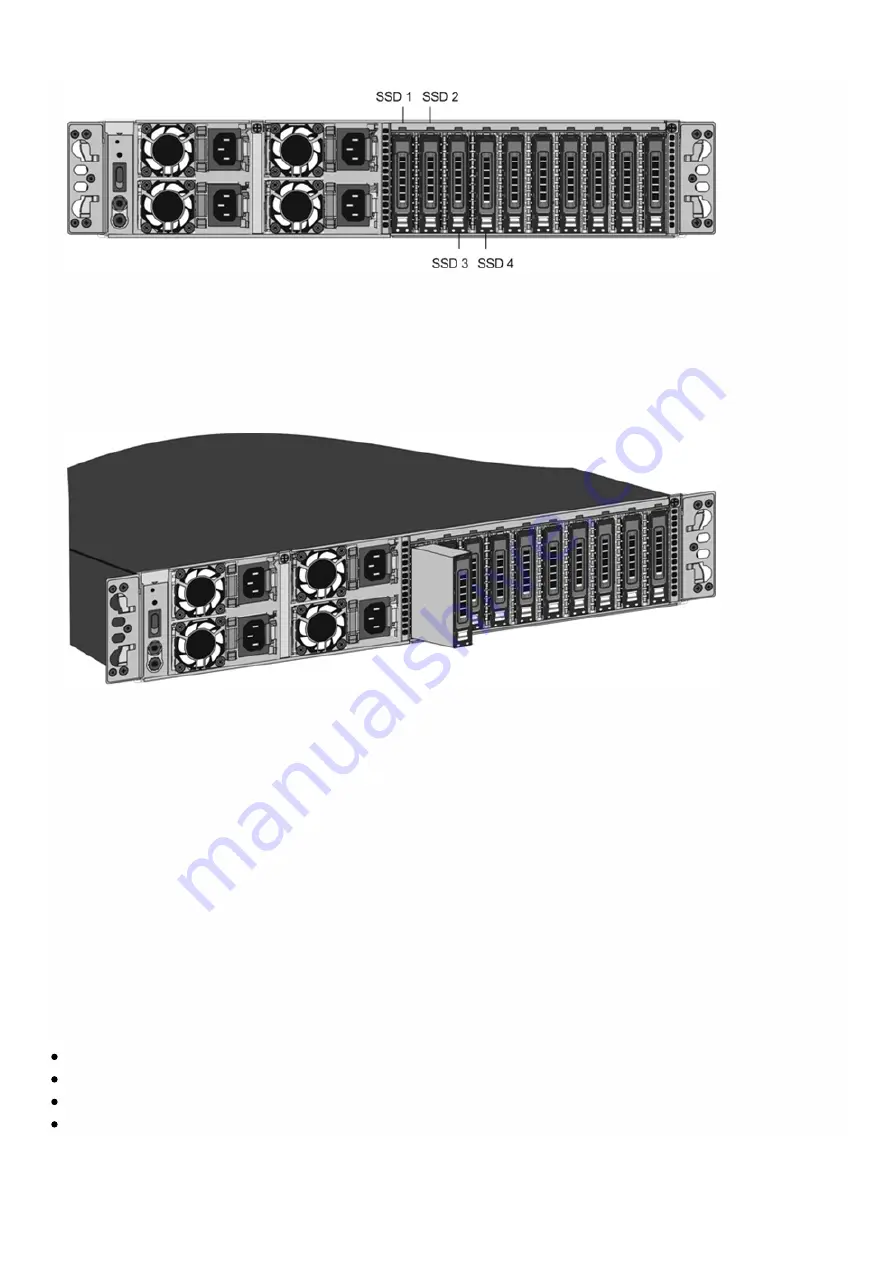
3. Pick up the new SSD, open the drive handle fully up, and insert the drive into the slot as far as possible. To seat the drive,
close the handle flush with the rear of the appliance so that the drive locks securely into the slot.
Important: When you insert the drive, make sure that the Citrix product label is at the right.
Figure 6. Inserting the Replacement Solid-State Drive
After you replace one of the SSDs, the configuration on the other SSD in the mirrored SSD is copied to the replacement
SSD.
Note: NetScaler SDX 22040/22060/22080/22100/22120 and SDX 24100/24150 appliances support up to 80 instances.
However, the mirrored SSDs in the third and fourth slots provide only enough storage for up to a maximum of 30
instances. To provision more instances on the appliance, you must purchase and install additional SSDs.
To add additional SSDs on SDX 22040/22060/22080/22100/22120 and SDX 24100/24150 appliances
Put the first new SSD into the leftmost empty slot, and put the second new SSD into the adjacent empty slot.
To replace a solid-state drive on any other SDX appliance
Replacement solid-state drives (SSDs) contain a pre-installed version of the NetScaler software and a generic configuration
file (ns.conf), but they do not contain SSL-related certificates and keys, or custom boot settings. After installing the
replacement SSD, you have to restore the configuration files and customized settings from backup storage. If no backups
are available, you have to reconfigure the appliance. The files to be restored might include:
/flash/nsconfig/ns.conf: The current configuration file.
/flash/nsconfig/ZebOS.conf: The ZebOS configuration file.
/flash/nsconfig/license: The licenses for the NetScaler features.
/flash/nsconfig/ssl: The SSL certificates and keys required for encrypting data sent to clients or servers.


