2-7
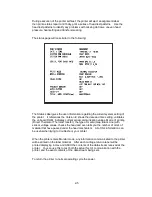
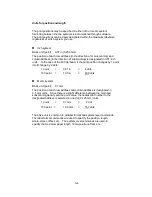
The final display in the maintenance mode is the Voltage setting mode. The
display will show ‘PE #.##V’ and as the second option ‘BL #.##V’ for Gap
mode and Black line mode. The ‘#.##’ represents the current voltage
reading for these sensors. For proper operation of the printer in these
modes the voltage needs to be set to a specific range of values for the
currently installed media.
Note:
A small, flat blade, jewelers screwdriver will be needed to make the
following adjustments.
To set the Paper- Gap voltage;
1) Peel off a label from the media to expose the liner.
2) Place the material into the printer so the exposed liner is under the sensor
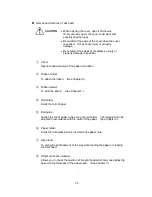
guide (#3 on the illustration on page 3-7) and close the sensor guide.
3) Close the printer cover to prevent ambient light from skewing the readings.
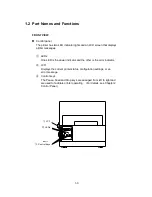
4) Adjust the Paper Gap sensor (the top hole on the front left-hand side of the
printer (see illustration on page 2-2)) to read between 3.00V to 3.30V.
5) Open the printer cover and draw the media under the sensor guide, until a
label is positioned under the sensor, close the cover.
6) The reading should be less than the reading voltage of Step 4. The difference
between the two should be more than 1.00V.
To set the Black Line voltage;
1) Place label material under the sensor guide with the media positioned so that
the black line is not at the sensor.
2) Close the printer cover to prevent ambient light from skewing the readings.
3) Adjust the Black Line sensor (the middle hole on the front left-hand side of the
printer (see illustration on page 2-2)) to read between 3.00V to 3.30V.
4) Open the printer cover and draw the media under the sensor guide, until a the
Black Line is positioned under the sensor, close the cover.
5) The reading should be less than the reading voltage of Step 3. The difference
between the two should be more than 1.00V.
Summary of Contents for CLP-6401
Page 1: ...CLP 6401 User s Manual C ITOU...
Page 13: ...xii...
Page 36: ...3 7 Roll paper Roll paper Notch for alignment Reference plane...
Page 40: ...3 11 Heating element b...
Page 57: ...4 11...
Page 59: ...4 13...
Page 63: ...5 4...
Page 82: ...6 19...


