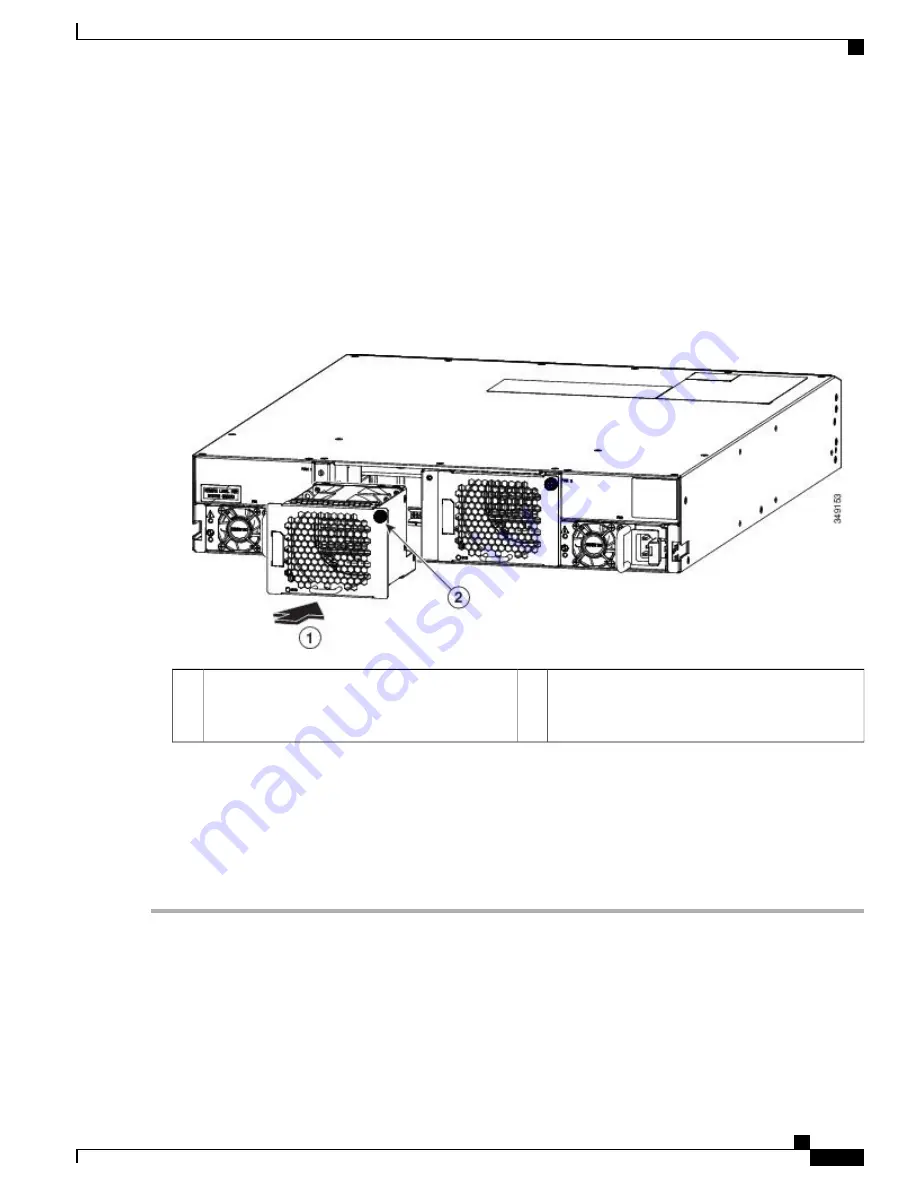
c) Position the fan module in front of the open fan slot (be sure that the backside of the module with the electrical
connectors is positioned to enter the slot first) and slide the module all the way into the chassis until its front side
comes in contact with the chassis. For the last 0.2 inches (0.5 cm), carefully mount the module onto the chassis
connectors by pushing more firmly, but do not force the module if it does not move further (excessive force can
damage the connectors).
If you are not able to push the module all the way into the slot, carefully slide the module out of the slot and
check its electrical connectors for damage. If damaged, contact Cisco Technical Assistance for help. If
undamaged, repeat this step to reinstall the module.
Note
Figure 10: Installing a Fan Module
Screw in the captive screw to attach the module to
the chassis.
2
Holding the handle on the fan module, slide its
connector end into the fan slot until the front of the
fan module is touching the chassis.
1
d) Verify that the STS LED turns on and becomes green.
If the STS LED does not turn on, slide the module out of the chassis, and visually check the electrical connectors on
the back side of the chassis for damage. If damaged, contact Cisco Technical Assistance for help. If undamaged,
repeat the previous step to reinstall the module.
e) Secure the fan module to the chassis by screwing in the captive screw to the chassis. Tighten the screw to 5 to 7 in-lb
(0.56 to 0.79 N·m).
Replacing a Power Supply Module
The switch requires only one power supply for operations but a second one can be installed for redundancy.
With one power supply providing the necessary power for operations, you can replace the other power supply
Cisco Nexus 9336PQ ACI-Mode Switch Hardware Installation Guide
35
Replacing Modules
Replacing a Power Supply Module


