


Figure 6: Security Zone Object
Step 3
If you want internal clients to use DHCP to obtain an IP address from the device, choose
Device
>
System
Settings
>
DHCP Server
, then select the
DHCP Servers
tab.
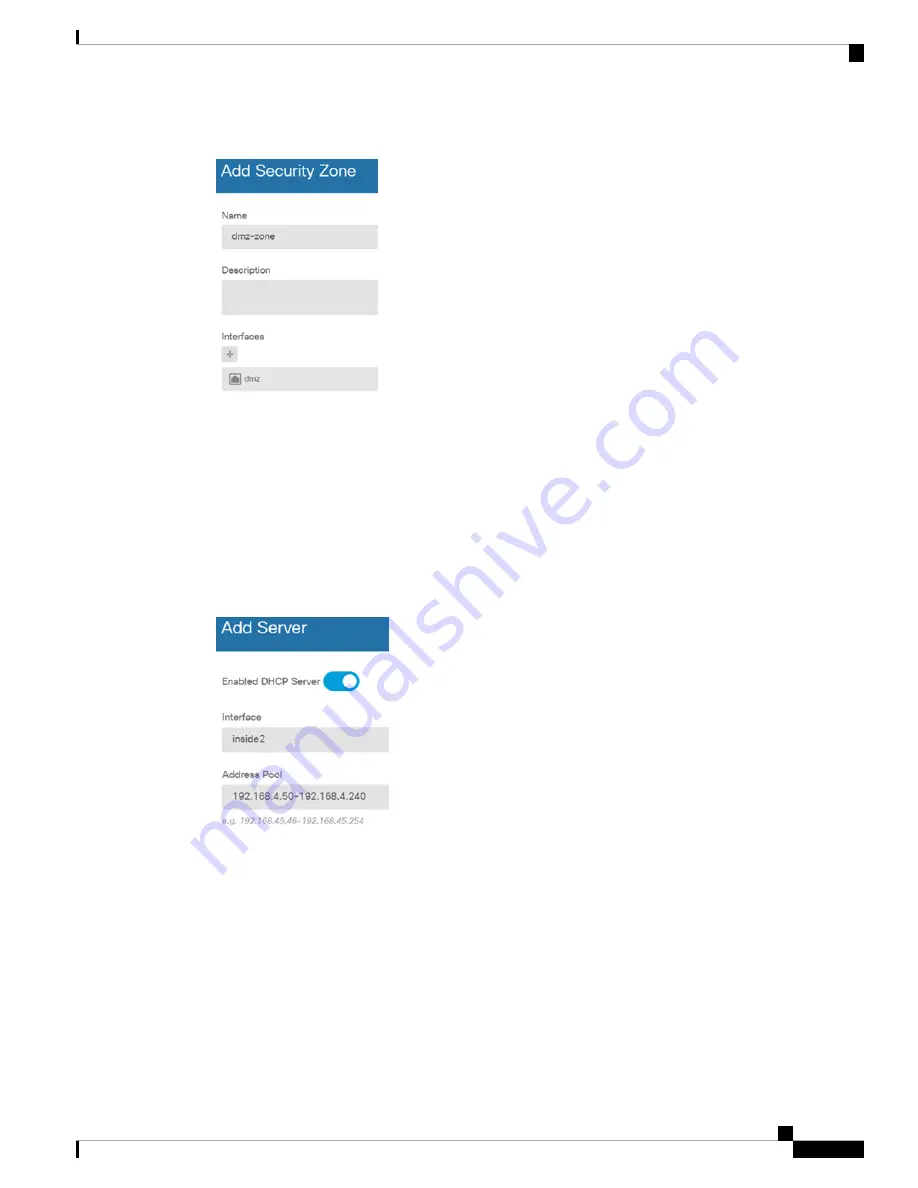
There is already a DHCP server configured for the inside interface, but you can edit the address pool or even
delete it. If you configured other inside interfaces, it is very typical to set up a DHCP server on those interfaces.
Click + to configure the server and address pool for each inside interface.
You can also fine-tune the WINS and DNS list supplied to clients on the
Configuration
tab. The following
example shows how to set up a DHCP server on the inside2 interface with the address pool
192.168.4.50-192.168.4.240.
Figure 7: DHCP Server
Step 4
Choose
Device
, then click
View Configuration
(or
Create First Static Route
) in the
Routing
group and
configure a default route.
The default route normally points to the upstream or ISP router that resides off the outside interface. A default
IPv4 route is for any-ipv4 (0.0.0.0/0), whereas a default IPv6 route is for any-ipv6 (::0/0). Create routes for
each IP version you use. If you use DHCP to obtain an address for the outside interface, you might already
have the default routes that you need.
The routes you define on this page are for the data interfaces only. They do not impact the
management interface. Set the management gateway on
Device
>
System Settings
>
Management
Interface
.
Note
Cisco Firepower 2100 Getting Started Guide
23
Firepower Threat Defense Deployment with FDM
Configure the Firewall in Firepower Device Manager
Summary of Contents for Firepower 2100
Page 2: ......
Page 166: ......
Page 191: ...Cisco Firepower 2100 Getting Started Guide 189 ASA Deployment with ASDM End to End Procedure ...
Page 221: ... 2021 Cisco Systems Inc All rights reserved ...
Page 222: ......


