Connecting Line Card Network Interface Cables
This section describes how to route the network interface cables through the router cable-management system
and attach the network interface cables to the line card ports.
This procedure uses an 40x1GE line card as an
example
to describe how to attach a network interface cable
to a line card port and route the cable through the cable-management system. Depending on which line cards
are installed in your system, your cable connection procedure might differ slightly from this example. For
cable connection information for your specific line card, refer to the installation and configuration note for
that line card.
You can access the most current Cisco line card documentation online at:
Note
Follow these steps as an example to route the network interface cables through the cable-management system
and connect them to the line card:
Procedure
Step 1
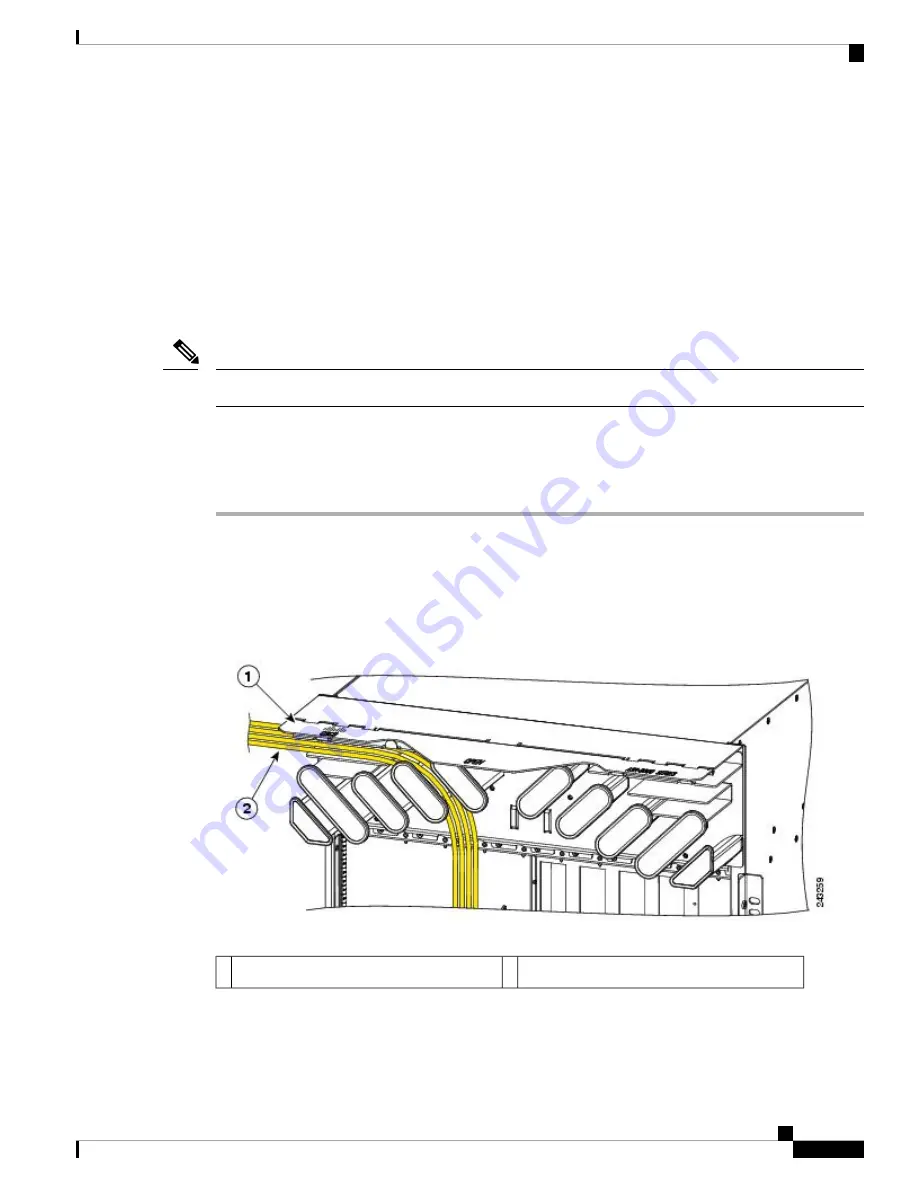
Route an interface cable across the horizontal cable management tray (see the figure below), and down through
the cable tray opening to connect it to the line card.
Each line card has its own cable routing slot in the cable management tray. For example, the figure
below shows cables being routed to line card 3 in slot 3 in a Cisco ASR 9010 Router.
Note
Figure 183: Routing Interface Cables through the Cable Management Tray
Line card cable bundle routed through the tray
2
Hinged cover (shown in the raised position)
1
Step 2
Attach a line card cable management bracket to the line card front panel (
Figure 184: Attaching a Line Card
Cable Management Bracket, on page 182
). This bracket is shipped with the line card.
Cisco ASR 9000 Series Aggregation Services Router Hardware Installation Guide
181
Installing Cards and Modules in the Chassis
Connecting Line Card Network Interface Cables


