13
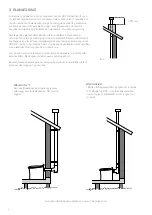
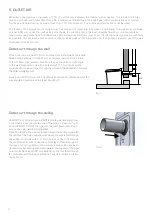
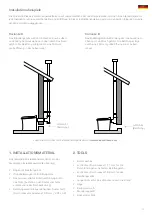
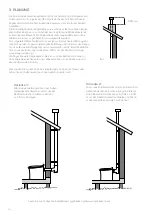
Using bend sections in the outlet air pipe
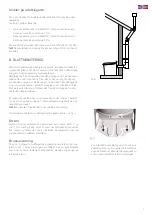
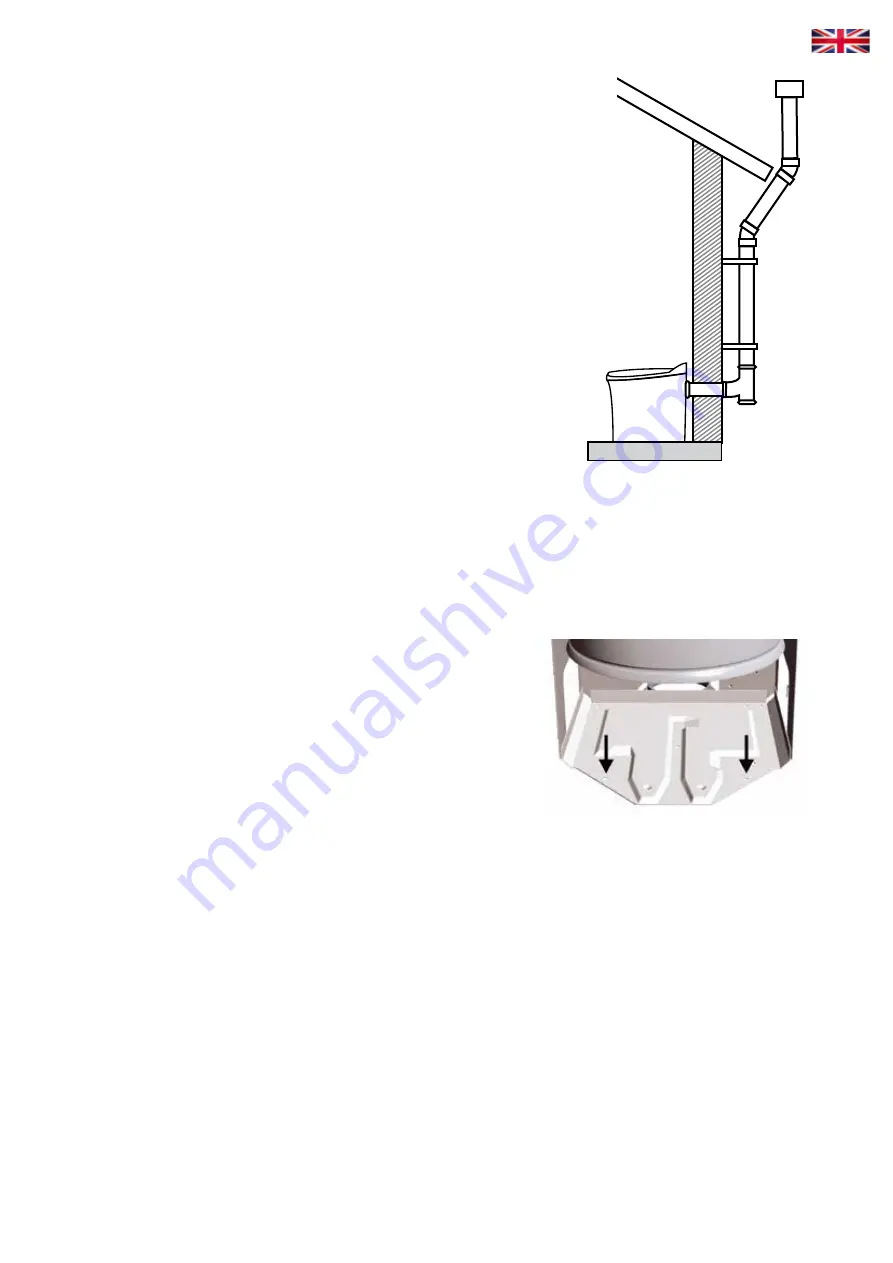
If it is necessary to duct the outlet air pipe past a window or over-
hanging roof, (study fig. 6) the following applies:
•
If the ventilation pipe has a 30° section, the overall length of
the slanted section must not exceed 1.5 m
•
If the ventilation pipe has a 45° section, the overall length of
the slanted section must not exceed 1.0 m
When using pipe bends, the limit is maximum 2 ea. 45°
bends or 2 ea. 30° bends.
NOTE!
The maximum length of the pipe must not exceed 4.5 m
when using bends.
6. FINAL INSTALLATION
Install the necessary fittings, using a few drops of washing deter-
gent to assemble parts, if required. If the pipe is installed along a
wall, wall-mounting brackets may be required.
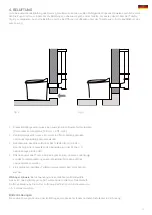
Always use the enclosed T-bend. The plug on the underside of the
T-bend must always point down, since there is a hole in the lower-
most part of the T-bend where condensation water can drain.
For this reason, the T-pipe should not be enclosed, since it should
be possible to inspect the hole and verify that it is not blocked by
leaves or similar objects. In cases where it is necessary to cover
up T-bends, an inspection hatch must be installed.
In internally installed pipe systems, a bowl may be placed below
the T-bend to collect any condensation water. Push the enclosed
chimney top onto the pipe as far as it will go.
NOTE!
Do not cover the opening of the ventilation pipe with insect
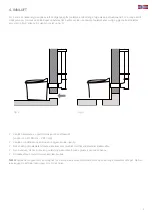
netting. Use suitable screws to attach Cinderella to the founda-
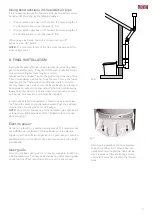
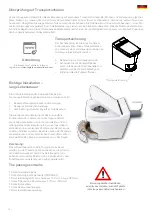
tions, study fig. 7.
Electric power
Connect the toilet to an earthed mains socket. The requirements
are 230VAC and at least a 10A fuse. Make sure the electric
supply circuit has sufficient capacity. It is a good idea to consult a
qualified electrician for information about regulations and electric
installations.
User guide
Place the enclosed user guide in an easily accessible location in-
side the toilet room. The user guide includes a poster showing how
to use the toilet. Post this information where it is easy to see.
fig. 6
Attaching Cinderella to the floor: Remove
the ash container. Drill holes in the indi-
cated attachment locations. Use suitable
wood screws or fully penetrating screws
and nuts to attach the toilet to the founda-
tions.
fig. 7

