Chapter 5
Maintenance and Checkup
52
Chapter 5
Maintenance and Checkup
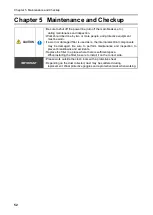
CAUTION
・
Be sure to shut off the power line (turn off the main breaker, etc.)
during maintenance and inspection.
・
Work should be done by two or more people, and protective equipment
must be worn.
・
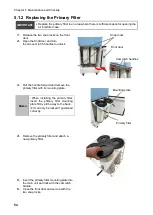
If a worn or damaged filter is used as is, the internal electrical components
may be damaged. Be sure to perform maintenance and inspection to
prevent breakdowns and accidents.
・
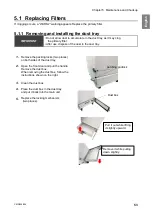
Replace the filter in a place where there is sufficient space.
When installing the filter, be sure to install it on the correct side.
IMPORTANT
・
Please work outside the clean room with a protective sheet.
・
Depending on the dust collected, dust may be scattered during
replacement. Wear protective goggles and a protective mask when working.
Summary of Contents for CMP-2500AT3-A
Page 3: ......
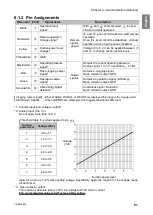
Page 7: ...1 CMN209 006 3 1 1 1 1 2 10 60 80 1 3 0 40 80 100 1 000...
Page 8: ...1 4 1 4 2 OFF NV63 SVF 3P 30A 1 5...
Page 10: ...2 6 2 2 1 4 HEPA V1 1 1 1 1 AWG14 2 08...
Page 11: ...2 CMN209 006 7 2 2 2 2 1 CMP 2500 AT3 A V1 AT3 BOX HEPA V1...
Page 14: ...2 10 2 4 3 OP kPa SP kPa DP kPa EP kPa Blower Motor rpm Runtime h 17 Total h...
Page 15: ...3 CMN209 006 11 3 3 1 3 1 1 0 40 80 RH...
Page 16: ...3 12 3 1 2 200 230V 1 BOX 2 3...
Page 17: ...3 CMN209 006 13 1 2 8 3 2 1 RS485 ID 2 AT3 ON 3 4 1 7 3 ON OFF 3 30 ON OFF Ver ID...
Page 23: ...5 CMN209 006 19 5 OFF 2...
Page 24: ...5 20 5 1 WARN2 1 5 1 1 1 1 2 2 3 4 5 2...
Page 25: ...5 CMN209 006 21 5 1 2 1 1 1 2 2 2 3 4 1 5 6 2...
Page 26: ...5 22 5 1 3 V1 1 4 2 3 4 5 2 1 1 1 1...
Page 29: ...5 CMN209 006 25 5 4 EL 1 2 3 4 1 4 30 1 1 5 1 20 5 1 20 5 1 20 5 1 20...
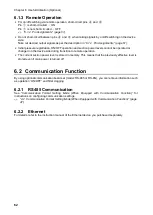
Page 31: ...6 CMN209 006 27 1 5V 0 2V B C ON HIGH LOW OFF LOW HI Z LOW DC 1 2...
Page 35: ...7 CMN209 006 31 7 3 7 3 1 CMP 2500AT3 A...
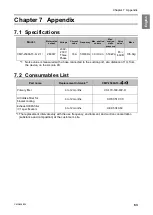
Page 36: ...32 12 7 2 7 2 30...
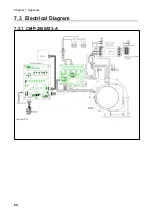
Page 68: ...Chapter 7 Appendix 64 7 3 Electrical Diagram 7 3 1 CMP 2500AT3 A Internal terminal...


