Chapter 4
Various settings (mode select mode)
CMN209-004
49
E
ng
lis
h
■
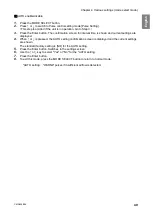
AUTO enable/disable
1.
Press the MODE SELECT button.
2.
Press
↑
or
↓
to switch to Pulse control setting mode [Pulse Setting].
(
This step is omitted if the unit is in operation. Go to Step 3.
)
3.
Press the Enter button. The confirmation screen for interval time is shown and current settings are
displayed.
4.
When
↑
or
↓
is pressed, the AUTO setting confirmation screen is displayed and the current settings
are shown.
The standard factory setting is [NO] for the AUTO setting.
5.
Press the Enter button. Switches to the settings screen.
6.
Use the
↑
or
↓
key to select
"
Yes"
or "No"
for the *AUTO setting.
7.
Press the Enter button.
8.
To exit this mode, press the MODE SELECT button to return to normal mode.
*AUTO setting
:
"WARN4" pulses if insufficient airflow is detected.
Summary of Contents for CMP-2500AT3-A
Page 3: ......
Page 7: ...1 CMN209 006 3 1 1 1 1 2 10 60 80 1 3 0 40 80 100 1 000...
Page 8: ...1 4 1 4 2 OFF NV63 SVF 3P 30A 1 5...
Page 10: ...2 6 2 2 1 4 HEPA V1 1 1 1 1 AWG14 2 08...
Page 11: ...2 CMN209 006 7 2 2 2 2 1 CMP 2500 AT3 A V1 AT3 BOX HEPA V1...
Page 14: ...2 10 2 4 3 OP kPa SP kPa DP kPa EP kPa Blower Motor rpm Runtime h 17 Total h...
Page 15: ...3 CMN209 006 11 3 3 1 3 1 1 0 40 80 RH...
Page 16: ...3 12 3 1 2 200 230V 1 BOX 2 3...
Page 17: ...3 CMN209 006 13 1 2 8 3 2 1 RS485 ID 2 AT3 ON 3 4 1 7 3 ON OFF 3 30 ON OFF Ver ID...
Page 23: ...5 CMN209 006 19 5 OFF 2...
Page 24: ...5 20 5 1 WARN2 1 5 1 1 1 1 2 2 3 4 5 2...
Page 25: ...5 CMN209 006 21 5 1 2 1 1 1 2 2 2 3 4 1 5 6 2...
Page 26: ...5 22 5 1 3 V1 1 4 2 3 4 5 2 1 1 1 1...
Page 29: ...5 CMN209 006 25 5 4 EL 1 2 3 4 1 4 30 1 1 5 1 20 5 1 20 5 1 20 5 1 20...
Page 31: ...6 CMN209 006 27 1 5V 0 2V B C ON HIGH LOW OFF LOW HI Z LOW DC 1 2...
Page 35: ...7 CMN209 006 31 7 3 7 3 1 CMP 2500AT3 A...
Page 36: ...32 12 7 2 7 2 30...
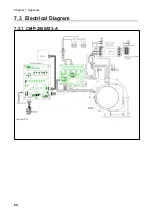
Page 68: ...Chapter 7 Appendix 64 7 3 Electrical Diagram 7 3 1 CMP 2500AT3 A Internal terminal...

