Page 10
For technical questions, please call 1-888-866-5797.
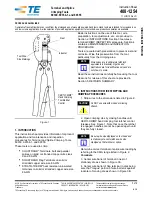
Item 64518
Sa
FE
ty
Op
Era
ti
O
n
Maint
Enanc
E
SE
tup
Operating instructions
read the EntirE iMpOrtant SaFEty inFOrMatiOn section at the beginning of this
manual including all text under subheadings therein before set up or use of this product.
inspect tool before use, looking for damaged, loose, and missing parts.
if any problems are found, do not use tool until repaired.
tool Set up
tO prEVEnt SEriOuS inJury FrOM acciDEntaL OpEratiOn:
turn off the tool, detach the air supply, safely discharge any residual air pressure in the tool, and
release the trigger before performing any inspection, maintenance, or cleaning procedures.
tO prEVEnt SEriOuS inJury:
Do not adjust or tamper with any control or component in a way not specifically explained within this
manual. improper adjustment can result in tool failure or other serious hazards.
Swivel air Fitting:
1. Attach the Swivel Air Fitting to the Air
Cylinder of the Riveter before use.
air cylinder
Swivel air
Fitting
pin cap:
1. Attach the Pin Cap to the Grip Housing
of the Riveter before use.
Grip Housing pin cap
priming:
1. Use the Wrench to remove the Outer
Cylinder from the Riveter.
Outer
cylinder
2. Use the included Wrench to remove the Air
Cylinder Cap from the bottom of the Riveter.
air cylinder cap
3. Use a pair of pliers (not included) to grasp the Nut
and pull the Piston Head from the Air Cylinder.
piston Head
air cylinder
nut
4. Hold the Air Cylinder upside down, and pour
hydraulic fluid (not included) into the Grip Housing
at the bottom of the Air Cylinder. The fill level
should only reach the top of the Grip Housing.
Hydraulic
Fluid
Grip Housing
air cylinder