


•
Once the layout is selected, assign a camera to each window. Right-Click on the desired location to highlight the
window orange. Right-Click again for the Menu and choose Select Camera. A list of cameras associated to the
CV4IP will display for selection. Once selected, the camera’s Live view will ap
pear.
Local Video Features
From the Local Video Menu, you can access enhanced features:
•
View or export DVR footage without requiring CheckVideo portal interface
•
View camera settings including resolution and frame rate
•
Configure PTZ camera settings for those discovered via ONVIF. PTZ controls are found under Settings
There are several display options available outside of the Menu:
•
To view a camera in full screen (single window) - Double Left-Click. To exit full screen
–
Double Left-Click.
•
Digital Zoom on an object
–
Left-Click and hold to drag the red box over the object. To exit: Left-Click.
•
For Tour Mode
–
Set Layout to 2x2 or 3x3, then select “Enable Tour Matrix” in the menu. To exit: Select “Disable
Tour Matrix” in the menu.
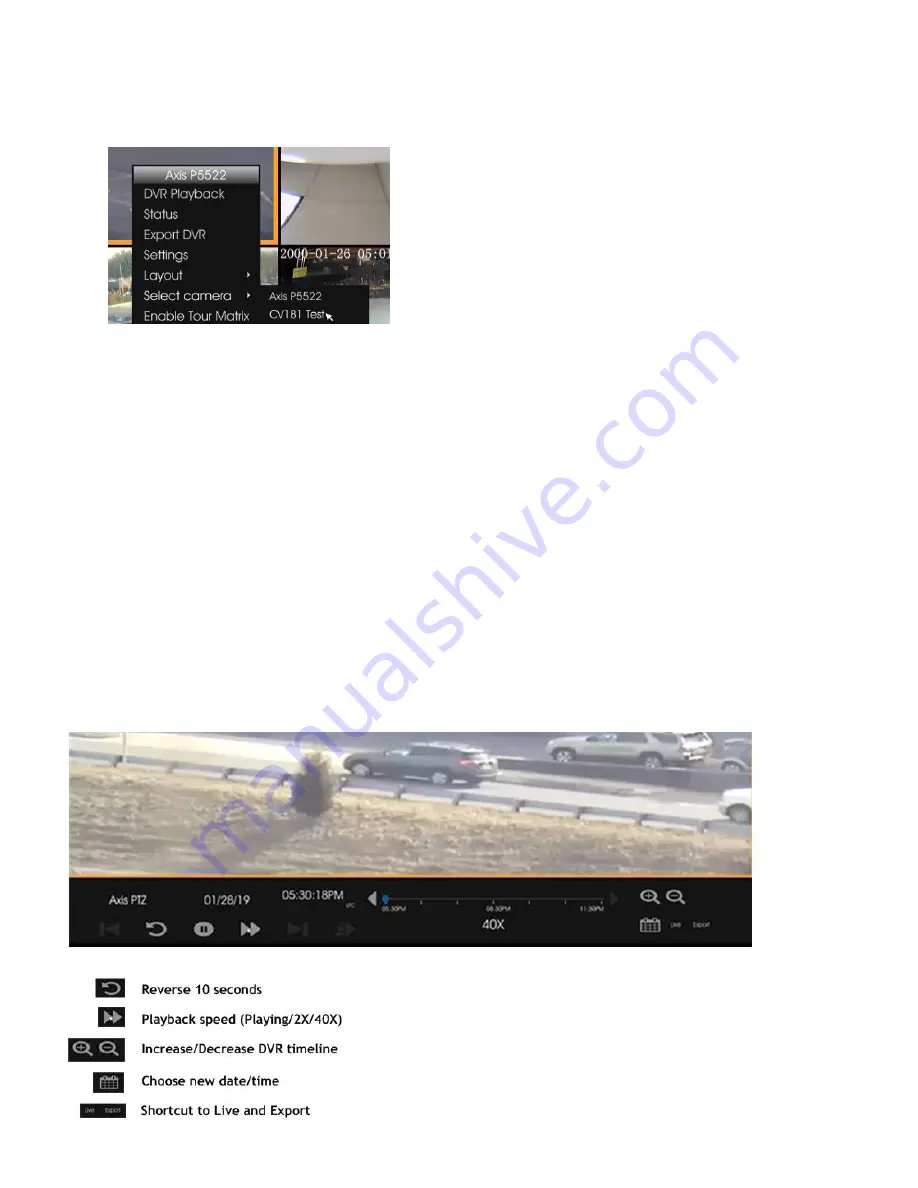
DVR Playback:
To begin, select DVR Playback from the Menu. Select your date and time. The DVR window will appear:


