USER MANUAL
12
4.11
Calibration
The instrument has been factory calibrated and a built-in self-test function performed before the
measurement. Therefore, it usually only needs to be tested before the measurement if the measured
value is 0 when measuring an uncoated metal. If this is not the case, a zero point calibration should be
performed.
4.11.1
Zero-point calibration
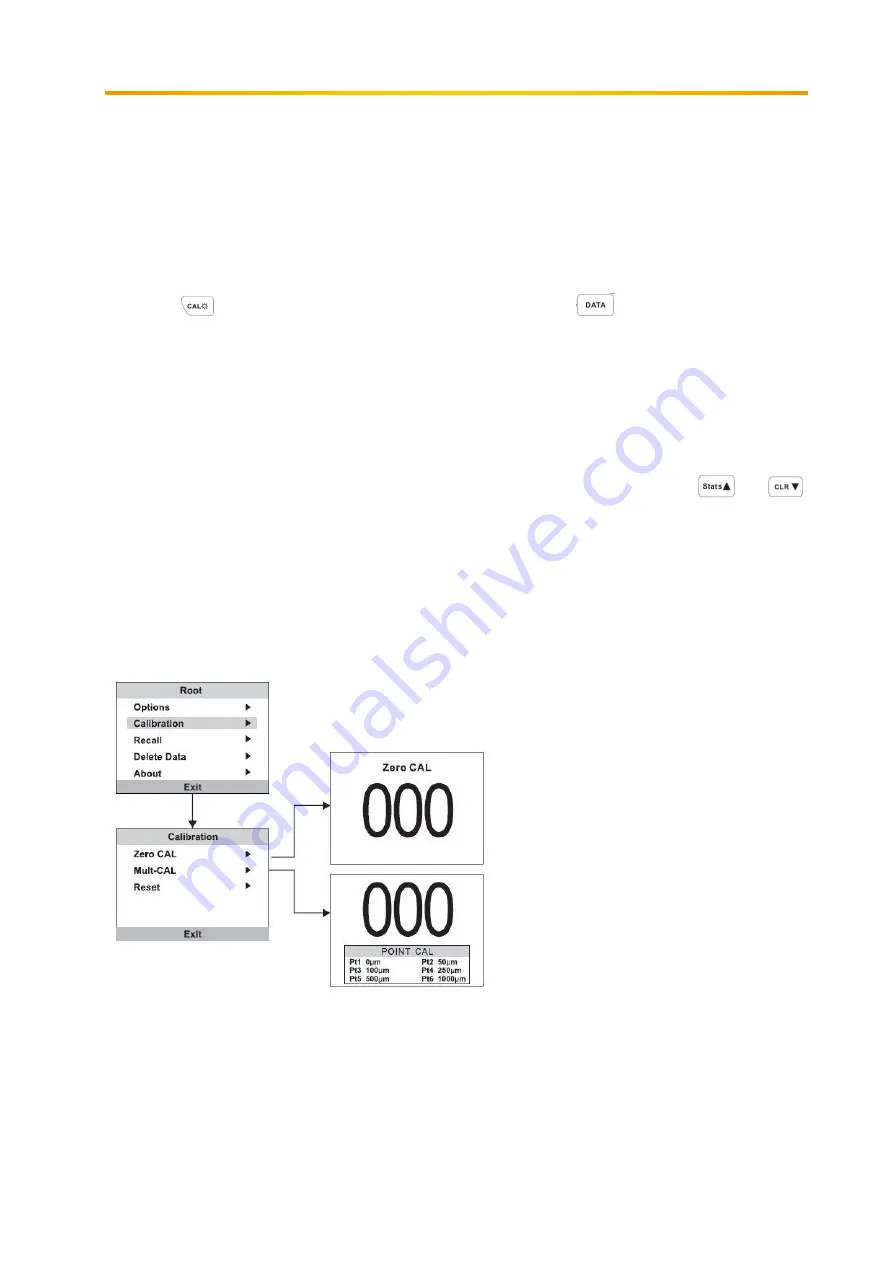
Press the
and select "Zero Point Calibration" by briefly pressing
and "000" will flash on the
screen. Then measure an uncoated substrate. When "0" is displayed on the screen, the zero calibration
is successful. After this process, the instrument can usually be reused for accurate coating thickness
measurements. Nevertheless, due to abnormal base materials or extreme environmental conditions,
additive errors may occur. If this is the case, you can use the standard plastic films to perform a multipoint
calibration.
4.11.2 M
ultipoint calibration
Use the instrument to place standard plastic films on a calibration block if the value found is outside the
accuracy limits of this manual. Lift the probe ("Pt1 ~ μm" flashes in the screen to "), press
or
for fast scrolling) to set the value of the actual thickness. Repeat this with other plastic films. The use of
two of these standard plastic films is better for calibration than just one. For example, you can use a thin
and, alternatively, a thick foil. If the coatings to be measured are relatively close to the thickness of the
other, it is sufficient to use only a film of similar thickness for the calibration.


