


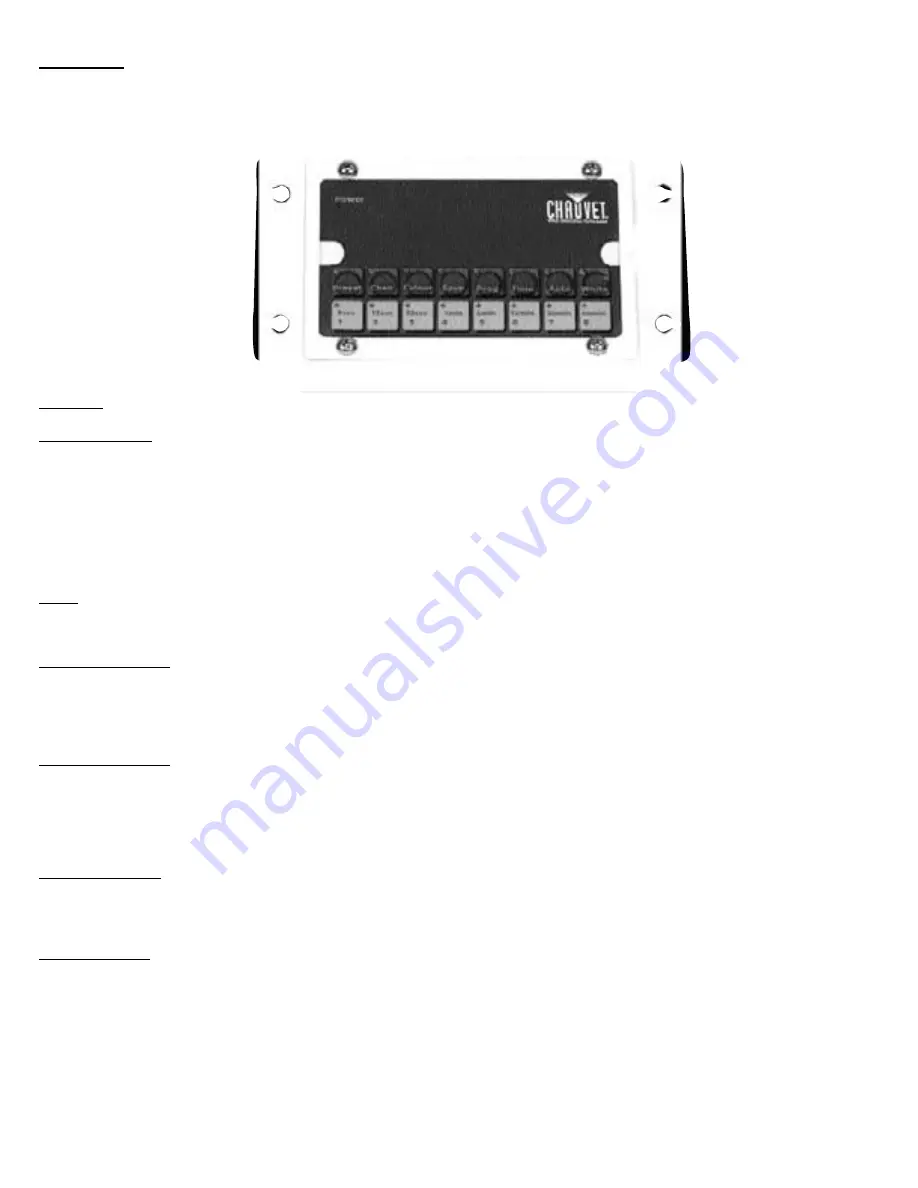
ART-16CON
The ART-16CON controller allows the user to control the ART-16CC downlighters via the driver unit. The ART-16CON is connected to the
ART-DRI via the 4 conductor RJ11 connector. The controller is powered via the driver unit. When connected and powered up, the panel
LEDs will flash.
Operation
Easy Color Setting:
The ART-16CON comes from the factory with the presets pre-programmed. The presets will set all channels to the same color. Preset 1
sets all downlighters to white. The presets are:
Preset 1
White
Preset 5
Blue
Preset 2
Red
Preset 6
Purple
Preset 3
Green
Preset 7
Orange
Preset 4
Magenta
Preset 8
Slow Scroll
White:
To set all ART-16CC to white, simply press the white button.
Manual Color Setting:
In order to set colors, first you must select the channels. Simply press the Channel button and then select the channel 1-4 that you wish to
change. The LED for the selected channels will illuminate. Next press the color button and select colors 1-7 or slow scroll. The LED for the
selected color will illuminate.
Programming Presets
The ART-16CON has 8 presets which can be programmed by the user. Programming the presets will override those set by the factory. To
program the preset, first set the channels and colors as desired. To save these settings, press the save button and then press preset. The
ART-16CON will then flash the LEDs corresponding to the presets which have not been programmed by the user. Press the number 1-8
where you wish to save the new preset.
Recalling the Preset
Simply press the preset button and then the number of the preset that you wish to run. The LEDs will flash indiciating the user programmed
presets. The other presets are those set by the factory.
Making a Program
A program consists of up to 8 steps of color changes. The ART-16CON can store 8 programs. To create a program, first press the save but-
ton and then the program button. The LEDs will flash indicating the program numbers that are empty. Press the button 1-8 where you wish
to save the program. The LED over 1 will light up indicating that you are on step 1 of the program.
The channels and color must now be set. This is done the same way as creating a preset by using the channel and color buttons. When
the desired effect has been created, press the save button to store the step. The LED above the number 2 will flash indicating that you are
ready to


