LIGHTING
On initial lighting, the stove may smoke and give off an odour as the
silicon paint with which the firebox is painted reacts to the heat. This
is normal and will cease after a short time, but meanwhile the room
should be kept well ventilated.
At first only light a small fire and burn it slowly for two hours to allow
any residual moisture in the chimney to evaporate.
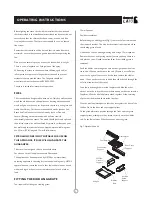
Light the stove using dry kindling wood and paper or fire lighters. Put
the paper, or fire lighters, and kindling in the firebox and cover with a
few small dry logs. Open the air controls – the primary air control in
the door and the airwash control - fully (see Fig. 2) Light the paper or
fire lighters. The door may be left cracked open for a few minutes to
assist the combustion and heat up the firebox more quickly. When
the kindling wood is well alight add a few more small logs, close the
doors but leave the air controls fully open. When the flames are
established around these logs, load the stove with the required fuel
load. Maintain the air controls at maximum at this stage. Once the
fire is up to temperature the airwash system will begin to work, so
allow the fire to become hot before adjusting the air controls to the
required setting. During the lighting period, do not leave the stove
unattended.
When relighting the stove, leave the ash on the base if burning wood,
unless it is becoming too deep, in which case some of it may be
removed. If burning high ash content fuel, clear the grate and empty
the ashpan before relighting.
CONTROLLING THE FIRE
REFUELLING
ASH CLEARANCE
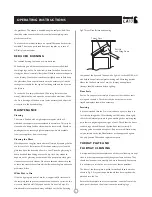
The rate of burning and hence the output is controlled by the front
air control slider and the airwash control (see Fig. 2).
The front air control slider should only be used when lighting or
when rapid burning is required. It should not be left fully open for
long periods as this can cause over-firing. For low burning it should be
closed.
The airwash control is used most of the time to control the burning
rate and to keep the glass clean. Fully extended gives full airwash for
faster burning and clean glass whereas fully closed gives low burning.
It will not be possible to keep the glass clean if this control is fully
closed, particularly immediately after refuelling.
When the stove is hot, these controls must only be operated using
the tool provided or a glove to avoid the danger of burned fingers.
Keep the firebox well filled but do not allow fuel to spill over the top
of the fuel retainer.
Logs should be evenly distributed, filling the firebed to give the most
pleasing flame pattern. The air controls must be fully opened after
refuelling until the flames are established above the fire. It is best to
refuel on to a hot bed of ash. If at this point the fire starts to die, the
doors must be cracked open until the fire is revived. If the fire has
started to die down before refuelling, then more kindling wood must
be added, the air controls opened fully and the door cracked open to
re-establish the firebed
before
adding larger logs (see suitable log
sizes in Fuel section).
Care should be taken, especially when burning wood, that fuel does
not project over the fuel retainer or damage to the glass may be
caused when the door is closed, it can also cause the glass to black
up. Maximum filling height is such that logs cannot fall from the fire
when the doors are opened. In smoke controlled areas do not fill the
stove above the level of the front firebars. Liquid fuels are not to be
used on this appliance.
The ashpan should be emptied regularly before it becomes too full.
Never allow the ash to accumulate in the ashpan so that it comes in
contact with the underside of the grate as this will seriously damage
For correct firing we
recommend the use of a stove pipe thermometer which may be
purchased from your supplier or from ourselves.
5
®
OPERATING INSTRUCTIONS
charnwood
Fig.2. Stove Controls
Primary Air Control
Airwash Control
Closed
Open
Slide right to Open
Slide left to Close
Rotate clockwise to lock
Rotate anti-clockwise to release
Door
Handle
Pull to
Open
Summary of Contents for LA10
Page 1: ...Operating Installation Instructions charnwood ...
Page 2: ......
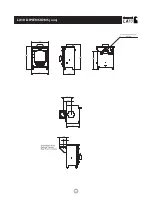
Page 12: ... LA10 DIMENSIONS mm 12 charnwood ...
Page 15: ......


