background image

11  

ENGLISH


100274

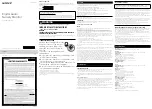
OPERATION

Support anchors are highly recommended if 
a load can not be placed on stable ground . 
Make sure the support anchors can withstand 
the full weight of the load being anchored .

WARNING

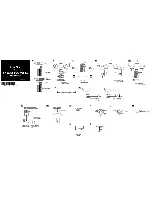
Winching Techniques

1 .  Take time to assess your winch area, and 

make sure it is free of any debris and other 
possible hazards and distractions . 

2 .  Take time to assess your situation and plan 

your winch .

3 .  Put on safety goggles to protect your eyes, 

gloves to protect your hands, tie back any 
long hair and remove jewelry .

4 .  Inspect winch, power cords and wire cable for 

excessive wear or damage .

5 .  Double check your anchors and make sure all 

connections are secure . 

6 .  Attach the battery cables to a battery and 

properly ground the connection .

7 .  Test the winch without a load connected . 

Make sure the wire cable extends and retracts 
properly without any problems .

8 .  Connect desired load using only properly 

rated winching slings, chains or shackles .

9 .  Once a load has been properly connected, 

drape a blanket or jacket over the wire cable 
approximately 5 to 6 ft . (1 .5 to 1 .8 m) from 
the hook . In the event of a broken cable it will 
dampen the snap back .

10 . Make sure hook clasp is closed fully .
11 . Clear the area . Make sure all operators and 

bystanders stand clear and that no one is 
directly above, underneath, or to the direct 
side of the load or wire cable .

12 . Begin winching . Be sure that the wire cable is 

winding evenly and tightly around the drum . 
Avoid shock loads; keep the wire cable under 
tension .

13 . The winch is meant for intermittent use . 

Winch for a short time and then let the motor 
rest if needed before restarting .

14 . If the winch must be stopped, with a load 

connected to it, support anchors should be 
placed until the winch is going again .

15 . The winching operation is complete once the 

load is on stable ground and/or has anchors 
for support placed under it .

16 . Disconnect the wire cable from the anchor, 

but still maintain tension .

17 . Rewind the wire cable . Make sure that any 

wire already on the drum has spooled tightly 
and neatly . If not, draw out the wire and  
re-spool from the point where the cable is 
tight .

18 . Keep your hands clear of the winch drum, 

wire cable, and hook as the cable is being 
drawn in .

19 . Secure the hook and hook strap .
20 . Clean and inspect connections and mounting 

hardware for next winching operation .

Winching Techniques Cont’d.

Users and bystanders must keep a minimum 
distance of 12 in . (30 .5 cm) at all times from 
the winch and load . If the wire cable breaks 
serious injury or death could occur if the 
broken cable “whips” around . More distance 
is advised as the cable length increases .

DANGER

Maintain at least 4 wraps (coils) of cable on 
the drum during operation . Operating with 
fewer than 4 warps of cable on the drum can 
cause the cable to pull off the drum .

WARNING

Summary of Contents for 100274

Page 1: ...y 5000 lb 2268 kg Rated Rolling Capacity 6000 lb 2722 kg Utility Winch SAVE THESE INSTRUCTIONS Important safety instructions are included in this manual MADE IN CHINA REV 100274 20160526 12039 Smith Ave Santa Fe Springs CA 90670 USA 1 877 338 0999 www championpowerequipment com 100274 MODEL NUMBER ...

Page 2: ... assistance Do not return this product to the store WE ARE HERE TO HELP Visit our website www championpowerequipment com for more info Product Info Updates Frequently Asked Questions Tech Bulletins Product Registration or Call our Customer Care Team Toll Free at 1 877 338 0999 Parts Ordering Mon Fri 8 30 AM 5 00 PM PST PDT Toll Free 1 877 338 0999 ...

Page 3: ...6 Contents of the Box 6 Utility Winch Location 6 Mounting the Winch Permanently 6 Adapter Plate 7 Battery Connections 7 Temporarily Wiring the Winch 8 Remote Control 8 Operation 9 Inspection 9 Connecting a Load 9 General Tips for Safe Operation 10 Manual Operation 10 Winching Techniques 11 Maintenance 12 Cleaning 12 Lubrication 12 Cable Assembly Replacement 12 Storage 12 Troubleshooting 13 Specifi...

Page 4: ... of the information in this manual and we reserve the right to change alter and or improve the product and this document at any time without prior notice Since CPE CET highly value how our products are designed manufactured operated and are serviced and also highly value your safety and the safety of others we would like you to take the time to review this product manual and other product material...

Page 5: ... which if not avoided may result in minor or moderate injury CAUTION CAUTION used without the safety alert symbol indicates a potentially hazardous situation which if not avoided may result in property damage CAUTION DANGER indicates an imminently hazardous situation which if not avoided will result in death or serious injury DANGER WARNING indicates a potentially hazardous situation which if not ...

Page 6: ...secure an item s for transport WARNING Do not use for overhead lifting WARNING Winch is NOT waterproof and is NOT for use underwater DO NOT mount in a location that could have the winch submerged in water WARNING Disconnect the winch from power source when not in use WARNING Never leave an item s attached to the wire cable hook or loaded when not in use WARNING Use gloves to protect hands when han...

Page 7: ...hes of cable are left before the stop bracket Keep hands clear of the winch cable and slight load which winch is under power WARNING Duration of winching pulls should be kept as short as possible If the motor becomes uncomfortably hot to the touch stop winching immediately and let it cool down for a few minutes Do not pull for more than one minute at or near the rated load CAUTION If the motor sta...

Page 8: ...ry Handle Can be used to carry the winch when not mounted or in use 2 Crank Handle Used to manually retract or extend wire cable 3 Clutch Used to engage or disengage wire cable 4 Adapter Plate Used to temporarily mount winch 5 Wire Cable 6 Hook Used to secure wire cable to load 7 Remote Control Used to electronically retract or extend wire cable 8 Battery Cables Used to connect the winch to 12V au...

Page 9: ... them by the loads and winch 6 Make sure all bolts and nuts are tightened Always double check anchor before drilling to ensure there are no hidden compartments or panels that may be damaged or cause structural damage by drilling CAUTION If a mounting channel not included is used make sure it is rated to take any load weight or force the winch and loads may impose on it NOTE The length of bolts nee...

Page 10: ...per ground Any metal that is coated or painted is not a proper ground DANGER Before wiring the winch to any battery powered source please heed these safety warnings Do not use adapter plate and or winch to tow any vehicle boat or other object WARNING Before attaching winch to the adapter plate make sure all bolts and nuts on the plate are tightened and secure WARNING Adapter Plate The adapter plat...

Page 11: ...rs the socket that houses the male ends 3 Plug in the female ends of the battery cable into the socket A 4 Route the battery cables from the winch location to the battery location securing them along an anchor or frame 5 Use the Red positive battery clamp and attach the clamp to the Red positive terminal of the battery 6 Use the Black negative battery clamp from the wire and attach the clamp to a ...

Page 12: ... to the hook using only rated equipment such as slings chains or winching shackles Connection to the hook must be completely secure to prevent any accidental disconnection Make sure the connection device is properly seated in the base of the hook and that the safety clasp closes fully Always check the wire cable for any wear fraying or damage Only wire cable in good condition should be used If the...

Page 13: ...h operation Store the winch indoors and in a place that it will not be damaged Any winch that appears to be damaged in any way is found to be worn or operates abnormally MUST BE REMOVED FROM SERVICE UNTIL REPAIRED It is recommended that the necessary repairs be made by a manufacturer s authorized repair facility Only attachments and or adapters supplied by the manufacturer are to be used Manual Op...

Page 14: ...erneath or to the direct side of the load or wire cable 12 Begin winching Be sure that the wire cable is winding evenly and tightly around the drum Avoid shock loads keep the wire cable under tension 13 The winch is meant for intermittent use Winch for a short time and then let the motor rest if needed before restarting 14 If the winch must be stopped with a load connected to it support anchors sh...

Page 15: ...ty and that only manufacturer supplied parts be used Storage It is recommended the utility winch is stored indoors in a clean dry place free from sunlight and moisture 1 Make sure the winch is properly cleaned before storage 2 Make sure the wire rope is drawn onto the spool as much as it can be without damage 3 Make sure to tie up all cords 4 Store in a place that moisture can not damage the winch...

Page 16: ...nnected to a live 12V automotive battery or equivalent and to the winch Pinched battery cable Check all battery cable connections and make sure nothing is resting on top of or pinching the battery cables Defective remote control Replace remote control Motor runs slowly or without normal power Insufficient current or voltage The voltage supply is weak Check to make sure voltage supply is 12V Motor ...

Page 17: ...ax lb 0 500 1000 1500 2000 kg 0 227 454 680 907 Line speed DC12V FPM 4 5 3 6 2 9 2 3 1 7 MPM 1 4 1 1 0 9 0 7 0 5 Max current A 3 6 11 17 21 Running Time minutes 1 1 1 1 1 Cooling Time minutes 5 5 5 5 5 Line Pull and Cable Capacity Per Layer Line of Cable 1 2 3 4 5 Max pulling capacity per layer lb 2000 1520 1226 1027 884 kg 907 689 556 466 401 Cable capacity per layer ft 4 7 10 8 18 4 27 5 30 m 1 ...

Page 18: ...15 ENGLISH 100274 Specifications Parts Diagram ...

Page 19: ...0 035 Small Gear Assembly II 3 36 12090 036 Screw M5 x 16 3 37 12090 037 Washer ø13 x 23 x 2 3 38 12090 038 Screw M5 x 10 2 39 12090 039 Circuit Breaker 25A 1 40 12090 040 Shaft 1 41 12090 041 Nut M8 1 42 12090 042 Frame Assembly 1 Part Number Description Qty 43 12090 043 Small Gear Assembly III 3 44 12090 044 Motor 1 45 12090 045 Motor Clamp 1 46 12090 046 Screw M5 x 25 1 47 12090 047 Nut M5 3 48...

Page 20: ...arranty will not apply to parts and or labor if the product is deemed to have been misused neglected involved in an accident abused loaded beyond the product s limits modified installed improperly or connected incorrectly to any electrical component Normal maintenance is not covered by this warranty and is not required to be performed at a facility or by a person authorized by CPE Other Exclusions...

Reviews: