background image

SKU 65342 

For technical questions, please call 1-800-444-3353. 

Page 7

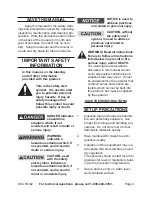
Maintain labels and nameplates on 

6. 

the equipment.  These carry impor-

tant information.  If unreadable or 

missing, contact Harbor Freight Tools 

for a replacement.
Have the equipment serviced by a 

7. 

qualified repair person using only 

identical replacement parts.  This will 

ensure that the safety of the equip-

ment is maintained.  Do not attempt 

any service or maintenance proce-

dures not explained in this manual 

or any procedures that you are un-

certain about your ability to perform 

safely or correctly.
Store equipment out of the reach of 

8. 

children.
Follow scheduled engine and equip-

9. 

ment maintenance.
Refueling Precautions:

10. 

Do not smoke, or allow sparks, 

a. 

flames, or other sources of ignition 

around the equipment, especially 

when refuelling.

Do not refill the fuel tank while the 

b. 

engine is running or hot.

Do not fill fuel tank to the top.  Leave 

c. 

a little room for the fuel to expand as 

needed.
Refuel in a well-ventilated area only.

d. 

 SavE THESE 

INSTRucTIONS.

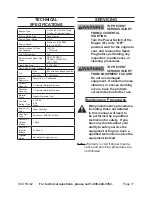
BaSIc SPEcIFIcaTIONS

Fuel

Type

89+ octane unleaded 

gasoline

Capacity

1.72 Gallons

Engine Oil

Type

10W-30

Capacity

1.16 Quarts

Note:

  Additional specifications found in 

the TECHNICAL ENGINE SPECIFI-

CATIONS chart in this manual.
The emission control system for this 

engine is warranted for standards set by 

the U.S. Environmental Protection Agency.  

For warranty information, refer to the last 

pages of this manual.

At high altitudes, the engine’s carbu-

retor, governor, and any other parts that 

control the fuel-air ratio will need to be 

adjusted by a qualified mechanic to allow 

efficient high-altitude use and to prevent 

damage to the engine and any other de-

vices used with this product.

uNPacKINg

When unpacking, check to make sure 

that the item is intact and undamaged.  If 

any parts are missing or broken, please 

call Harbor Freight Tools at the number 

shown on the cover of this manual as soon 

as possible.

Summary of Contents for 65342

Page 1: ...p www harborfreight com Read this material before using this product Failure to do so can result in serious injury Save this manual Copyright 2008 by Harbor Freight Tools All rights reserved No portio...

Page 2: ...EDDER 26 PARTS LIST aSSY dIAGRAM CYLINDER HEAD SYSTEM 27 PARTS LIST ASSY DIAGRAM CYLINDER BARREL 27 PARTS LIST ASSY DIAGRAM CRANKCASE COVER 28 PARTS LIST ASSY DIAGRAM CRANKSHAFT 28 PARTS LIST ASSY DIA...

Page 3: ...which if not avoided could result in minor or moderate injury NOTICE is used to address practices not related to personal injury CAUTION without the safety alert symbol is used to address practices n...

Page 4: ...eep children away from the Shred 5 der especially while it is operating Do not feed metal stone glass or 6 any other non botanical objects into the Shredder Do not attempt to shred or chip ma 7 terial...

Page 5: ...pacemakers should 23 consult their physician s before use Electromagnetic fields in close proximity to a heart pacemaker could cause pacemaker interference or pacemaker failure Caution is neces sary...

Page 6: ...condition that may affect the equipment s operation If damaged have the equipment serviced before using Many ac cidents are caused by poorly main tained equipment Use the correct equipment for the 39...

Page 7: ...ing or hot Do not fill fuel tank to the top Leave c a little room for the fuel to expand as needed Refuel in a well ventilated area only d Save these instructions Basic Specifications Fuel Type 89 oct...

Page 8: ...lled Operation of this equipment may create sparks that can start fires around dry vegetation The operator should contact local fire agencies for laws or regulations relating to fire prevention requir...

Page 9: ...the Front Axle 43 3 See Figures E and F Attach a Wheel 39 to the Back Axle 37 using one Flat Washer 40 and one 4 Cotter Pin 41 Make sure to spread the Cotter Pin once it is inserted through the end of...

Page 10: ...the Cotter Pin once it is inserted through the end of the Front Axle Then repeat this step for the other end of the Front Axle See Figures I and J Place four Cushion Washers 86 between Shredder Hopper...

Page 11: ...r mounting holes of the Chipper Hopper 6 onto the four Carriage Bolts Then secure the Chipper Hopper to the machine using four Big Washers 8 and four Lock Nuts 9 See Figures M and N Attach the Plastic...

Page 12: ...permanently damage the Engine Remove the Dipstick and wipe it off 1 with a clean rag Clean area around Dipstick See Figures S and T Reinsert the Dipstick do not thread 2 in completely and remove it t...

Page 13: ...e Fuel Tank Cap 6 See Figure U FIGURE U FUEL TANK CAP FUEL TANK FILTER FUEL GAUGE Start Procedure Before starting the engine Follow the Set Up Instruc a tions to prepare the equip ment Inspect the equ...

Page 14: ...ilize Break in Period Breaking in the Engine will help to 1 ensure proper equipment and Engine operation and will extend the En gine s lifespan The warranty is void if the Engine is not broken in prop...

Page 15: ...dry flat level surface capable of supporting the weight of the machine materials being processed the operator s and any additional tools and equipment Make sure the machine is empty of 10 material pr...

Page 16: ...nives and Wear Plate Extremely hard knots will not process 5 very well Short stubs that have not self fed into the Chipper Hopper 6 can be pushed through with the next branch to be chipped Do not thro...

Page 17: ...Cartridge Drive Belt Type Goodyear SPB 1500 V Belt Number of Chipper Blades 1 Piece Number of Impeller Blades 24 Pieces Highway Rated Not Rated for Highway Use Servicing To prevent serious injury from...

Page 18: ...ing the instructions under the Start ing the Engine section FIGURE Z DRAIN PLUG Air Filter Element Maintenance Wipe off the Air Cleaner Cover 1 See Figures AA and BB The Air Cleaner Cover is held in...

Page 19: ...e Engine 61 Gasket style Finger tighten until the gasket contacts the cylinder head then about 1 2 2 3 turn more Non gasket style Finger tighten until the plug contacts the head then about 1 16 turn m...

Page 20: ...replace Air Filter Element a Inspect clean Spark Plug b Every 50 Operation Hours Change engine oil a Every 100 Operation Hours Replace Spark Plug a Replace Air Filter Element b Note All maintenance p...

Page 21: ...rates unusually check sys tems immediately The maintenance needs of this machine will differ depending on factors such as working environment frequency of use and other factors Note These procedures a...

Page 22: ...plug and set choke to start position Ignition spark Related Spark plug wire not connected 1 securely Spark plug electrode wet or dirty 2 Incorrect spark plug gap 3 Spark plug wire or spark plug 4 brok...

Page 23: ...d gasoline Test replace fuel tank cap 3 Properly adjust idle speed 4 Have qualified technician diagnose 5 and service engine Engine knocks Old or low quality gasoline 1 Engine overloaded 2 Incorrect s...

Page 24: ...elt and tighten When chipping branch seems to vibrate and moved about exces sively Knife is dull Gap between 1 Knife and Wear Plate is too great Have a qualified service 1 technician remove Knife and...

Page 25: ...xle Bushing 2 43 Front Axle 1 ITEM DESCRIPTION QTY 44 Tow Handle 1 45 Front Axle Bracket 1 46 Hex Nut M16 1 47 Lock Nut M16 1 48 Bottom Plate 1 49 Hex Bolt M8X60 4 50 Engine Bottom Assembly 1 51 Hex B...

Page 26: ...SKU 65342 For technical questions please call 1 800 444 3353 Page 26 ASSEMBLY DIAGRAM SHREDDER...

Page 27: ...1 1 2 3 4 5 6 6 6 6 13 9 8 8 7 11 12 12 10 10 PARTS LIST ASSY DIAGRAM CYLINDER BARREL Part Description Qty Part Description Qty 1 Flange Bolt 6 x 14 3 8 Lock Pin 10mm 1 2 Oil Level Switch Assy 1 9 Go...

Page 28: ...Governor Holder Clip 1 3 Crankcase Cover 1 11 Governor Weight Holder 1 4 Oil Filter Seal Ring 1 12 Plain Washer 6mm 1 5 Oil Filter Cap 1 13 Slider Governor 1 6 Crankcase Cover 1 14 Governor Packing 1...

Page 29: ...necting Cover 1 5 Piston Pin Clip 20mm 2 10 Connecting Rod Bolt 2 PARTS LIST ASSY DIAGRAM CAMSHAFT Part Description Qty Part Description Qty 1 Pivot Adjusting Nut 2 9 Valve Rotator 1 2 Rocker Arm Pivo...

Page 30: ...Pulley 1 2 Center Screw 1 8 Start Return Spring 1 3 Spring Retainer 1 9 Recoil Starter Case 1 4 Friction Spring 1 10 Recoil Starter Rope 1 5 Starter Ratchet 2 11 Starter Grip 1 6 Ratchet Spring 2 12...

Page 31: ...on Qty 1 Carburetor Packing A 1 4 Carburetor Assy 1 2 Carburetor Insulating Plate 1 5 Carburetor Spacer 1 3 Carburetor Packing B 1 PARTS LIST ASSY DIAGRAM FLYWHEEL Part Description Qty Part Descriptio...

Page 32: ...oise Suppressor Cap 1 6 Cord Grommet 1 2 Ignition Coil 1 7 Charge Coil 1 3 Stop Switch Cord 1 8 Flange Bolt 6 x 40 2 4 Stop Switch Cord Holder A 1 9 Cord Clamp 1 5 Flange Bolt 6 x 25 2 10 Flange Bolt...

Page 33: ...Governor Rod 1 3 Control Adjusting Spring 1 9 Flange Nut 6mm 1 4 Pan Screw 5 x 34 1 10 Governor Arm Bolt 1 5 Flange Bolt 6 x 14 1 11 Governor Arm 1 6 Governor Spring A 1 PARTS LIST ASSY DIAGRAM MUFFL...

Page 34: ...Grommet 1 9 Air Cleaner Collar B 1 4 Air Cleaner Element 1 10 Air Cleaner Elbow 1 5 Outer Filter 1 11 Air Cleaner Collar A 1 6 Silencer Nose 1 12 Flange Nut 8mm 2 PARTS LIST ASSY DIAGRAM FUEL TANK SY...

Page 35: ...ntrol System Warranty California and United States Emission Control Defects Warranty Statement The United States Environmental Protection Agency herein EPA and Harbor Freight Tools herein HFT are plea...

Page 36: ...cheduled for replace ment as required maintenance or are scheduled only for regular inspection to the effect of repair or replace as necessary are warranted for the warranty period Any warranted part...

Reviews: