background image

4

A

A

t

t

t

t

a

a

c

c

h

h

i

i

n

n

g

g

t

t

h

h

e

e

H

H

a

a

n

n

d

d

C

C

o

o

n

n

t

t

r

r

o

o

l

l

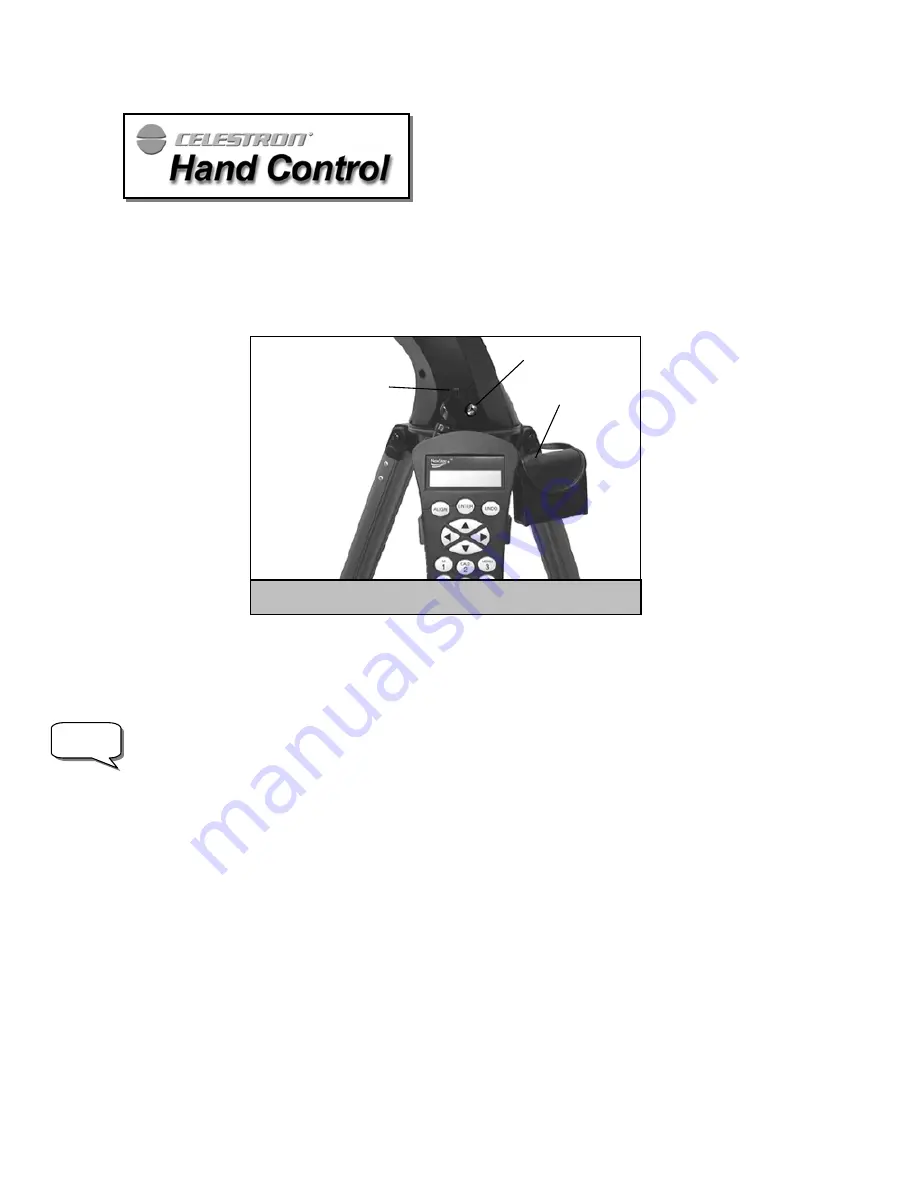
The NexStar GT hand control has a phone jack type connector at the end of its cord. Plug the phone jack connector into the
outlet at the base of the telescope’s fork arm. Push the connector into the outlet until it clicks into place and place the hand
control into its holder as described previously in the Assembly section of the manual.

P

P

o

o

w

w

e

e

r

r

i

i

n

n

g

g

t

t

h

h

e

e

N

N

e

e

x

x

S

S

t

t

a

a

r

r

The NexStar GT can be powered by the supplied battery pack or an optional 12v AC adapter. The power pack requires 8
user supplied AA size alkaline batteries. To power the NexStar, insert the batteries into the battery pack and plug the round
post into the 12v outlet located on the side of the fork arm

.

Once the battery pack is plugged in, the NexStar will power on

and the hand control will display the message

NexStar Ready

NexStar Ready

NexStar Ready

NexStar Ready

.

In case of a loss of power, the optical tube can be moved by hand. However, when powered on, the telescope should always
be controlled via the hand control. The NexStar will lose its star alignment if moved by hand when powered on.

T

T

h

h

e

e

H

H

a

a

n

n

d

d

C

C

o

o

n

n

t

t

r

r

o

o

l

l

The NexStar GT's hand controller is designed to give you instant access to all the functions the NexStar has to offer. With
automatic slewing to over 4,000 objects, and common sense menu descriptions, even a beginner can master its variety of
features in just a few observing sessions. Below is a brief description of the individual components of the NexStar GT hand
controller

:

1.

Liquid Crystal Display (LCD) Window:

Has a dual-line, 16 character display screen that is backlit for comfortable

viewing of telescope information and scrolling text.

2.

Align:

Instructs the NexStar to use a selected star or object as an alignment position.

3.

Direction Keys:

Allows complete control of the NexStar in any direction. Use the direction keys to center objects in

the StarPointer finderscope and eyepiece.

4.

Catalog Keys:

The NexStar has a separate key on the hand control to allow direct access to each of the catalogs in its

4,000+ object database. The NexStar contains the following catalogs in its database:

Note

Figure 3-1 – The NexStar GT Outlets

Hand Control

Outlet

Battery Pack
Outlet

Battery Pack

Summary of Contents for NexStar GT

Page 1: ...s to your NexStar hand control Please refer to these pages for specific information regarding telescope alignment and hand control functions Also included is a Quick Setup guide designed to help you q...

Page 2: ...the display reads NexStar Ready press ENTER to AutoAlign the NexStar The hand control display will ask you to move the telescope tube so that it is level with the ground and facing the north horizon...

Page 3: ...to use the arrow buttons to aim the Star Pointer at the star If the star is not visible perhaps behind a tree press UNDO to select a new star Next focus and center the star in the eyepiece and press...

Page 4: ...d always be controlled via the hand control The NexStar will lose its star alignment if moved by hand when powered on T Th he e H Ha an nd d C Co on nt tr ro ol l The NexStar GT s hand controller is d...

Page 5: ...st popular deep sky objects Double Stars Alphabetical listing of the most visually stunning double triple and quadruple stars in the sky Variable Stars Select list of the brightest variable stars with...

Page 6: ...tached and lens cover removed as described in the Assembly section of the manual 1 Once the NexStar is powered on the display will read NexStar Ready Press ENTER to begin alignment The first time that...

Page 7: ...red dot in the center of the Star Pointer If for some reason the chosen star is not visible perhaps behind a tree or building you can press UNDO to select and slew to a different star Once centered in...

Page 8: ...urately locate small or faint deep sky objects or to track objects accurately for photography Note Once a Quick Align has been done you can use the Re alignment feature see below to improve your teles...

Page 9: ...speed at which information scrolls across the hand control display can be changed while the information is being viewed Press the 1 key repeatedly to speed up the scroll speed Press the 4 key repeated...

Page 10: ...ponds to the desired speed The hand control has a double button feature that allows you to instantly speed up the motors without having to choose a speed rate To use this feature simply press the arro...

Page 11: ...o be above the horizon when you are observing You can customize the object database by selecting altitude limits that are appropriate for your location and situation For example if you are observing f...

Page 12: ...bove U Ut ti il li it ty y F Fe ea at tu ur re es s Scrolling through the MENU options will also provide access to several advanced utility functions such as anti backlash compensation and slew limits...

Page 13: ...nged To reverse the button logic of the hand control press the MENU button and select Direction Buttons from the Utilities menu Use the Up Down arrow keys 10 to select either the Azimuth buttons left...

Page 14: ...nter Time Choose City Choose State United States Choose City Choose Country International CITY DATABASE Enter Time Enter Date Enter Long Lat CUSTOM SITE PO INT TUBE NO RTH LEVEL AUTO ALIGN CENTER STAR...

Page 15: ...15 APPENDIX C MAPS OF TIME ZONES...

Page 16: ...16...

Reviews: