


EN
OPERATOR'S MANUAL
29
5.2.2. SELECTING AN EXAMINATION
5.2.2. SELECTING AN EXAMINATION
For 2D machine only
Once the configuration is completed, the application can
be started by using the relevant icon in the application list.
From now on, every choice made on the console is sent
directly to NewTom GO and displayed on the control
panel.
The application is divided into two main screens:
home,
2D examination selection and 3D examination
selection
(for 3D machine only) that can be accessed by
pressing the relevant button on the button bar placed at
the bottom of the screen.
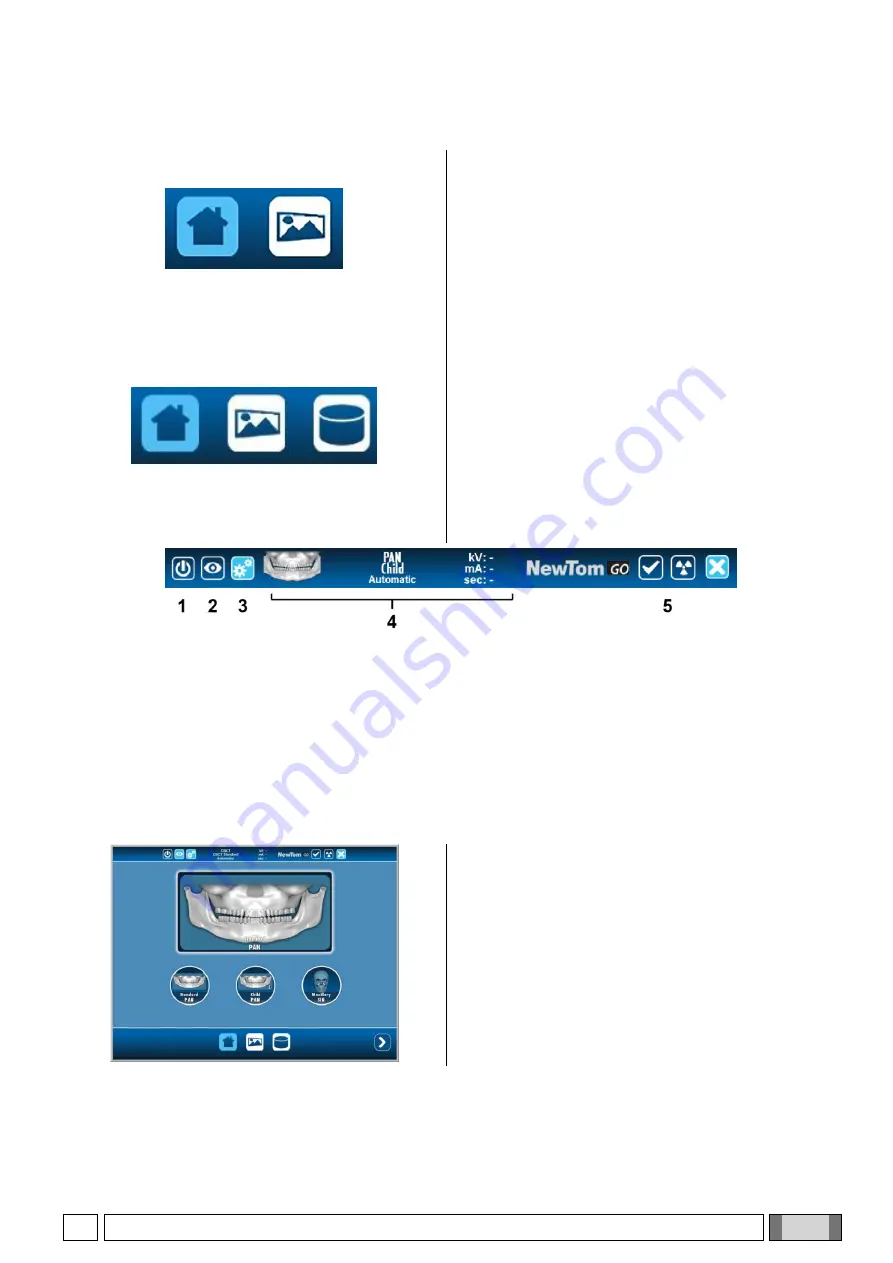
The images on the left show the button bars in case of 2D
version (top) and 3D version (bottom) of the machine.
By way of example, the images used in the following
pages will show the button bar of the 3D version. Unless
otherwise specified, the console functions in case of 2D
version of the machine are completely equivalent
.
For 3D machine only
Every screen features an upper tool bar; it is structured as shown in the figure on the left.
1-
Connection
button.
Press this button
to connect
/
disconnect the device
.
During
the connection procedure,
this button
flashes,
and it
turns off when
the device is in
"
Demo" mode
or there is no connection
.
2-
Button
to display
the
last
image downloaded
on your iPad
(
always saved,
even after the
tablet
has been turned
off
,
until
the
next
scan
).
3-
Button
to access the
application settings
.
4-
Type of exam
selected
; the
parameters
(
kV,
mA
and SEC
)
are displayed
only when the machine
is in
“
Ready”
status for displaying.
5- S
tatus icons
of NewTom GO.
The main screen (Home) lists the last 3 examinations.
This helps in the quick selection of the scanning protocol.
Summary of Contents for NewTom GO
Page 1: ...97050801 Rev 09 2018 07 NewTom GO EN...
Page 75: ...EN OPERATOR S MANUAL 75 Figure 1 Figure 2...
Page 76: ......


