Product Inspection and Test
1
Product Warranty
1
Warnings
1
Receiving Pump
1
Storage
1
Mechanical Design Specifications
2
Installation
3-5
Application and Reapplication
3
Pump Foundation
3
Baseplate Mounting and Alignment
3
Suction and Discharge Piping
4
Pump and Driver Alignment
4
Allowable Piping Loads
5
Pump Cooling Requirements
6
Seal Chamber Cooling
6
Mechanical Seal Gland Cooling
6
Bearing Housing Cooling
6
Casing-Pedestal Cooling
6
Cooling Water Piping
6
Cooling Water Flow Rates
6
Piping Connections
7
Pump Lubrication
7
Starting the Pump
8
Filling
8
Operating
8
Pump Start Up Check List
8-9
Spare Parts
9
Ordering Spare Parts
9
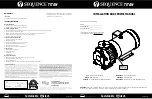
Pump Section Views
10
Pump Parts List
10
Disassembly and Assembly Procedures
11-14
Warning
11
Disassembly Procedure
12
Reassembly Procedure
12-14
Installation and Maintenance of Shaft Compression Packing
14-15
Purpose of Lantern Ring
14
Internal Seal Connection to the Lantern Ring
14
External Seal connection to the Lantern Ring
14
Lantern Ring Not Used
14
Packing Installation
15
Usual Causes of Packing Failure and
Excessive Stuffing Box Leakage
15
Installation of Standard Mechanical Shaft Seals
15-17
Single Inside Seals
15
Single Outside Unbalanced Seals
16
Double Inside Unbalanced Seals
16
INDEX