5
POWER UP CONSOLE
Your console can pairing up with the wireless 5-IN-1 outdoor weather sensor and up to 7
optional wireless sensors . (Not included)
INSTALL THE BACKUP BATTERY
1 . Remove the battery door of the console .
2 . Insert a new CR2032 battery as per the polarity information marked on the battery
compartment .
3 . Replace the battery door .
NOTE:
The backup battery can backup: Time & Date, Max/Min & Past 24 hours weather records, Alert
setting values, offset value of weather data and Sensor(s) channel history.
The built-in memory can backup: Router setting and Weather server setting
POWER UP THE CONSOLE
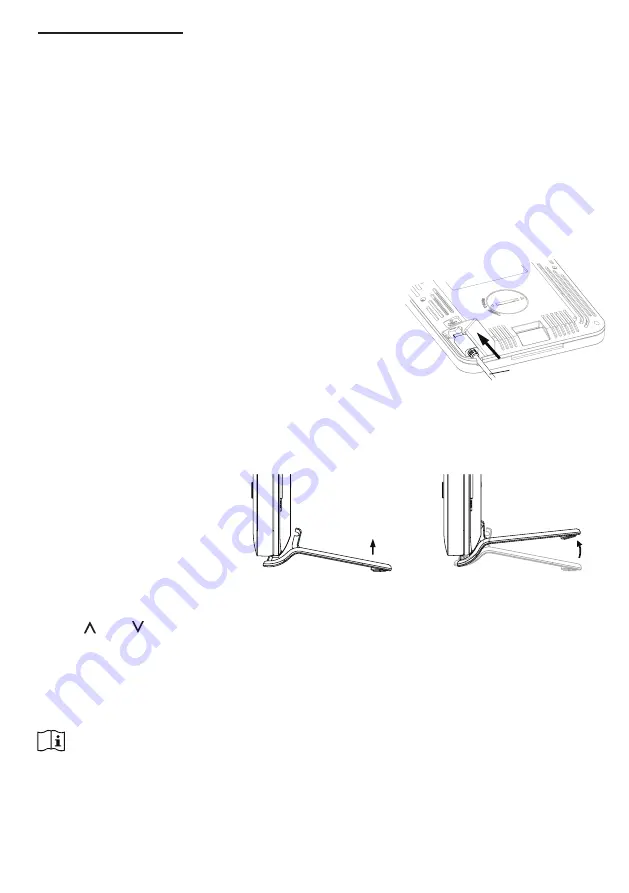
1 . Plug the power adapter USB plug to power up
the main unit .
2 . Once the main unit power up, all the segments
of the LCD will be shown .
3 . The console will automatically start AP mode .
USB cable
NOTE:
If no display appears on the LCD after you plug the adaptor, press
[ RESET ]
key by using a
pointed object .
TABLE STAND INSTALLATION
The unit is designed for
desktop or wall mount for easy
viewing . follow the steps to
hook the table stand on the
botton of the console .
Step 1
Step 2
SET LCD DISPLAY VIEWING ANGLE
Press
[ ]
or
[ ]
key in normal mode to adjust LCD viewing angle to fit table stand or wall
mount situation .
BUILT-IN MEMORY
The console has built-in FLASH memory that holds the vital settings . These include:
-
Time Zone, DST status, Time SYNC status, WI-FI and Weather server setting, Latitude / Longitude,
Hemisphere setting, Calibration values, and Sensor ID of paired sensor(s)
RESET AND FACTORY HARD RESET
To reset the console and start again, press the
[ RESET ]
key once or remove the backup battery and then
unplug the adapter . To resume factory settings and remove all data, press and hold the
[ RESET ]
key for 6
seconds .


