background image

and the Editor Window is closed. The two new records are listed underneath one an-
other in the List Window.

Note:

The menu item 

'Exit Editor'

 has the effect of saving the current record to your

computer's memory, but not to disk. To save your data to disk, choose 'File': 'Save'
or 'Save As...'.

Copying Records via the Clipboard

In our example, we are going to duplicate the first record via the Clipboard. This is a
convenient way of saving input time whenever two records are almost identical, e.g. two
different contacts at the same company. In the List Window, select the first record by
single-clicking on it with the mouse, so that it is displayed in reverse video. Next, choose
'Edit': 

'Copy'

. This has the effect of placing the record onto the Clipboard. Next, choose

'Edit': 

'Paste'

 to insert the content of the Clipboard into the Telephone Directory. To edit

the copy with the Editor, either select it with the mouse in the List Window and choose
'Edit': 

'Edit Telephone Item...'

 or double-click on it with the mouse (i.e. click the left

mouse button twice in quick succession). When you have edited this record, save it in
the usual way via 

'Exit Editor'

.

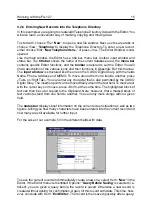
Copying and Moving Records with the Mouse (Drag & Drop)

Apart from the above Clipboard options, there is also a drag-and-drop function similar to
the one in the Windows File Manager. It enables you to pick up marked records in the
List Window with the mouse and move or copy them to other database areas or even
other file windows. In our example we shall copy two of the previously entered records
into the Memo area. To start with, select the two records in the List Window: Hold down
either <Shift> or <Control> while at the same time clicking on the relevant records. 

<Shift>

marks all the records between the first record that has been selected and the current
one, whereas 

<Control>

 marks only the current record in addition to the one selected

earlier. When you have made your selection, choose one of the selected records with
the mouse, hold down the mouse button and move the mouse to one of the area tabs or
to the file window into which you want to move/copy the records. For the sake of our
example, move the mouse onto the [Memo] tab.
If you wanted to 

move

 the records (so that they are deleted from their previous loca-

tions), you would now simply let go of the mouse button. However, as you want to 

copy

them, press 

<Control>

 and keep it down until you have released the mouse button.

Finally go to the Memo area via the area tabs or 'View': 'Memo', and you will find copies
of the two Telephone Directory records.

The drag-and-drop function allows you to move/copy the following types of records:

• From one file to another but within the same database area (e.g. from one file win-

dow to another),

• From all database areas, except Free Files, into the Memo area,
• Business cards into the Telephone Directory.

Working with the FA-127

16

Summary of Contents for FA-127

Page 1: ...FA 127 User s Guide E Version 1 5 ...

Page 2: ... any human or computer language in any form or by any means without the express written permission of CASIO COMPUTER CO LTD Copyright 1996 2002 Yellow Computing Computersysteme GmbH GermanyAll Rights Reserved Please note that the program and this manual are under copyright No part of this program or manual may be reproduced changed translated into other languages or stored in a retrieval system in...

Page 3: ...User s Guide Personal Computer Link for Windows FA 127 from Version 1 5 ...

Page 4: ...Diary to a PC 12 3 2 3 Saving Data 14 3 2 4 Loading Data 14 3 2 5 Entering New Records into the Telephone Directory 15 3 2 6 Entering New Appointment Items 17 3 2 7 Finding Records 17 3 2 8 Deleting Certain Records 18 3 2 9 Transmitting Data from a PC to a CASIO Digital Diary 18 3 2 10 Working with Secret Data 19 3 2 11 Data Import and Export 20 3 2 12 Calling up the Spreadsheet Transmission Progr...

Page 5: ...larity of the index bar area tabs all Appointment areas have been sum marized in a further index which is only shown when needed Here is a simple example of how you can use the FA 127 in the day to day running of your office during the day you may be out collecting information on your CASIO Digital Diary new customers addresses for example Meanwhile your secretary plans your appointments on the PC...

Page 6: ... do not want to confuse you with the functions of other CASIO models the FA 127 only offers you the functions that are available on your own Digital Diary As a result the screen display on your PC may sometimes vary from the relevant illus tration in this manual So when a particular screenshot does not match your own display please remember that this is not due to a mistake on our part but to a de...

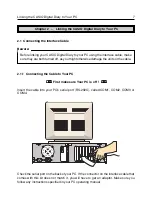
Page 7: ...s or the cable 2 1 1 Connecting the Cable to Your PC First make sure Your PC is off Insert the cable into your PC s serial port RS 232C called COM1 COM2 COM3 or COM4 Check the serial port on the back of your PC If the connector on the interface cable that comes with this kit does not match it you will have to get an adaptor Make sure you follow any instructions specified in your PC operating manua...

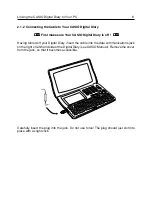
Page 8: ... insert the cable into the data communications jack on the right or left hand side of the Digital Diary see CASIO Manual Remove the cover from the jack so that it becomes accessible Carefully insert the plug into the jack Do not use force The plug should just slot into place with a slight click Linking the CASIO Digital Diary to Your PC 8 ...

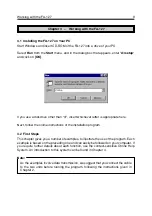
Page 9: ...e installation program 3 2 First Steps This chapter gives you a number of examples to illustrate the use of the program Each example is based on the preceding one and can easily be followed on your computer If you require further details about each function use the context sensitive Online Help System An introduction to this system can be found in Chapter 4 Note As the examples involve data transm...

Page 10: ...epeated on the toolbar in the form of icons These are the most frequent functions and the purpose of the toolbar is to give you more convenient access to them Appendix B of this manual contains a complete list of all toolbar icons and their functions The display window shows the data currently in the memory of your PC It is divided into two sections the List Window and the View Window The Appointm...

Page 11: ...he status bar also shows information depending on the selected CASIO model The tool bar area tabs and status bar can be shown or hidden via the Options menu If say you want to display as many records as possible you may find it useful to hide some of the bars The Calendar The structure of the FA 127 Calendar is similar to that of the CASIO Digital Diary When you change over to the Appointments or ...

Page 12: ... that the two units cannot communicate unless you have set the relevant Digital Diary model and coordinated its transmission setup with that of the CASIO Digital Diary Not all models have a transmission setup Setting the CASIO Digital Diary Model This setting tells the program which model you are using so that it adjusts itself exactly to the specific qualities of your diary The details include fo...

Page 13: ...in the normal way the values are automatically saved and will be available for all future occasions Data Transmission Preparations for transmission are now concluded From the Casio menu choose Receive From Casio As we want to transmit all the available database areas click on the All button in the right hand section of the dialog box Under Scope select All Items and under Mode Append Before starti...

Page 14: ... you have specified a file name and path choose OK to start saving to disk If the file name already exists a query is presented asking you whether you wish to overwrite the existing file Note If the mode you save to a file has more than 16 000 entries you may not be able to open the file 3 2 4 Loading Data In this section we want to comment briefly on the reading of files that have been saved to d...

Page 15: ...ab or Shift Tab You can enter any character that is also permitted by the CASIO Digital Diary The insertion point can be moved freely around the text field To mark a text with the cursor keys or mouse press Shift at the same time The highlighted block of text can then be cut or copied to the Clipboard Note however that a marked block of text cannot extend from one field to another You can only mar...

Page 16: ...o pick up marked records in the List Window with the mouse and move or copy them to other database areas or even other file windows In our example we shall copy two of the previously entered records into the Memo area To start with select the two records in the List Window Hold down either Shift or Control while at the same time clicking on the relevant records Shift marks all the records between ...

Page 17: ...ference is that next to the text fields there are also fields which are specially designed for dates and times If you want certain fields especially Schedule Reminder 1 or 2 to remain empty e g to distinguish between monthly and daily Reminder items deactivate the relevant field If say you deactivate the month field in the Reminders Editor then the item will be pre sented every day Furthermore you...

Page 18: ...get doubles To delete the superfluous records choose Options Erase Area A dialog box is presented prompting you to select the database areas in which you want to weed out the doubles For the sake of our example click on Telephone To erase doubles only specify Doubles Only under Scope Choose OK The program now erases all records that are totally identical so that each record is only available once ...

Page 19: ... terisk for each character that is entered As this is your first time in this area your input is understood by the program as the definition of a password As soon as you choose OK a further dialog box is therefore opened asking you to confirm your password Do make sure that you enter your password without typing errors and that you remember it well Once entered the password is saved permanently wh...

Page 20: ...side shows a list of all the fields available in the telephone directory and the right hand side shows a list of all the fields to be exported You can now customize the right hand list according to your requirements using the buttons Add Add All and Re move Remove All To create an empty field select Dummy For our example you should export the fields Name E mail Address Dummy and Phone in the given...

Page 21: ... to be found using Path to Spreadsheet A dialog box is presented where you can enter the complete path and file name of the transmission program through the keyboard or a file selector box Enter the name then using the keyboard e g c llink llink exe or choose Browse to select the program via a file selector box as usual If the spreadsheet transmission program is saved under the path name entered p...

Page 22: ... Help Contents gives you the Topic Overview Simply select the required topic Press F1 to obtain context sensitive Help i e Help which relates to a specific situation and your current screen structure NB In the Editor and in the main win dow F1 gives you the Topic Overview unless a dialog box is open If you are in the main window and no dialog box is open you may wish to use Direct Help on certain ...

Page 23: ...y clicking on the icon to the left of the title at the top A submenu is presented To get to any of the topics listed there simply click on the relevant item 4 2 How to Find Certain Help Topics If you want to find a specific Help topic you needn t go through the entire Help System by hand Simply choose Help Contents and then Search on the toolbar in the Help window This calls up a search dialog whe...

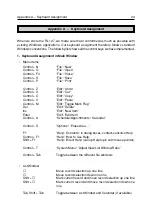
Page 24: ...M Edit Toggle Mark Flag Del Edit Delete Ins Edit New Item Enter Edit Edit Item Control A Schedule Appointments Calendar Control D Options Erase Area F1 Help Contents in dialog boxes context sensitive Help Control F1 Help How to Use Help Shift F1 Help Direct Help call up Help topic with mouse pointer Control T System Menu Adjust View List Window Ratio Control Tab Toggle between the different file w...

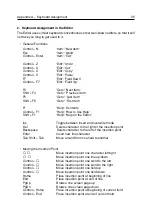
Page 25: ...aracter to the right of the insertion point Backspace Delete character to the left of the insertion point Enter Insert new line character Tab Shift Tab Move around from one field to another Moving the Insertion Point Move insertion point one character left right Move insertion point one line up down Control Move insertion point one word to the left Control Move insertion point one word to the righ...

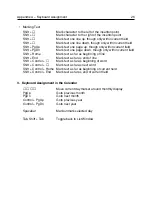
Page 26: ...ark text as far as beginning of line Shift End Mark text as far as end of line Shift Control Mark text as far as beginning of word Shift Control Mark text as far as next word Shift Control Home Mark text as far as beginning of current field Shift Control End Mark text as far as end of current field 3 Keyboard Assignment in the Calendar Move current day marker around monthly display PgUp Goto previ...

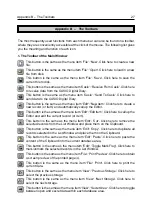
Page 27: ... Edit Edit Item Click here to call up the Editor and edit the current record or item This button is the same as the menu item Edit Cut Click here to remove the selected records from the List Window and place them on the Clipboard This button is the same as the menu item Edit Copy Click here to duplicate all records selected in the List Window and place them on the Clipboard This button is the same...

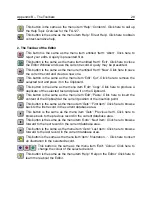
Page 28: ...ce it on the Clipboard This button is the same as the menu item Edit Paste Click here to insert the content of the Clipboard at the current position of the insertion point This button is the same as the menu item Goto First Item Click here to browse back to the first record in the current database area This button is the same as the menu item Goto Previous Item Click here to browse back to the pre...

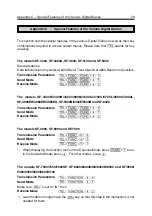
Page 29: ...0 4600B 4600C 4700C 4700L 4900C 4900L SF 4900ER 4980ER 4985ER SF 5300B 5300E 5500B and SF 6300 Transmission Parameters Send Mode Receive Mode The models SF 4990 SF 6990 and SF 7990 Transmission Parameters Send Mode Receive Mode When displaying the function menu in the Expense Mode press here In the Calendar Mode press For other modes press The models SF 7000 7500 7600SP SF 8000 8300 8350 8350R 850...

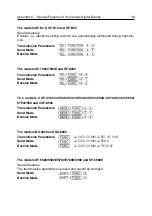
Page 30: ... models CSF 4450 4450A 4650 4650A 4950 4950A 4970A 5350 5550 5750 7950 and CSF 8950 Transmission Parameters Send Mode Receive Mode The models NX 4000 and NX 6000 Transmission Parameters DATA COMM SET UP PAR Send Mode DATA COMM SEND Receive Mode DATA COMM RECEIVE The models SF 5580 5580E 5780 5780E 5980 and SF 5980E Special features The transmission parameters are fixed and cannot be changed Send M...

Page 31: ...he right to make technical changes to the hard and software We can give no guarantee that our products will work perfectly on computers and con figurations other than the ones used by ourselves In particular this applies to emulators of all kinds Names and data used in the examples are purely fictitious Product names in this book which are registered trademarks are not marked as such The fact that...

Reviews: