background image

Playing on the Keyboard

EN-22

Your Digital Keyboard includes reverb, chorus, and delay 
effects, which you can use to enhance the sound of tones.

Reverb (REVERB)

Reverb simulates ambient spaces, such as a room or hall.

Chorus (CHORUS)

Chorus adds a rich, shimmering quality to a sound. This digital 
keyboard applies a preset chorus setting that is suitable for 
each tone.

Delay (DELAY)

Delay stores a sound and repeats it periodically with a slight 
delay before each repeat, which creates an echo effect. Delay 
is different from reverb, which creates a reverberation effect. 
This digital keyboard applies a preset delay setting that is 
suitable for each tone.

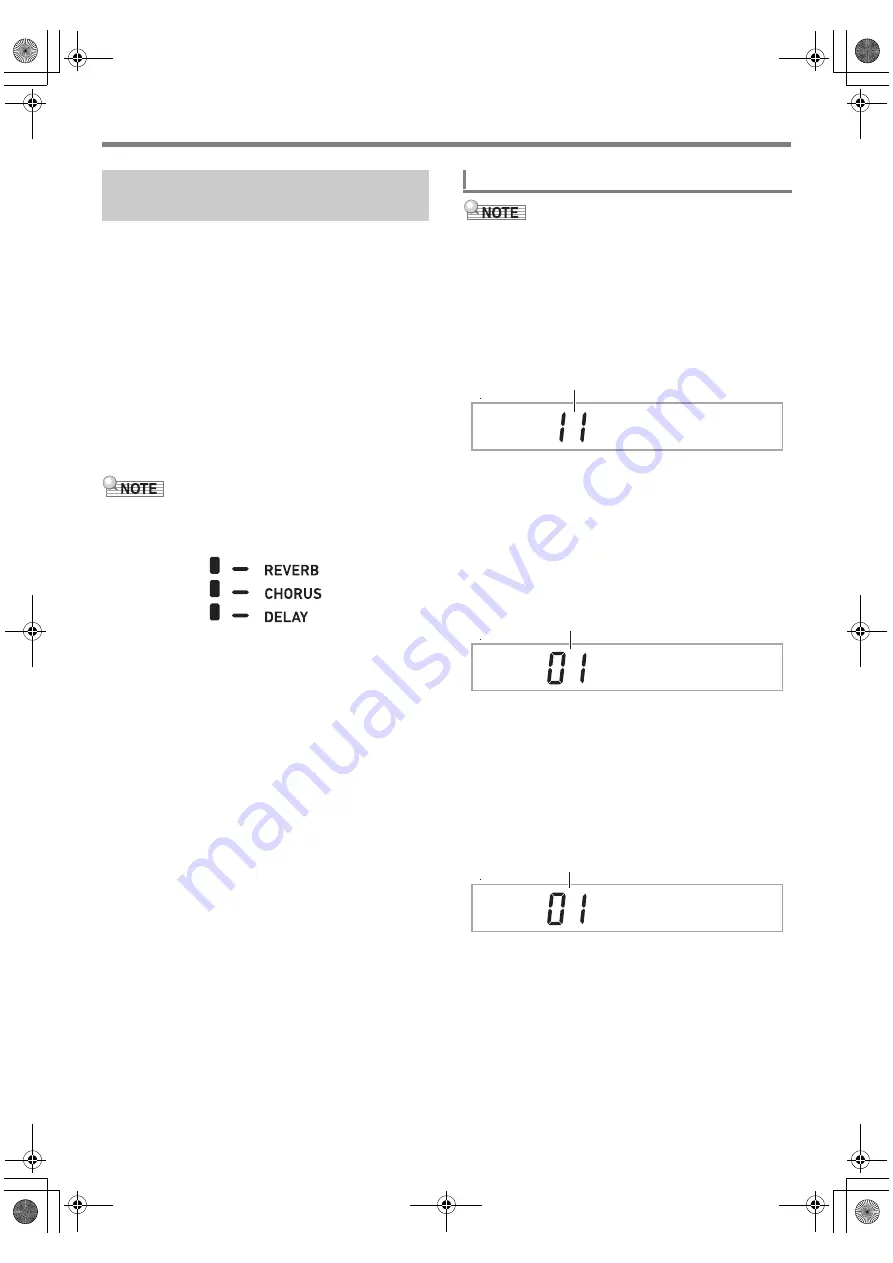
• You can determine the current enabled/disabled status of 

each effect by checking the indicator marks on the right 
side of the display.

• Preset chorus effect and delay effects are applied to each 

tone even when there is no indicator mark next to 
[CHORUS] and [DELAY].

• You can adjust how tone effects are applied to each part. 

For details, see “Using the Mixer” (page EN-62). The 
setting items that are used for adjustment correspond to the 
following: Reverb Send, Chorus Send, Delay Send (see 
“Advanced Mixer Settings” on page EN-64).

• The procedure below explains how to select the reverb 

(steps 2 and 3), chorus (4 and 5), and delay (6 and 7) 
settings. You can skip any of the steps for any effect whose 
settings you don’t need to change.

1.

Press 

bk

FUNCTION

.

2.

Use the [1] (

V

) and [3] (

W

bm

 number keys 

to display “Reverb”.

3.

Use 

bn

 [–] and [+] or the 

bl

 dial to change the 

setting value.

• For information about the reverb types that correspond 

to each setting value, see the “Reverb Effect List” 
(page EN-23).

4.

Use the [1] (

V

) and [3] (

W

bm

 number keys 

to display “Chorus”.

5.

Use 

bn

 [–] and [+] or the 

bl

 dial to change the 

setting value.

• For information about the chorus types that 

correspond to each setting value, see the “Chorus 
Effect List” (page EN-24).

6.

Use the [1] (

V

) and [3] (

W

bm

 number keys 

to display “Delay”.

7.

Use 

bn

 [–] and [+] or the 

bl

 dial to change the 

setting value.

• For information about the delay types that correspond 

to each setting value, see the “Delay Effect List” 
(EN-24).

8.

When the setting is the way you want, long-
press the [4] (EXIT) 

bm

 number key to exit the 

setting screen.

Selecting an Effect for a Tone 
(Reverb, Chorus, Delay)

To select a digital effect

R e v e r b

Current setting value

C h o r u s

Current setting value

D e l a

y

Current setting value

CT-X9000_8000IN_EN.book  22 ページ  2018年4月12日 木曜日 午後1時8分

Summary of Contents for CT-X8000IN

Page 1: ...arate Safety Precautions Please keep all information for future reference About Music Score data You can use a computer to download music score data from the CASIO Website For more information visit t...

Page 2: ...hort circuit the battery terminals Manufacturer CASIO COMPUTER CO LTD 6 2 Hon machi 1 chome Shibuya ku Tokyo 151 8543 Japan Responsible within the European Union Casio Europe GmbH Casio Platz 1 22848...

Page 3: ...6 Playing a Built in Song or a Song on a USB Flash Drive Song Bank Mode EN 38 Selecting a Built in Song for Playback EN 38 Looping Playback of Specific Song Measures A B Repeat EN 39 Playing Back with...

Page 4: ...USB Flash Drive EN 114 Connecting a USB Flash Drive to and Detaching It from the Digital Keyboard EN 114 Formatting a USB Flash Drive EN 115 USB Flash Drive Operations EN 116 Using a Computer to Copy...

Page 5: ...here include the mark This indicates that you need to long press the button to perform its operation General Guide CT X9000IN CT X8000IN 1 2 3 bl 4 5 67 bo bp bq br bs bt ck bk 9 8 bm bn cq cr cm cp d...

Page 6: ...STOP PLAY STOP button cl SYNCHRO STOP button cm ACCOMP MUSIC PRESET button cn FREEZE button co BANK button cp STORE button cq PHRASE PAD buttons cr STOP button cs REGISTRATION buttons ct METRONOME BE...

Page 7: ...OUTPUT jack fl MIC IN jack CT X9000IN only fm MIC VOLUME knob CT X9000IN only fn AUDIO IN jack fo PEDAL1 jack fp PEDAL2 EXPRESSION jack fq CT X9000IN DC 24V terminal CT X8000IN DC 12V terminal In this...

Page 8: ...her Indicators There are two ways to reset the Digital Keyboard to its default settings a setting reset that initializes settings only without deleting data and a factory reset that initializes settin...

Page 9: ...rminal Doing so creates the risk of accident Do not try to use the power cord that comes with the product with another device Use the AC adaptor so its label surface is pointed downwards The AC adapto...

Page 10: ...P power firmly and completely to turn on power Turning off the Digital Keyboard causes most current settings to be cleared While Auto Resume function page EN 10 is turned on most settings are retained...

Page 11: ...to its setup state when power was last turned off Perform the procedure under To configure function settings with the bk FUNCTION button page EN 107 and turn on Auto Resume Other Other 3 Auto Resume...

Page 12: ...Speaker on off Enabled page EN 112 Perform the procedure under To configure function settings with the bk FUNCTION button page EN 107 and enable the following setting Speakers Speaker 3 Enabled when...

Page 13: ...T L MONO jack output is left channel sound It is up to you to purchase connecting cables like the ones shown in the illustration for connection of audio equipment Normally in this configuration you mu...

Page 14: ...page EN 107 and configure the following setting Other Other 3 Audio In Center Cancel AIn CCan page EN 112 Digital Keyboard built in effects reverb chorus delay DSP are not applied to AUDIO IN jack in...

Page 15: ...creases it by one Holding down either button will sequentially increase or decrease the displayed number or value until you release the button Pressing both buttons at the same time will return the nu...

Page 16: ...category the first category tone under initial default settings will be selected first when you re enter it You can also use bn back and forward in place of 4 CATEGORY to scroll between categories Pre...

Page 17: ...7 or other special setting operation The meanings of the text that appears along with a displayed or flashing FUNCTION indicator are described below Only while a setting item that is a function settin...

Page 18: ...isplay and start play of the three demo songs During demo play you can use bn and to jump to the beginning of the previous or next song Demo song play will repeat until you perform the operation in st...

Page 19: ...t to DSP TONE while a DSP tone is selected You can use the eo TONE Category buttons to quickly and easily navigate between categories Tone categories are divided between two groups Group A L and Group...

Page 20: ...tiple parts tone effects will be removed and tone quality may change 1 After confirming that the part indicator in the upper left corner of the display looks like select a tone This will be the UPPER...

Page 21: ...he LOWER part keyboard and accompaniment keyboard overlap For details see the Advanced Split Settings page EN 49 1 After confirming that the keyboard part indicator in the upper left corner of the dis...

Page 22: ...icator is not displayed To disable the lower layer only long press dq UPPER LAYER LOWER LAYER until the L2 indicator disappears LOWER LAYER indicator mark also disappears There will be an indicator ma...

Page 23: ...ing Reverb Send Chorus Send Delay Send see Advanced Mixer Settings on page EN 64 The procedure below explains how to select the reverb steps 2 and 3 chorus 4 and 5 and delay 6 and 7 settings You can s...

Page 24: ...Stadium3 25 Plate 1 Plate 1 26 Plate 2 Plate 2 27 Plate 3 Plate 3 28 Delay Delay 29 Pan Delay PanDelay 30 Long Delay 1 L Delay1 31 Long Delay 2 L Delay2 32 Church Church 33 Cathedral Cathedrl Setting...

Page 25: ...lay4 Setting Value Setting Type Display 1 Tone Tone 2 Chorus 1 Chorus 1 3 Chorus 2 Chorus 2 4 Chorus 3 Chorus 3 5 Chorus 4 Chorus 4 6 FB Chorus FBChorus 7 Deep Chorus Deep C 8 Flanger 1 Flanger1 9 Fla...

Page 26: ...tting Value Setting Type Display 1 Tone Tone 2 Short 1 Short 1 3 Short 2 Short 2 4 Echo Echo 5 Tempo Sync Short TSync S 6 Tempo Sync Middle TSync M 7 Tempo Sync Long TSync L 8 Ambience Ambience 9 Mid...

Page 27: ...screen User Equalizer Setting List 1 Setting values 1 through 13 A in the table below correspond to cutoff frequencies 50 Hz to 800 Hz B in the table below 2 Setting values 1 through 20 A in the tabl...

Page 28: ...Perform the procedure under To configure function settings with the bk FUNCTION button page EN 107 and configure the following setting Metronome Metronom 3 Metronome Volume Volume page EN 112 With the...

Page 29: ...iator type is displayed long pressing do AUTO HARMONIZE ARPEGGIATOR will select the tone that is recommended for the displayed type For details about arpeggiator types refer to the separate Appendix 4...

Page 30: ...use it To do this perform the procedure under To connect a pedal to the fp PEDAL2 EXPRESSION jack page EN 30 1 Connect a pedal to the fo PEDAL1 jack 2 Press bk FUNCTION 3 Use the 1 V and 3 W bm number...

Page 31: ...Exp Expression to be selected for Pd2Efect If you connect an expression pedal to the fp PEDAL2 EXPRESSION jack use the procedure below to calibrate the pedal before using it 1 Use the 1 V and 3 W bm...

Page 32: ...essed even if the keyboard key is subsequently released Organ and other tones that are sustained as long as keyboard key are depressed continue to sound as long as the pedal is depressed 2 Sostenuto S...

Page 33: ...rd You also can configure pitch bend wheel operation by specifying the amount of pitch change at maximum rotation in either direction Perform the procedure under To configure function settings with th...

Page 34: ...ied to parts that are turned on and not applied to parts that are turned off 5 When the setting is the way you want long press the 4 EXIT bm number key to exit the setting screen For details about key...

Page 35: ...lays Trans You can change the pitch of the keyboard within the range of 12 to 00 to 12 While Trans is displayed you can use the bm number keys bn and or the bl dial to change the setting value Pressin...

Page 36: ...POSE w or q button Pressing w shifts the specified keyboard parts one octave down while q shifts one octave up Use the Quick Octave Shift keyboard part selection procedure below to select the parts th...

Page 37: ...ize page EN 51 sound depends on the UPPER 1 part setting You can select from among 17 different scales including those that a suitable for classical music of specific eras Arabian music etc Scale List...

Page 38: ...whose pitch you want to fine tune 2 Use bn and or the bl dial to fine tune the pitch of the currently displayed note You can change pitch within a range of 99 to 99 cents 3 Repeat steps 1 and 2 as ma...

Page 39: ...to match the currently selected song Selecting some songs will initially cause Lod to be displayed for TEMPO see the illustration under step 3 This indicates that data is being loaded 3 Press ck PLAY...

Page 40: ...ss bq A B This will make the beginning of the measure that is playing when you press bq A B the beginning of the loop and cause the indicator mark next to A B to start to flash 4 When playback reaches...

Page 41: ...rive can also be played back by the Digital Keyboard such files do not have part channel information Use the procedure below to specify whether the right hand part or left hand part should be muted wh...

Page 42: ...o MIDI files on the USB flash drive The files are sorted on their file names and the first MIDI file is assigned song number 41 You can use your Digital Keyboard to play back audio files WAV format 44...

Page 43: ...e accompaniment rhythm you want and the matching accompaniment bass guitar and other instruments will sound automatically when you play a chord with your left hand It s like having your own personal b...

Page 44: ...cluded in the category To exit category rhythm selection press 6 RHYTHM This causes to stop flashing 3 Use the bm number keys bn and or the bl dial to select the number of the rhythm you want to sound...

Page 45: ...sic genre you want to perform without inputting chords For details see Using Music Presets page EN 52 Auto Accompaniment Parts and the ACCOMP Indicator The Digital Keyboard s Auto Accompaniment sounds...

Page 46: ...ultiple times at as steady a beat as possible This will set a tempo that is as close as possible to the timing of the beat you tap It helps to use this method to specify the approximate tempo in combi...

Page 47: ...n the first beat after one measure or two measures and then return to the original variation accompaniment pattern To play a fill in While Variation 1 is sounding press bp VARIATION FILL IN 1 If a dif...

Page 48: ...n the accompaniment keyboard This starts Auto Accompaniment To exit synchro start standby press bt ENDING SYNCHRO START 1 Press cl SYNCHRO STOP This enters synchro stop standby 2 While Auto Accompanim...

Page 49: ...de will play the major chord whose name is marked above the key All of the accompaniment area keys that are marked with the same chord name play exactly the same chord Example C C Major Minor Chords T...

Page 50: ...t keyboard overlap For details see the Advanced Split Settings page EN 49 Your Digital Keyboard can be split into three areas an UPPER part keyboard a LOWER part keyboard and an accompaniment keyboard...

Page 51: ...r keys to display Chord Pt 3 Use bn and or the bl dial to specify the note name of the chord point page EN 50 You can also specify the chord point by holding down dp SPLIT and pressing the keyboard ke...

Page 52: ...Har for the following setting Auto Harmonize Arpeggiator AHar Arp 3 AUTO HARMONIZE ARPEGGIATOR button assignment BtnAsign page EN 109 1 Perform the procedure under To turn on Auto Harmonize and confi...

Page 53: ...gured by the Music Preset Mode remain in effect With some music presets selecting a number in step 3 causes the SYNC START indicator to start to flash indicating that the Digital Keyboard is in synchr...

Page 54: ...the setting screen Before playing back a phrase you must first change to the phrase set where the phrase is located if it is not already assigned to the phrase pads For details see Changing to Anothe...

Page 55: ...ssigned to a phrase pad 1 to 4 plays when you press the pad The setups you configure here are recorded to the corresponding pad 1 Specify the phrase pad whose playback setup you want to configure 1 Pr...

Page 56: ...ed it means nothing is recorded to the P1 phrase pad If you want to change mixer settings perform the procedure under To configure mixer settings page EN 62 To configure mixer settings of the phrase t...

Page 57: ...8 RECORD STOP This causes the RECORD indicator to disappear If you change phrase recording settings those settings will be in effect for the subsequent recording operation as well Change the recordin...

Page 58: ...operation long press the 4 EXIT bm number key You can use the procedures in this section to edit individual phrases You can delete or copy a phrase and configure quantize key shift and mixer settings...

Page 59: ...peration in progress Do not perform any operation while this message is displayed Complete is displayed after the operation is complete 7 To exit the operation long press the 4 EXIT bm number key 1 Us...

Page 60: ...age EN 57 to enter the Phrase Editing mode 2 Use the 1 V and 3 W bm number keys to display KeyShift and then press 6 ENTER This displays Phrase and causes the P1 indicator to flash on the display 3 Us...

Page 61: ...w to turn each Auto Accompaniment part on or off If you perform this operation while an Auto Accompaniment is sounding you can compare what the accompaniment sounds like with and without the part 1 Pr...

Page 62: ...even if you exit the Part Mode Besides the Auto Accompaniment in the explanation above the Digital Keyboard also uses other parts in order to generate sounds for manual keyboard play song playback an...

Page 63: ...played at this time 3 After selecting a part group press 9 PART and confirm that the indicator lamp to the left of the button is unlit 3 Use the 1 V and 3 W bm number keys to select the part whose set...

Page 64: ...9 to 16 are displayed at a time While parts 9 through 16 are displayed first subtract 8 from the part number Next press the bm number key that corresponds to the result For part for example press the...

Page 65: ...OWER 2 5 Auto Harmonize 6 Phrase Pad 1 7 Phrase Pad 2 8 Phrase Pad 3 9 Phrase Pad 4 Part Number Corresponding Part 1 to 8 Song Part 1 to Part 8 9 to 16 Song Part 9 to Part 16 Part Number Corresponding...

Page 66: ...the Digital Keyboard tone rhythm and other settings You can recall a registered setup as required to perform a particular song etc Registration can be used in the Rhythm Mode page EN 42 The registrat...

Page 67: ...or Hold on off Phrase Pad Phrase set number Phrase playback setups Mixer Part on off setting Volume Pan Reverb send Chorus send Delay send settings Specifying a bank and area that already has data sto...

Page 68: ...bk FUNCTION button page EN 107 and enable or disable the items on each sub menu that appears when you perform the following operation Registration Memory Reg Mem 3 Registration Memory Freeze Target RM...

Page 69: ...sed 5 When the setting is the way you want long press the 4 EXIT bm number key to exit the setting screen 6 Connect a sustain pedal see Separately Available Accessories page EN 3 to the jack you selec...

Page 70: ...key If the tone you are editing is a user tone the message Replace will appear here Press bn YES to replace the original tone data with the new data or bn NO to save the new data without replacing th...

Page 71: ...play DSP Edit and then press 6 ENTER This displays On Off 3 If the setting is turned off press bn or to turn it on 4 Press 3 W to display DSP Num 5 To select the DSP to be edited use bn and or the bl...

Page 72: ...press 6 ENTER This displays Sure If there is already a user tone stored at the tone number you specified as the copy destination the message Replace will appear 5 Press bn YES to execute the copy oper...

Page 73: ...esonance Resonance Adjusts the gain of harmonic tones in the vicinity of the cutoff frequency specified above A larger value creates a more unusual sound 0 to 127 Vibrato Vibrato Sub menu of vibrato s...

Page 74: ...pecifies how much reverb is applied to a tone 0 to 127 Chorus Send Cho Send Specifies how much chorus is applied to a tone 0 to 127 Delay Send Dly Send Specifies how much delay is applied to a tone 0...

Page 75: ...ment pattern of an existing rhythm as a base and add new recordings of keyboard play to empty parts Note that this operation is possible for variations and fill ins only 2 In the above illustration Fi...

Page 76: ...pattern for editing page EN 81 4 Specify the number of measure and the time signature of the accompaniment pattern you want to create 1 Press cs REGISTRATION 8 EDIT MENU 2 Use the 1 V and 3 W bm numbe...

Page 77: ...for all accompaniment patterns 12 Save the edited rhythm using the procedure under To save a user rhythm page EN 83 When editing the accompaniment pattern of an existing rhythm you can perform new rec...

Page 78: ...you want 1 Select the tone you want to use for part recording See Selecting a Tone page EN 18 Only drum set tones can be selected for Drums and Percussion parts Drum set sounds cannot be selected for...

Page 79: ...his enters recording standby and displays Recorded or Empty If Fixed is displayed here it means that the currently selected part cannot be recorded After a few seconds the display will return to what...

Page 80: ...en the display returns to the measure and beat where it was recorded To delete specific recorded notes hold down cs REGISTRATION 2 When playback reaches the note you want to delete press the keyboard...

Page 81: ...r a precount should sound before recording starts after ck START STOP is pressed in recording standby Selecting 1 sounds a one measure precount while 2 sounds a two measure precount Selecting Off turn...

Page 82: ...or bn NO to cancel The message Wait remains on the display while the copy operation is being performed Do not perform any operation while this message is on the display Complete appears on the display...

Page 83: ...batch clear Perform steps 1 to 3 under To edit an existing rhythm and save it page EN 76 2 Press cs REGISTRATION 2 This displays Element 3 Press the 6 ENTER bm number key This displays Sure 4 Press b...

Page 84: ...rhythm number will be the lowest one in memory that currently does not have any data stored The newly saved user rhythm will be selected after this operation is complete If there is no data stored for...

Page 85: ...s 05 Chord Basic 2 Chord Normally used for a chord part 06 Chord Var2 2 Chord Used for a chord part that has a tension chord 07 Chord Var3 2 Chord When a 7th chord is specified while playing the 5th n...

Page 86: ...On or 7th for this setting make sure that you select C for the Break Point Break Pt setting Retrigger Retrig This parameter specifies how accompaniment pattern play is affected by a chord change that...

Page 87: ...Copy and then press 6 ENTER 4 Use bn and or the bl dial to select the copy destination rhythm number and then press 6 ENTER This displays Sure If there is already a user rhythm stored at the rhythm n...

Page 88: ...ations of the various different performance functions of the Digital Keyboard including Auto Accompaniment phrase pads layer split etc Solo Tracks 1 to 16 Record keyboard play using one tone UPPER 1 T...

Page 89: ...rding when you want to insert rests at the beginning On this screen you can configure recording settings such as the recording destination track etc 4 Press 8 RECORD STOP This returns to recording sta...

Page 90: ...f each of the system track parts perform the procedure under To configure mixer settings page EN 62 Configure the mixer settings of each part of the KEYBOARD part group Layer and split settings as wel...

Page 91: ...ord 1 Long press 8 RECORD STOP This displays the recording setting screen that you can use to select the recording target track RecTrkSy indicates that the current recording target track is the system...

Page 92: ...the recording press ck START STOP in place of 8 RECORD STOP Starting playback of another track that is already recorded simultaneously starts recording and inserts rests until you play something on th...

Page 93: ...een and causes the RECORD indicator to flash 4 Use the 1 V and 3 W bm number keys to display Rec Type 5 Use bn and or the bl dial to display either of the settings below This causes MEASURE and BEAT t...

Page 94: ...cording press 8 RECORD STOP This causes the RECORD indicator to disappear 1 Perform the procedure under Looping Playback of Specific Song Measures A B Repeat page EN 39 When performing the procedure s...

Page 95: ...cks page EN 91 1 Press 7 SONG BANK 2 Use the bm number keys bn and or the bl dial to select the number of the song you want to copy 3 Hold down 8 RECORD STOP until Song Clr appears 4 Use the 1 V and 3...

Page 96: ...orm the operations below Editing an entire song in measure units page EN 96 Editing a recorded song in track units page EN 97 Editing a track of a recorded song in measure units page EN 98 Editing a r...

Page 97: ...number keys to display Copy and then press 6 ENTER This displays Point A 4 Use bn and or the bl dial to select the number of the first measure of the range you want to copy and then press 6 ENTER This...

Page 98: ...Perform the procedure under To enter the Song Editing Mode page EN 95 2 Use the 1 V and 3 W bm number keys to display WholeTrk and then press 6 ENTER This displays Clear 3 Press 6 ENTER again This dis...

Page 99: ...s specification 1 Perform the procedure under To enter the Song Editing Mode page EN 95 2 Use the 1 V and 3 W bm number keys to display Trk Meas and then press 6 ENTER This displays Quantize 3 Press 6...

Page 100: ...lue of the range of 24 to 24 Lowering the setting value by one lowers the pitch by one semitone while raising the value raises the pitch 8 Press 6 ENTER This displays Sure 9 Perform the procedure unde...

Page 101: ...example pressing a keyboard key causes multiple events to be recorded the timing of the key press the pressed key pitch press time note length and key pressure note volume Event editing can be used t...

Page 102: ...the track 4 Use the 2 w and 5 q bm number keys to display the event whose parameters you want to change Event location information measure beat tick is shown on the right side of the display Displayi...

Page 103: ...he 2 w and 5 q bm number keys to display Rhythm Rhythm Number Event 2 If you want to check the name of the rhythm assigned to the event press bk FUNCTION This displays the rhythm name If you want to l...

Page 104: ...ck you also can perform step input of Auto Accompaniment chords chord events as well Performing step input into a track that already contains recorded data will not delete the existing data This means...

Page 105: ...rdance with the key input will appear on the right side of the display 8 Specify the event to be input 2 Extends the length of the previously input note event For example if you input a quarter note e...

Page 106: ...he STEP indicator and enters the Step Input Mode 7 If necessary specify the chord event velocity keyboard touch For information about how to specify the setting see step 6 under To input note events u...

Page 107: ...to display the menu item you want to change Initial default setting values are indicated by an asterisk 6 Use bn and or the bl dial to change the setting value 7 When mixer settings are the way you wa...

Page 108: ...ub menu item display 2 Use the 1 V and 3 W keys to display the sub menu for the changes you want to make After the sub menu item appears advance to step 3 To return to a main menu item from a sub menu...

Page 109: ...f for tone part UPPER 2 U2Pd1Enb On Off Pedal 1 effect on off for tone part LOWER 1 L1Pd1Enb On Off Pedal 1 effect on off for tone part LOWER 2 L2Pd1Enb On Off Pedal 2 effect Pd2Efect 1 to 4 Target pa...

Page 110: ...one part LOWER 1 portamento time L1 Port 0 to 127 Tone part LOWER 2 portamento time L2 Port 0 to 127 Auto Harmonize Arpeggiator AHar Arp EN 27 51 AUTO HARMONIZE ARPEGGIATOR button assignment BtnAsign...

Page 111: ...e L1CsTune 24 to 24 Tone part LOWER 2 coarse tune L2CsTune 24 to 24 Part fine tune Prt Fine EN 36 Tone part UPPER 1 fine tune U1FnTune 99 to 99 Tone part UPPER 2 fine tune U2FnTune 99 to 99 Tone part...

Page 112: ...lume 0 to 127 Audio playback Center Cancel C Cancel On Off Registration Memory Reg Mem EN 68 Registration Memory Freeze Target RMFrzTgt EN 67 Freeze effect for rhythm on off Rhythm On Off Freeze effec...

Page 113: ...IDI MIDI EN 120 Keyboard channel Keybd Ch 1 to 16 Local control Local On Off Accomp out AcompOut On Off Media 4 Media EN 114 Other Other Tap rhythm start Tap Rhy On Off EN 45 Right hand melody part ch...

Page 114: ...animent keyboard in the Examination Mode 1 Press bk FUNCTION 2 Use the 1 V and 3 W bm number keys to display Other and then press 6 ENTER 3 Use the 1 V and 3 W keys to display ExamMode 4 Press bn or t...

Page 115: ...tricity conducted to the USB flash drive port from your hand or from a USB flash drive can cause malfunction of the Digital Keyboard If this happens turn the Digital Keyboard off and then back on agai...

Page 116: ...function to reformat it to FAT32 Do not use quick format 1 Insert the USB flash drive to be formatted into the Digital Keyboard s USB flash drive port 2 Press bk FUNCTION 3 Use the 1 V and 3 W bm numb...

Page 117: ...e of data being saved See Sub Menu File Name Extension List above 6 Press 6 ENTER If All Data is selected in step 5 step 7 is not required Proceed to step 8 7 Use bn and or the bl dial to select the d...

Page 118: ...is procedure or if the user area you specified in step 7 already contains data the message Replace will appear If this happens pressing bn YES in step 9 below will overwrite the existing data in the u...

Page 119: ...ress bn NO Pressing bn YES displays Wait operation in progress Do not perform any operation while this message is displayed Complete is displayed after the operation is complete 9 To exit the operatio...

Page 120: ...edure below exactly Connecting incorrectly can make data send and receive impossible 1 Turn off the Digital Keyboard and then start up your computer Do not start up the music software on your computer...

Page 121: ...Registration bank unit page EN 65 User Phrase phrase set unit page EN 53 1 Go to the CASIO WORLDWIDE site at the following URL http world casio com 2 At the site select a geographic area or country 3...

Page 122: ...page EN 9 Nothing happens or notes do not play normally when I play notes on the left side of the keyboard Press cm to disable chord input in the accompaniment keyboard area page EN 43 Nothing happens...

Page 123: ...strange when played long with other instruments Check and adjust the transpose page EN 34 tuning page EN 36 part coarse tuning and part fine tuning settings page EN 36 Turn power off and then back on...

Page 124: ...Use a USB flash drive that is not protected by anti virus software Err No File There is no loadable or playable file in the MUSICDAT folder Move the file you want to load into the MUSICDAT folder or...

Page 125: ...he USB flash drive format is not compatible with this Digital Keyboard Use a computer or other device to change the USB flash drive format to something that is compatible with the Digital Keyboard pag...

Page 126: ...MF format 0 1 CASIO MIDI files CMF format on a USB flash drive is supported USB Audio Playback Playback of audio files on a USB flash drive is supported Supported File Formats WAV format 44 1 kHz 16 b...

Page 127: ...or 150 types MIDI 16ch multi timbre received GM Level 1 standard Inputs Outputs USB Flash Drive Port Type A USB Port Type B Pedal 1 Jack Standard jack 6 3 mm Pedal 2 Expression Jack Standard jack 6 3...

Page 128: ...signal Chorus Chorus Gives notes depth and breadth Flanger Flanger Applies wildly pulsating and metallic reverberation to notes Selects the LFO waveform Rotary Rotary This effect is a rotary speaker...

Page 129: ...Freq EQ2 Frequency Adjusts the center frequency of Equalizer 2 1 EQ2 Gain EQ2 Gain Adjusts the gain of Equalizer 2 12 to 00 to 12 EQ3 Freq EQ3 Frequency Adjusts the center frequency of Equalizer 3 1...

Page 130: ...quency Adjusts the cutoff frequency of High range 3 HighGain High Gain Adjusts the High range gain 12 to 00 to 12 In Level Input Level Adjusts the input level 000 to 127 WetLevel Wet Level Adjusts the...

Page 131: ...which limiting is applied 000 to 127 Attack Attack Adjusts the time until the compression effect starts A smaller value causes prompt limiter operation which suppresses the attack of the input signal...

Page 132: ...nd metallic reverberation to notes Selects the LFO waveform Rate LFO Rate Adjusts the LFO rate 000 to 127 Depth LFO Depth Adjusts the LFO depth 000 to 127 Waveform LFO Waveform Selects the LFO wavefor...

Page 133: ...und 000 to 127 Pitch Shifter This effect transforms the pitch of the input signal Pitch Pitch Adjusts the pitch shift amount in quarter tone steps 24 to 00 to 24 HighDamp High Damp Adjusts the high ra...

Page 134: ...ance with number of beats Off 1 4 1 3 3 8 1 2 2 3 3 4 1 In Level Input Level Adjusts the input level 000 to 127 DryLevel Dry Level Adjusts the level of the direct sound 000 to 127 WetLevel Wet Level A...

Page 135: ...etLevel Wet Level Adjusts the level of the effect sound 000 to 127 DryLevel Dry Level Adjusts the level of the direct sound 000 to 127 Modeling Wah Simulates various types of wah pedals This effect ca...

Page 136: ...ain Adjusts the driver input signal gain 000 to 127 OutLevel Level Adjusts the drive output level 000 to 127 WetLevel Wet Level Adjusts the level of the effect sound 000 to 127 DryLevel Dry Level Adju...

Page 137: ...SBL 41 2 KH STDT 42 3 KR RV 43 4 LY IRST 44 3 MB MK3 45 3 MB F3 DI 46 1 MB D5 47 4 MB DRCT 48 1 MB TX 5 Settings V Display 49 4 MB TX DI 50 4 MS VS80 51 4 MS J800 52 2 MS J2401 53 3 MS J2000 54 2 MS J...

Page 138: ...Channel 1 MIDI IN MIDI OUT On Off KEYBOARD n 1 r e p p U d r a o b y e K 1 1 n 2 r e p p U d r a o b y e K 2 2 n 1 r e w o L d r a o b y e K 3 3 n 2 r e w o L d r a o b y e K 4 4 n e z i n o m r a H...

Page 139: ...the product is exposed to rain or moisture when the product does not operate normally when the product is dropped 10 Do not allow the product to be exposed to dripping or splashing liquid Do not place...

Page 140: ...tion of water and a mild neutral detergent Wring all excess moisture from the cloth before wiping Included and Optional Accessories Use only accessories that are specified for use with this product Us...

Page 141: ...ENTERTAINER 017 FR HLICHER LANDMANN 018 LA CHEVALERESQUE 019 SONATA K 545 1st Mov 020 LA PRI RE D UNE VIERGE 021 VALSE op 64 no 1 PETIT CHIEN 022 LIEBESTR UME no 3 023 JESUS BLEIBET MEINE FREUDE 024 C...

Page 142: ...forms are not supported With FULL RANGE CHORD when the lowest note fingered is a certain distance from the neighboring note the chord is interpreted as a fraction chord Unlike FINGERED 1 2 and FINGER...

Page 143: ...us2 7 m7 M7 m7 b 5 7 b 5 7sus4 add9 madd9 mM7 dim7 69 6 m6 A B b B F G b G G A b A F C C D b D D E b E 2 1 You can use the split point to change the size of the accompaniment keyboard range page EN 20...

Page 144: ...lock Diagram 1 Volume Pan 2 Chorus Send 3 Delay Send 4 Reverb Send 1 2 3 4 1 2 3 4 1 2 3 4 MIC IN CT X9000IN AUDIO IN SPEAKER PHONES LINE OUT 5 5 CT X9000IN 1 2 3 4 1 2 3 4 1 2 3 4 1 2 3 4 CT X9000_80...

Page 145: ...Mode 3 X Mode 3 X Default Messages Altered 0 1 5 6 38 7 10 11 64 65 66 67 71 72 73 74 76 Bank select Modulation Portamento Time Data entry LSB MSB Volume Pan Expression Hold 1 Portamento Switch Soste...

Page 146: ...77 78 84 91 93 94 100 101 Bank select Modulation Portamento Time Data entry LSB MSB Volume Pan Expression Hold 1 Portamento Switch Sostenuto Soft pedal Filter resonance Release time Attack time Filter...

Page 147: ...arate Safety Precautions Please keep all information for future reference About Music Score data You can use a computer to download music score data from the CASIO Website For more information visit t...

Reviews: