EN-34
Recording and Playback
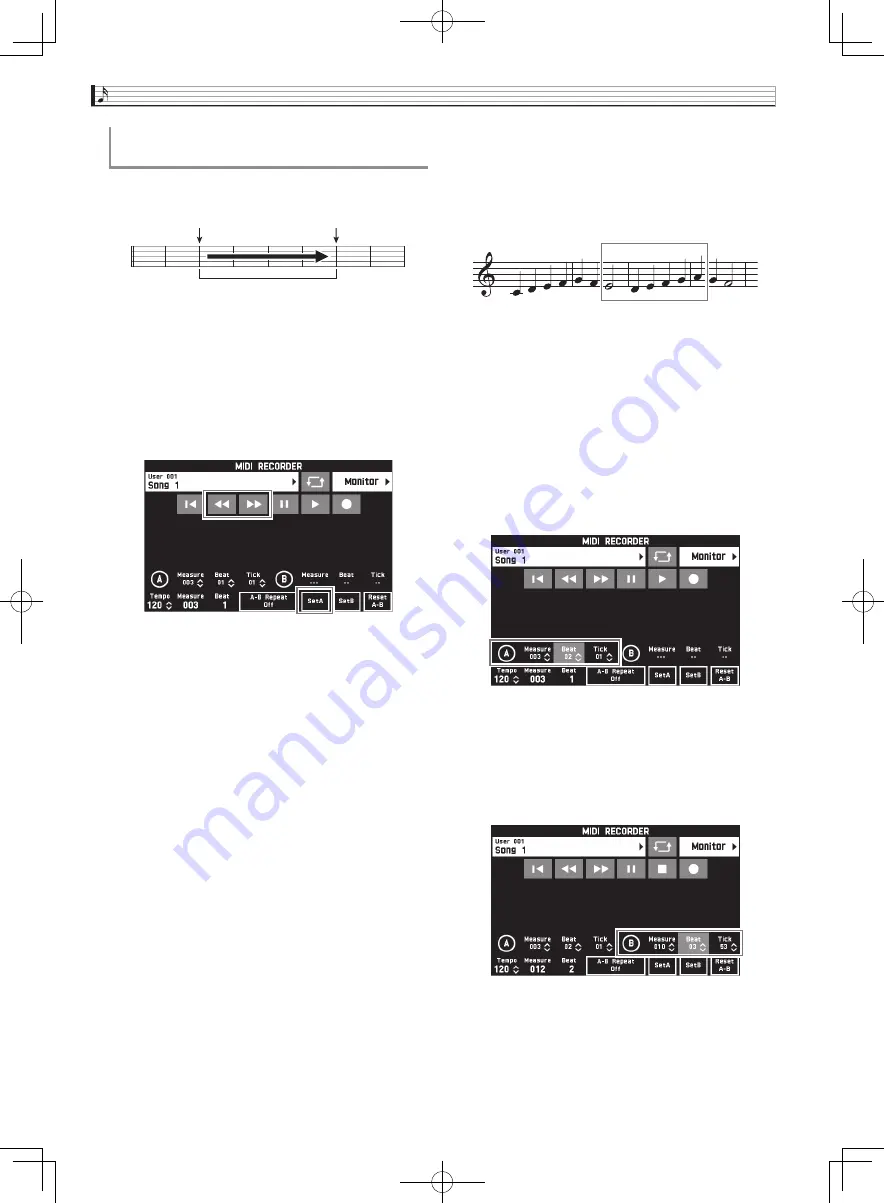
You can use the following procedure to specify a
particular range for punch-in recording.
1.
Enter the MIDI recorder recording mode and
then select the song that contains the section
you want to re-record.
2.
Use “
s
” and “
d
” to display the first
measure of the section you want to record
and then touch “Set A”.
3.
Use “
s
” and “
d
” to display the last
measure and then touch “Set B”.
4.
Touch “
Y
W
” to return to the beginning of the
song, or use “
s
” and “
d
” to adjust the
position to start playback.
5.
Touch “
0
”.
This enters record standby.
6.
Touch “Rec Type”.
7.
Touch “Punch In A-B”.
8.
Touch “
X
”.
•
Punch in recording will start from the start measure
and stop with the end measure automatically.
■
To re-record an area smaller than one
measure
Use the procedure below to specify a punch-in
recording area that includes a part of a measure.
Example:
To re-record from beat 3 of measure 2 up to beat
1 of measure 4
1.
Use the MIDI Recorder to start playback of
the song that contains the section you want to
re-record.
2.
When playback reaches the point where you
want to start punch-in recording, touch “Set
A”.
•
After touching “Measure”, “Beat”, or “Tick” for Point
A, you can then use the
bs
w
,
q
buttons to make
fine adjustments to the start point.
3.
When playback reaches the point where you
want to end punch-in recording, touch “Set
B”.
•
After touching “Measure”, “Beat”, or “Tick” for Point
B, you can then use the
bs
w
,
q
buttons to make
fine adjustments to the end point.
4.
Touch “
Y
” to stop play back.
To re-record a specific range
(Auto Punch-in Recording)
Start measure
End measure
Punch-in recording range
To re-record this section
CGP700-ES-1B.indd 36
2017/09/08 12:54:25


