— 12 —
Connector (CN10)
■
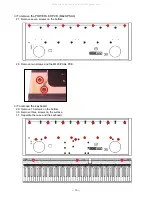
To remove the jack PCB (M429-PS2) and the jack PCB (M429-PS3)
11. Remove the Insulok tie.
12. Remove three screws and the jack PCB (M429-PS2).
Note: Arrange the cables using the Insulok tie when assembling.
13. Remove the Insulok tie.
14. Remove one connector, two screws and the jack PCB (M429-PS3).
Note: Arrange the cables using the Insulok tie when assembling.
■
To remove the speaker (only on the right side)
15.Remove six screws and two speakers.
All manuals and user guides at all-guides.com
Summary of Contents for Celviano AP-80R
Page 8: ... 6 PRINTED CIRCUIT BOARDS MAIN PCB M419 MAA1 All manuals and user guides at all guides com ...
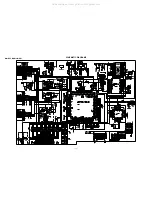
Page 28: ... 26 SCHEMATIC DIAGRAMS MAIN PCB M419 MAA1 All manuals and user guides at all guides com ...
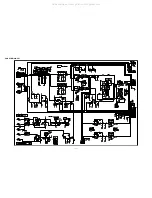
Page 29: ... 27 SUB PCB M429 PS1 All manuals and user guides at all guides com ...
Page 30: ... 28 CONSOLE PCB M429 CNA1 All manuals and user guides at all guides com ...
Page 33: ... 31 LED PCB M419 LCA1 All manuals and user guides at all guides com ...
Page 35: ... 33 JACK PCB M429 PSA2 All manuals and user guides at all guides com ...
Page 38: ... 36 KEY PCB MCPK KYA1 All manuals and user guides at all guides com ...
Page 39: ... 37 KEY PCB MCPK KYB2 All manuals and user guides at all guides com ...
Page 40: ... 38 KEY PCB MCPK KYA3 All manuals and user guides at all guides com ...


