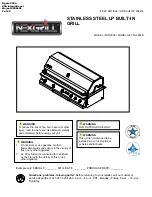
background image

Grill Assembly

10

STEP FIVE 

5E

5F

a. Remove the paper from the back of the Mirror Overlay 

(5A) and paste it onto the cart door. Make sure the two 
holes on the overlay match the holes on the cart door.

b.  Remove  the  protect  film  on  the  mirror  overlay,  Use 

one  M6  x  10  phillips  pan  head  screws  (5B)  to  attach 
one samll handle end (5C) to the cart door.

c.  Slide  one  end  of  the  Door  Handle  Bar  (5D)  into  the 

installed  handle  end. Attach  the  second  handle  end 
using  the  supplied  phillips  head  screw  while  holding 
the cart door assembly in place. 

d. Repeat to assemble the other cart door.

e. Place Cart Door Right (5E) on an angle over the right 

side door pivot.

f. Tilt the top of the door toward the grill, while depressing 

the top door pivot pin above the door edge.

g. Move the door slightly until the pin locks into place in 

the hole on bottom of the front face.

h. Repeat steps a - c for Cart Door Left (5F) installation.

5B

5A

5C

5D

5C

Summary of Contents for TS29LP

Page 1: ...il us at saleshelp sureheat com FOR YOUR SAFETY 1 Read this Manual before attempting to assemble or operate your grill 2 Follow safety instructions 3 Check for leaks according to the directions in thi...

Page 2: ...ill installed by a qualified service technician Locate the main gas supply valve so that you know how to shut the gas off to your grill If you smell gas make sure all gas connections are tight before...

Page 3: ...nity of this or any other appliance FOR YOUR SAFETY If you smell gas 1 Shut off gas to the appliance 2 Extinguish any open flames 3 Open grill hood 4 If odor continues immediately call your gas suppli...

Page 4: ...ing cooking surface 3 Side shelf 4 Towel bar 5 Control knobs Main burners 6 Hood Handle 7 Bread warming rack 8 Side burner 9 Control Knob Side burner 10 Electronic igniter main burners and side burner...

Page 5: ...e master carton 2 Remove and set aside all wrapping paper and additional packaging from the parts 3 Do not destroy carton or packing until your grill is completely assembled and operating to your sati...

Page 6: ...on the cart base 1C as shown STEP ONE 1B 1A 1C WARNING The Cylinder limit h a n d l e m u s t b e installed to prevent storage of spare L P Gas Tanks Failure to comply with these instructions could re...

Page 7: ...ead M6 x 40 scews 2A to secure the cart side right 2D to the cart base 2C Note Add flat washer and lock washer then install the screws in position Note The sides of the cart sides without holes facing...

Page 8: ...tapping screws 3A to secure the front top cross bar 3B onto the cart sides b Use four 4 self tapping screws 3A to secure the grill cart back 3C to the rear of the cart sides as shown STEP THREE 3A 8 3...

Page 9: ...wn The cutout flange should be toward back of the cart b Have someone help you pick up the grill head assembly and set it on top of the cart as shown c Use six 6 M5 x 12 Phillips Pan Head Screws 4A to...

Page 10: ...nd of the Door Handle Bar 5D into the installed handle end Attach the second handle end using the supplied phillips head screw while holding the cart door assembly in place d Repeat to assemble the ot...

Page 11: ...side shelf 6B by inserting the four screws on the side of the grill head into the holes on the left shelf c Tighten the screws with a wrench d Install one self tapping screw 6C into the bottom front...

Page 12: ...c Loosen the four 4 5 16 24 Hex Head screws 7A on the right side of the grill d Attach the Right Side Burner Shelf 7B by inserting the four 4 screws on the side of the grill head into the holes on the...

Page 13: ...on pointing up making sure to line up holes d Attach bezel valve to side burner shelf with screws removed in step 8a e Press knob 8F onto valve stem assembly f Unscrew the igniter button cap and insta...

Page 14: ...tes 9C on the ledges provided on the grill to create your cooking surface d Slide the Bread Warming Grate 9D through the cutouts on the hood support sides and rest it on the brackets The finished gril...

Page 15: ...as Code NFPA 54 2002 ANSI Z223 1 2002 Gas conversions kits may be purchased separately When ordering gas conversion kits have the model number and the type of gas N G or L P used for your grill This g...

Page 16: ...portation DOT or the National Standard of Canada CAN CAS B339 Cylinders Spheres and Tubes for the Transportation of Dangerous Goods and Commission L P TANK USE When turning the L P tank on make sure t...

Page 17: ...on the fuel supply cylinder 5 Turn on the burner control knobs for a moment to release the pressure in the hose then turn the control knobs back off 6 Wash off soapy solution with cold water and towe...

Page 18: ...4 seconds See Fig 1 NOTE If the burner does not light in 4 seconds turn the knob to the OFF position and wait 5 minutes before trying again 5 Repeat above steps to light remaining burners Match Light...

Page 19: ...tested and is properly located 2 Light the grill burners using the instructions provided in this manual 3 Turn the control knobs to desired temperature High Medium or Low and preheat the grill for 10...

Page 20: ...and other flammable vapors and liquids Do not obstruct the flow of combustion and ventilation air Keep the ventilation openings of the cylinder enclosure free and clear from debris Visually check the...

Page 21: ...off by the burners this is normal Purchase a mild stainless steel cleaner and rub in the direction of the grain of the metal Specks of grease can gather on the surface of the stainless steel and bake...

Page 22: ...to reduce this risk BEFORE CALLING CUSTOMER SERVICE If the grill does not function properly use the following checklist Problem Grill will not light when the igniter button is pushed SOLUTION Is your...

Page 23: ...check and clean the burner ports if clogged or dirty Check for leaks Flame is erratic Note PreHeating time can take from 5 to 10 minutes Check gas connection look for kinked hose make sure gas supply...

Page 24: ...FCCS0007032 1 pcs 1 pcs Bread Warming Rack Igniter Module 5 poles FCFM2908003 FCCS0007040 1 pcs 1 pcs Main Cooking Grates Side Burner Casting FCTG3007006 FCTG2608028 1 set 1 pcs Flavor Grids Side Burn...

Page 25: ...1 pcs Cart Door Left Drip Pan FCFM290808 FCMD2908018 1 set 1 pcs Cart Door Right Wheel Channel Left Assy FCFM2908009 FCTG2608023 1 set 1 set Cart Door Handle Assy Wheel Channel Right Assy FCFM2908010...

Page 26: ...applicable building codes including heating the product to temperatures above its rated specifications which can cause considerable warping disassembly including removal of the product from a built i...

Reviews: