75
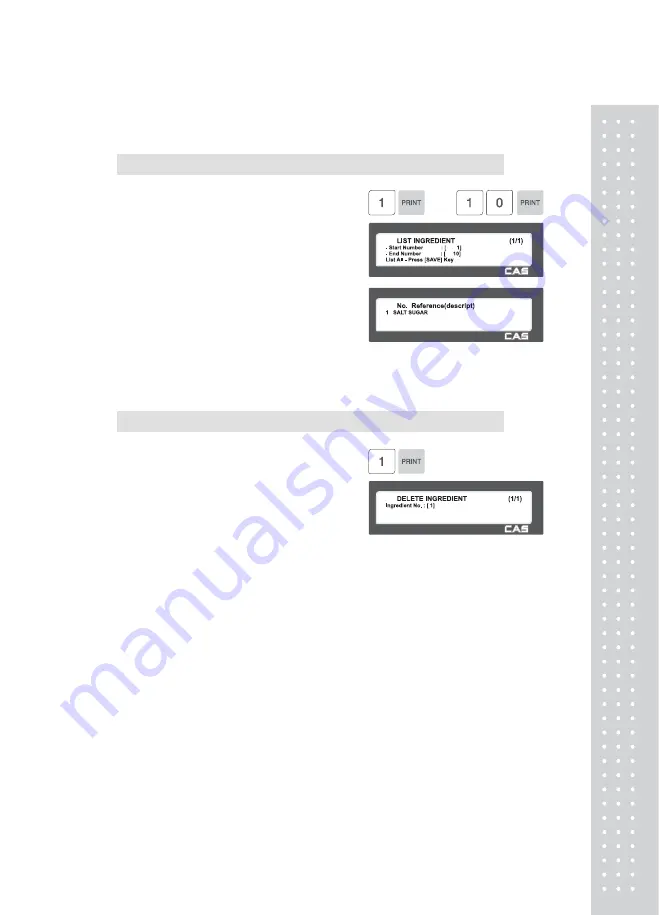
2.3.1.2 List Ingredient (Menu code 1312)
( MENU → 3. PLU Data Table II → 1. Ingredient → 2. List )
1. Set the list range
EX) Ingredient No.’s 1~10
※
Press Print Key to List Ingredient No.’s on
screen.
After Ingredient No.’s are listed on the
screen, pressing the TEST key will print the
Ingredient No.’s
2.3.1.3 Delete Ingredient (Menu code 1313)
( MENU → 3. PLU Data Table II → 1. Ingredient → 3. Delete )
1. Enter ingredient number to delete
EX) Delete ingredient no. 1
Note: There is no confirmation request when
deleting an Ingredient No. Pressing the
PRINT key will cause the Ingredient No.
entered to be deleted.
Note :
Method of Using
the Ingredient
1.1 Ingredient
Total of 510 characters can be inputted for the Ingredient in the basic setting.
These 510 characters can be used by categorizing them into Ingredient1 and
Ingredient2. Categorization code exists to distinguish Ingredient1 and 2. This code can
be inputted by using the [CHAR] CODE input key.
Ingredient1 and Ingredient2 are printed onto separate fields in the label format.
Field ID of Ingredient1 is 25, while that for ingredient2 is 26.
1.2
Inputting
of Ingredient at the
weighing scale
(1) Input Ingredient1 at the ingredient input window (MENU 1311).
(2) After having inputted Ingredient1, press the [CHAR] key to indicate “0000” in the Unit Price
box of the VFD window.
(3) Input categorization code (0x0c). “♀” will be indicated.
[0] + [C] + [PRINT]
※
Space (“ ”) instead of “♀” can be indicated depending on the country.
Summary of Contents for CL5000 Series
Page 1: ...2 ...
Page 8: ...9 1 GENERAL 1 1 PRECAUTIONS ...
Page 14: ...15 1 4 NAMEAND FUNCTIONS OVERALLVIEW ...
Page 15: ...16 ...
Page 16: ...17 ...
Page 17: ...18 ...
Page 18: ...19 CL7200 ...
Page 19: ...20 OVERALLVIEW TYPE I 5 8 9 TYPE II 4 5 6 6 CL5000 CL5500 TYPE III CL5000 G TYPE Ⅳ CL5500 D ...
Page 20: ...21 ...
Page 21: ...22 TYPE Ⅴ CL5200 P CL5200 B ...
Page 22: ...23 KEYBOARD Poletype Standard ...
Page 23: ...24 H Type hangingtype S Type Selfkeytype ...
Page 24: ...25 D Type Doublebodytype CL5200 P Poletype ...
Page 25: ...26 CL5200 B Standard ...
Page 26: ...27 CL7200 Sale mode Operator View CL7200 Salemode Customer View ...
Page 27: ...28 CL7200 Input Mode ...
Page 28: ...29 1 5 Basic set up ...
Page 30: ...31 SERVER Connection status indicator LN Ethernet Link Status indicator ...
Page 38: ...39 1273 Delete Tare ...
Page 75: ...76 4 AfterhavinginputtedIngredient2afterthe pressthe SAVE key ...
Page 103: ...104 ...
Page 108: ...109 8 100 00c 12c Greek When total amount is less than 1 only Last currency symbol shows up ...
Page 113: ...114 Table No entered to be deleted ...
Page 125: ...126 7 Label Preprint You can set preprint length ...
Page 140: ...141 Setting Configuration Permission ...
Page 141: ...142 ...
Page 152: ...153 190 PLU LIST Show PLU List and Call CL7200 0 or 9999 PLU Key ...
Page 167: ...168 Sample Clerk Report ...
Page 171: ...172 ...
Page 208: ...209 1 1 Label Format Sample 1 2 3 4 5 6 ...
Page 209: ...210 7 8 9 10 11 12 13 14 ...
Page 210: ...211 15 16 17 18 19 20 ...
Page 211: ...212 21 22 23 24 ...
Page 212: ...213 25 26 27 28 29 30 ...
Page 213: ...214 31 32 33 34 35 36 37 38 ...
Page 214: ...215 39 40 41 42 43 44 ...
Page 215: ...216 45 1 2 Label Format s field Sample 1 Label sample 1 2 Label sample 2 ...
Page 216: ...217 ...
Page 218: ...219 3 Window Character Set Information ...
Page 219: ...220 MEMO ...
Page 220: ...221 MEMO ...
Page 221: ...222 MEMO ...
Page 222: ...223 MEMO ...
Page 223: ...224 MEMO ...
Page 224: ...225 MEMO ...
Page 225: ...226 MEMO ...
Page 226: ...227 MEMO ...
Page 227: ...228 ...
Page 228: ...229 뒷표지 ...


