CONTROLS AND DISPLAYS
12
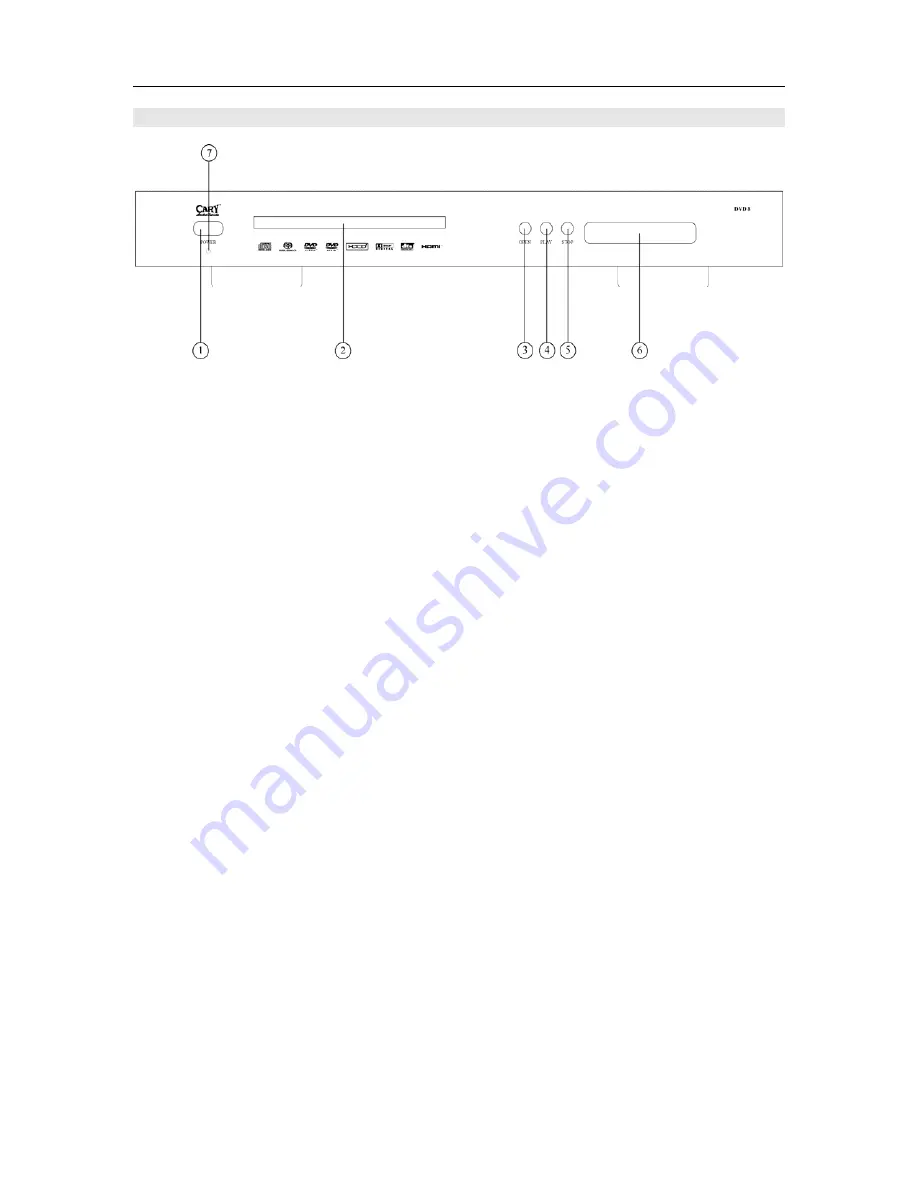
FRONT PANEL
1.
POWER
•
Press once to turn the power ON.
•
Press again to turn the power OFF. The DVD 8 will enter into STANDBY and the blue
POWER LED will light.
2.
DISC LOADER TRAY
•
Load discs here.
3.
OPEN
•
Press this button to open and close the disc loader tray.
4.
PLAY
•
Press this button to start playback.
5.
STOP
•
Press this button to stop playback.
6.
ALPHANUMERIC Display
A multi-character display providing information on the operation of the DVD 8 player.
7.
POWER Indicator
•
This LED lights when the player is turned OFF.