


TO DISMANTLE PUMP
FREQUENTLY ASKED QUESTIONS
‘’MOTOR DOES NOT START’’
Disconnect switch open; Fuses blown or thermal overload open;
Motor windings burned out; Defective starting switch inside motor;
Disconnected or defective wiring.
‘’MOTOR DOES NOT REACH FULL SPEED’’
Low voltage; Motor windings connected for wrong voltage; Shaft
binding or impeller rubbing.
‘’MOTOR OVERHEATS (Protector trips)’’
Low voltage; Motor windings connected for wrong voltage;
Inadequate ventilation.
‘’PUMP DELIVERS NO WATER’’
Pump not primed; Closed valve in suction or discharge line; Suction
or discharge line plugged; Leakage of air into suction system; Impeller
plugged.
‘’LOW PUMP CAPACITY’’
Check setting of dial valve; Valve in suction or discharge line partly closed;
Suction or discharge line partly plugged; Suction or discharge line too
small; Pump running at reduced speed (see above); Plugged basket in
skimmer or hair in lint strainer; Dirty filter; Impeller plugged.
‘’LOW PUMP PRESSURE’’
Check setting of dial valve; Pump running at reduced speed (see
above); Discharge valve or inlet fitting opened too much; Leakage of air
into suction system.
‘’HIGH PUMP PRESSURE’’
Discharge valve or inlet fittings closed too much; Return lines too small;
Dirty filter.
‘’NOISY PUMP AND MOTOR’’
Plugged basket in skimmer or hair in lint strainer; Defective motor
bearings; Valve in suction line partly closed; Suction line partly plugged;
Vacuum cleaner hose plugged or too small; Piping causing strain on
pump case; Impeller rubbing on pump case.
‘’LEAKAGE OF WATER AT SHAFT’’
Shaft seal requires replacement.
‘’AIR BUBBLES AT INLET FITTINGS’’
Leakage of air into suction line at connections; Cover of hair and lint
strainer not airtight; Restriction in suction line; Low water level in pool.
M22904240
WWW.CARVINPOOL.COM
4
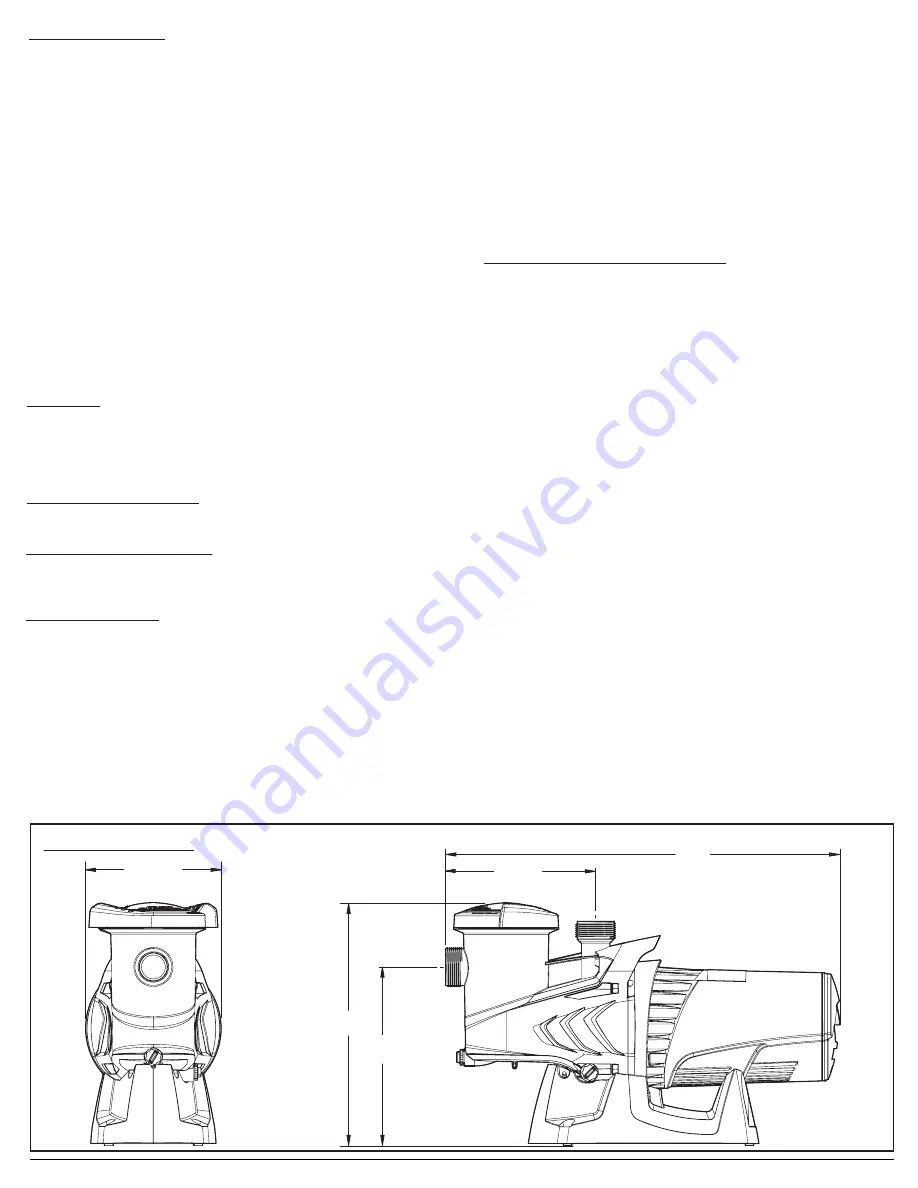
Dimensionnal
(Fig.1)
NOTE: VERIFY THE ELECTRICAL POWER IS DISCONNECTED BEFORE YOU
CONTINUE. Note: Numbers in brackets refer to item numbers in Figure 5.
1). Remove the back plate (19) by taking out two self-tapping screws (17).
2). Disconnect the black wire (30) from the switch (18).
3). Disassemble base(23) blocking the rotation of the splash cover. Turn
the Splash Cover counterclockwise to unlock (see Figure 3).
4).
THE FOLLOWING IS FOR U.S. 2 SPEED SHARKJET PUMP ONLY:
To facilitate access to the motor shaft remove the motor cap screw and
remove back cap. It is not necessary to unplug the motor power cord (29),
unless the motor (15) or the power cord (23) have to be replaced or
repaired.
5). Remove the four screws (13) that holds the pump together, retract the
sub-assembly containing: Motor Bracket ( 12), Main O-Ring (11), Motor
(15), Mechanical Shaft Seal Assy (10), Flinger (14), Impeller (9), Diffuser (7)
and Diffuser O-Ring(6)
6). To disassemble Diffuser (7), insert a small flat screwdriver between the
two small snaps on Motor Bracket (12), gently lift the diffuser assembly
tab and pull the diffuser to free one side at a time. (See Figure 4).
7). Bloc the motor shaft by inserting a flat screwdriver in the slot in the end
of the shaft at the back of the motor, and unscrew the impeller.
8). Remove the four long motor screws holding the motor (15) to the
bracket (12).
INSPECTION
Inspect all parts of the pump for wear or damage, and order replacements
as necessary. Check the shaft seal (10) carefully. Look for cracks in the
ceramic seat. Check the seal faces for wear and nicks. Flex the rubber parts
and check them for holes and cracks. Replace the complete seal if any part
is damaged, or if the seal leaks. Do not use old parts.
SHAFT SEAL REPLACEMENT
Take great care while handling the shaft seal (10) to avoid damage to
its carbon and ceramic sealing faces.
TO REMOVE OLD SHAFT SEAL
After dismantling the pump and removing the impeller as already
described, pull the rotating parts of the seal from the hub of the impeller
(9). Press or tap the stationary section of the seal from the motor bracket
FIT NEW SHAFT SEAL
DO NOT USE OIL OR GREASE ON THE SEAL PARTS,
because either may
damage the thermoplastic material of the pump through overheating
or chemical reaction. Make sure that the pump parts are clean, but be
careful not to scratch the surfaces that come into contact with the seal.
Moisten the rubber cup of the new stationary section with WATER.
Protect the sealing surface with a disc of clean cardboard, and use a
light mallet and small wooden block to tap the seal gently into the
bracket (12). Be sure that the sealing surface faces the pump. Reassem-
ble the bracket (12) onto the motor (15). Moisten the bore of the new
rotating seal assembly with WATER. Push the assembly into position on
the hub of the impeller (9) with its sealing surface facing outward.
Prevent the motor shaft from rotating by inserting a screwdriver in the
screw the impeller (9) to the shaft by hand. Put the diffuser back into
place by snapping the Motor Bracket (12) and the diffuser (7) back
together . Make sure that the diffuser o-ring (6) is still on. Make sure
that the Main O-Ring (11) is properly positioned on the face of the
Motor Bracket (12), then reassemble the bracket (12) to the pump Strain-
er Case(5). Tighten the screws (13) evenly by tightening its opposit
in alternance. Reassemble the splash cover (20) and the base (23) (Fig. 3).
Reinstall the pump and run it for 5 minutes to ensure that no water leaks
from the pump case (which would indicate improper seal installation). If
any water is observed leaking from the pump case, repeat seal installation
procedure.
8 “ (21.27 cm)
3
8
/
24 “
(62.62 cm)
21
32
/
9 “
(24.45 cm)
3
8
/
15 “
(38.48cm)
9
64
/
11 “
(28.30cm)
9
64
/


