background image

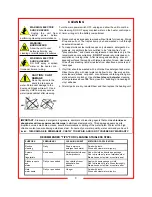
CLEANING 

Turn the main power switch OFF, unplug and allow the unit to cool be-
fore cleaning. DO NOT spray or splash water on the heater, control pan-
el, timer, wiring or in the battery compartment. 
 

1. Racks or shelves are easily removed without tools for cleaning, Simply 

lift up and pull out. The tray racks may be hand washed or run through 
an automatic washer.  

2. To clean stainless steel surfaces use only cleansers, detergents, de-

greasers, or sanitizers that are certified to be "chloride-free" and 
"phosphate-free," and cleansers, degreasers, or sanitizers only in the 
recommended concentrations.  

DO NOT 

exceed recommended con-

centrations or mixing ratios.  After cleaning and sanitizing, rinse all 
exposed surfaces thoroughly with large amounts of clean, clear water. 
Wipe off any standing liquid or residue from all surfaces, corners and 
rear edges.  

3. Vinyl trim should be washed with a chlorine-free detergent and water.  

Rinse thoroughly  with clear water and allow to dry.  Never use abra-
sive cleaners, waxes, car polish, or substances containing strong aro-
matic solvents or alcohol.  Use of 

direct steam / hot water 

cleaning 

at temperatures above 

190

°

may result in “bubbling” or loosening of 

vinyl  adhesive. 

4. After all parts are dry, reinstall them and then replace the heating unit. 

WARNING: ELECTRIC 
SHOCK HAZARD 


Unplug the unit from 


electric 

power 

before    

performing cleaning or maintenance. 


WARNING:  
BURN HAZARD 

Allow the unit to cool     
before performing  any 

cleaning or maintenance procedures. 


WARNING: ELECTRIC 
SHOCK HAZARD 

DO NOT spray or splash 
water on the heater, con-

trol panel, timer or wiring. 

IMPORTANT: 

Cleansers, detergents, degreasers, sanitizers or bleaching agents that contain 

chlorides or 

phosphates will cause permanent damage 

to stainless steel products.  This damage appears as pits, 

eruptions, voids, small holes, cracks, severe discolorations or dulling of the metal finish.  Water with a high 
chlorine content can also damage stainless steel.  If unsure of your water quality, we recommend you have it 
tested

.  THIS DAMAGE IS PERMANENT, COSTLY TO REPAIR, AND IS NOT COVERED BY WARRANTY.  

PURPOSE 

FREQUENCY 

CLEANING AGENT 

METHOD OF APPLICATION 

Routine        
cleaning 

Daily 

Soap, ammonia, 
detergent and water 

Swab with cloth.                                    
Rinse with clear water, wipe dry. 

Smears                 
and              
fingerprints 

As needed 

Stainless steel cleaner,         
similar products 

Rub with cloth as directed on package.  
Rub in direction of grain of stainless steel.  

Do not 

use on vinyl trim or control panel. 

Stubborn spots 
and  
stains 

Daily or as needed 

Any chloride-free or            
phosphate-free 
cleanser 

Apply with damp sponge or cloth.           
Rub in direction of grain. Rinse thoroughly.         

Do not 

use on vinyl trim or control panel. 

Hard  
water spots 

Daily or as needed 

Vinegar 

Swab with cloth.                                         
Rinse with clear water, wipe dry. 

RECOMMENDED "TIPS" FOR CLEANING STAINLESS STEEL 

CAUTION:  CART 
DAMAGE 

Do not tip cart onto the 
doors to drain excess 

water. Permanent damage to the 
doors and hinges will result.  Use a 
clean dry cloth to mop any excess 
water inside cabinet after cleaning. 

Summary of Contents for GTH12

Page 1: ...ation Instructions are read and followed Damage to the appliance may occur if these in structions are not followed This manual is considered to be a permanent part of this appliance This manual must r...

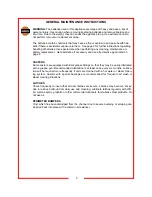
Page 2: ...or its agents When battery reaches 0 it is no longer safe to hold potentially hazardous foods Cleanliness of this appliance is essential to good sanitation Read and follow all included cleaning instru...

Page 3: ...the skin wash immediately and thoroughly If electrolyte enters the eyes also seek medical attention Neutralize spilled electrolyte with a solution of 1 lb bicarbonate of soda baking soda to one gallo...

Page 4: ...rsal tray slides Fully adjustable at 1 3 4 spacing Standard spacing at 3 1 2 centers HEATING SYSTEM Top mounted blower heater for even heat distribution High efficiency DC motor with cooling fans Full...

Page 5: ...r the appliance is properly grounded Unpack the cart and heating unit Ensure that all packing materials and protective plastic has been removed from the unit Inspect all components for completeness an...

Page 6: ...ZARD Allow the unit to cool before performing any cleaning or maintenance procedures WARNING ELECTRIC SHOCK HAZARD DO NOT spray or splash water on the heater con trol panel timer or wiring IMPORTANT C...

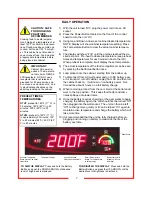
Page 7: ...y will show cabinet temperature setting Press the Temperature Button to view the actual cabinet tempera ture 4 The display will show PrE until the unit has reached the de sired set point Pre heat to d...

Page 8: ...cants for stainless steel products Do not use oil PERIMETER BUMPERS Vinyl which has been dislodged from the channel due to severe bumping or scraping can be pried back into place with a common screwdr...

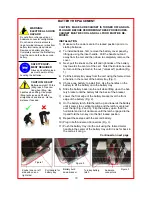
Page 9: ...Fig 1 on the left and right sides of the battery tray towards the center of the cart Twist the knobs one quarter turn until they remain in the out unlocked position 4 Pull the battery tray away from t...

Page 10: ...y tray towards the center of the cart Twist the knobs one quar ter turn until they remain in the out unlocked position Fig 1 4 Pull the battery tray away from the cart using the formed met al handle i...

Page 11: ...ORE PERFORMING THESE PROCEDURES CABINET MUST BE COOL AND ALL FOOD MUST BE RE MOVED INSTALLATION CONTINUED 12 Next twist the knobs one quarter turn until they release from the out unlocked position Fig...

Page 12: ...20 Plug 18607 0019 Terminal Block 6 pos 603 18612 0162 Hoop Element 1 400W 18612 0163 Hoop Element 2 400W 18614 0272 Fan Guard SC120 W15 18614 0275 Fan Guard SC80 W2 18614 0303 Muffin Fan 24VDC 26 CFM...

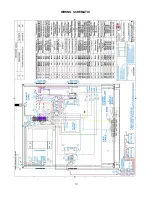
Page 13: ...WIRING SCHEMATIC 13...
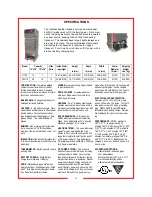
Page 14: ...y Replace both batteries Damaged wiring Repair wiring Damaged relay Replace relay Damaged controller Replace controller Damaged heating element Perform ohm reading Replace element Unit overheats Setpo...

Page 15: ...he equipment in accordance with the procedures described in the Operation Manual 6 Carter Hoffmann is NOT responsible for any loss of the customer s income loss of food product extra labor charges or...

Page 16: ...ter Hoffmann neither makes nor assumes and does not authorize any other person to make or assume any obligation or liability in connection with its products other than that covered in this warranty Th...

Reviews: