background image

Rev. (0) - 2014

Rev. (0) - 2016

Enviromental 

Management System

ISO 14001 : 2004

Certificate No : 12 104 30334 TMS

Safety 

Management System

BS OHSAS 18001 : 2007

Certificate No : 12 116 30334 TMS

53KDHT60N-518 

53KDHT72N-518

53KDHT84N-518

53KDHT90N-518

03504154

INSTALLATION  MANUAL

Miraco

Miraco

MISR REFRIGERATION & AIR CONDITIONING MFG. CO.

380-420V ~ 50Hz 3Ph

Carrier is committed for continuous improvement of Carrier products according to national and international standards  

to ensure the highest quality and reliability standards, and to meet market regulations and requirements.  

All specifications subject to change without prior notice according to Carrier policy of continuous development.

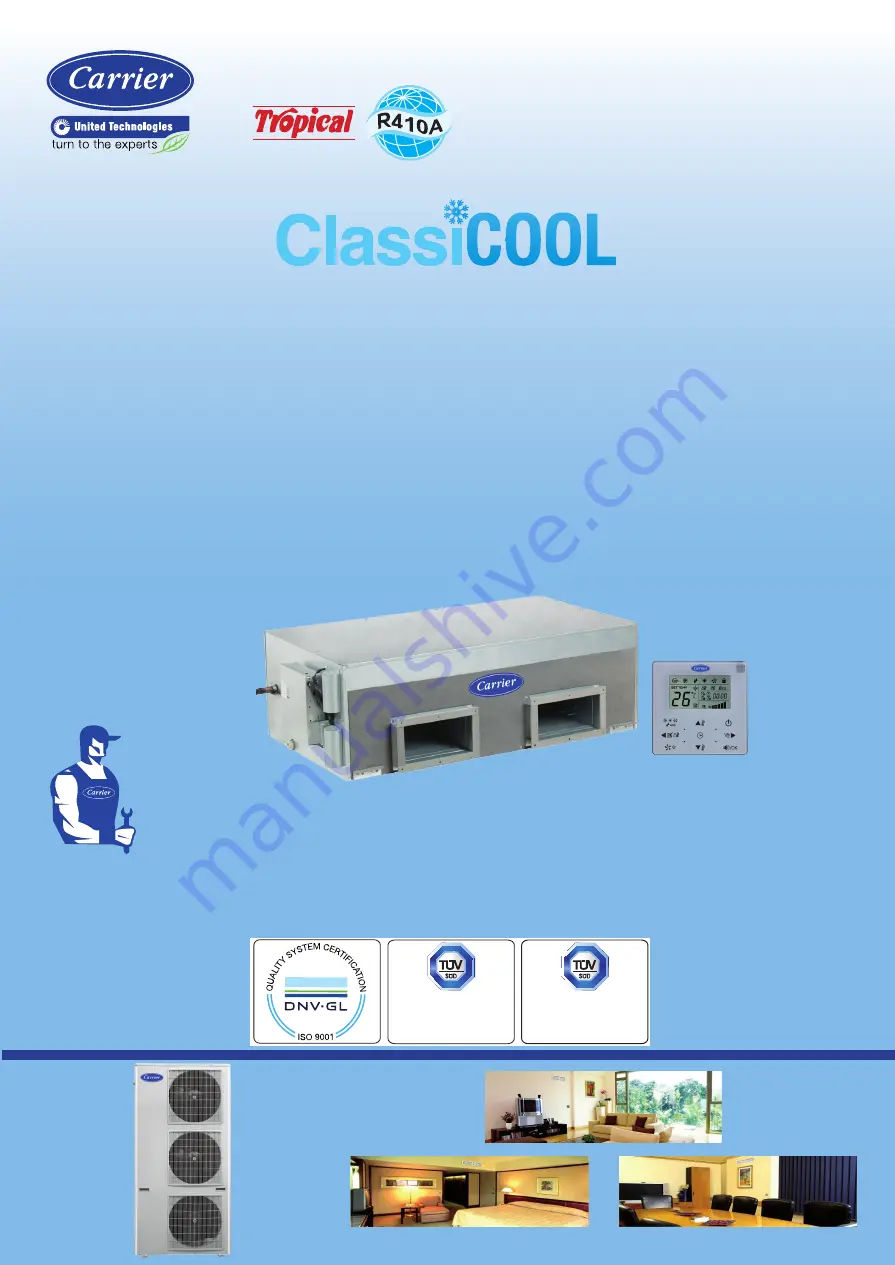
Ceiling Concealed Ducted Split Systems

High Efficiency - Green

Cool Only

Summary of Contents for ClassiCOOL 53KDHT60N-518

Page 1: ...iraco MISR REFRIGERATION AIR CONDITIONING MFG CO 380 420V 50Hz 3Ph Carrier is committed for continuous improvement of Carrier products according to national and international standards to ensure the highest quality and reliability standards and to meet market regulations and requirements All specifications subject to change without prior notice according to Carrier policy of continuous development...

Page 2: ...e Discharge Outdoor Unit 8 10 Installation Location Check List 15 11 Installation Accessories 16 12 Installation Chart 17 13 Indoor Unit Installation 18 14 Installation of Wired Room Controller 21 15 Installation of Display and Receiver Panel 24 16 Outdoor Unit Installation 27 17 Connecting Refrigerant Piping Lines 28 18 Installation Drain Line of Indoor Unit 41 19 Connecting Electrical Wiring 43 ...

Page 3: ...or refrigerant R410A 7 Pipe cutter 16 Gauge manifold R410A 8 Spanner half union 17 Thermometer 9 Reamer 18 Electrical multimeter Important During the system installation make first refrigerant piping connections and then electrical connections If the system is uninstalled first disconnect electrical cables and then refrigerant piping connections After completion of installation perform a run test ...

Page 4: ...ake the electrical connections Similarly when disassembling disconnect the electrical wiring first and only then open refrigerant connections What is not covered in our warranty 1 Failure due to wrong electrical connections between the electrical power supply and circuit breaker of air conditioner leading to fire due to short circuiting As these electrical connections are owner s responsibility 2 ...

Page 5: ...4 Supply Air From Indoor Unit 5 Electrical Box 6 Inter connecting refrigerant piping lines and electrical cables between outdoor and indoor units 7 Condensate Drain hose 8 Wired control Standard 9 Display Receiver Panel for optional wireless remote control Side Discharge Outdoor Unit 1 4 7 6 3 5 8 Indoor Unit High Static Pressure 2 9 ...

Page 6: ...een Refrigerant 7 Power Supply 220 240V 1Ph 50Hz 5 Power Supply 380 420V 3Ph 50Hz 1 Wired Room Controller 8 Manufactured by Miraco Carrier 5 OPERATING LIMITS COOLING Difference Dry Bulb Temp C Wet Bulb Temp C Indoor temperature Maximum Minimum 32 21 23 15 Outdoor temperature Maximum Minimum 52 21 MAIN POWER SUPPLY System Model Nominal Power Supply V PH HZ Minimum Voltage Maximum Voltage 53KDHT60N ...

Page 7: ...side of indoor unit when facing supply air flow of indoor unit The indoor unit should be installed horizontally for horizontal discharge only Using the factory provided holes located at the topside flanges of the indoor unit Weight Model Kg 42KDHT60N 718 83 42KDHT72N 718 83 42KDHT84N 718 83 42KDHT90N 718 83 Dimensions mm Pipe side view Kg 795 1470 510 510 398 112 75 66 238 45 24 ...

Page 8: ...6 7 DIMENSIONS AND WEIGHTS OF OUTDOOR UNIT Side Discharge Outdoor units Model Weight 38KDHT60N 518 110 38KDHT72N 518 119 38KDHT84N 518 119 38KDHT90N 518 120 1700 371 350 665 384 665 Kg 598 ...

Page 9: ...ch can lead to excessive length of refrigerant piping lines between outdoor and indoor units Avoid installation location which can lead to excessive height difference between outdoor and indoor units Select Installation location which should be able to support indoor unit operating weight The ceiling should be horizontal Select Installation location which should permit easy connection of refrigera...

Page 10: ...on on system cooling performance Avoid installation location which can lead to excessive height difference between outdoor and indoor units to avoid alteration on system cooling performance Avoid installation location which can lead to unnecessary turns and bends in the refrigerant piping lines connecting outdoor unit with indoor unit Avoid installation location where there are obstacles near the ...

Page 11: ...hich may result in malfunction Avoid installation location which is full of sulfuric gas which may result in malfunction Select installation location where the operation noise and discharged air are not disruptive to your neighbors When the installation is made on the rooftop or other places subject to strong wind When the outdoor unit is to be installed on the rooftop or at the places where there...

Page 12: ...tlet should be away from any obstacle by 500 mm or more to ensure free air circulation The back of outdoor unit air inlet should be away from any obstacle by 160 mm or more This distance is built in the design of wall support to ensure free air circulation The left side of outdoor unit should by away from any obstacle by 400 mm or more to ensure easy access to refrigerant and electrical connection...

Page 13: ...ht or left Obstacle at unit front air outlet Obstacle at unit back air inlet Note The height of Obstacle should be less than the height of outdoor unit No obstacle at top or right or left Obstacle at unit front air outlet Obstacle at unit top No obstacle at back or right or left 100 cm or more 16 cm or more 50 cm or more Outdoor Unit Obstacle Outdoor Unit Obstacle Obstacle 100 cm or more 100 cm or...

Page 14: ...No obstacle at front or top or right or left Obstacle at unit back air inlet Obstacle at unit top No obstacle at front or right or left Obstacle at unit back air inlet Obstacle at unit right and left sides No obstacle at front or top 16 cm or more Outdoor Unit Obstacle 16 cm or more Obstacle 40 cm or more 25 cm or more Obstacle 16 cm or more Outdoor Unit Obstacle 40 cm or more Outdoor Unit ...

Page 15: ...k air inlet Note The height of obstacle should be less than the height of outdoor units No obstruction at top or right or left Obstacle at unit back air inlet No obstacle at front or top or right or left 100 cm or more 16 cm or more 40 cm or more 100 cm or more Outdoor Unit Obstacle Obstacle Obstacle 16 cm or more Obstacle Outdoor Unit Outdoor Unit Outdoor Unit Outdoor Unit Outdoor Unit Outdoor Un...

Page 16: ...e Outdoor Unit Obstacle at unit back air inlet Obstacle at right and left sides No obstacle at front or top No obstacle at front or top 16 cm or more Obstacle 100 cm or more 40 cm or more 200 cm or more 150 cm or more 16 cm or more 40 cm or more 40 cm or more Obstacle 40 cm or more 25 cm or more Obstacle Obstacle Obstacle Outdoor Unit Outdoor Unit Outdoor Unit ...

Page 17: ...is close to the indoor unit The installation location is able to support operating weight of outdoor unit The installation location is far away from any sunlight The installation location is free of dust or any material which can cause clogging of outdoor coil The installation location allow sufficient space for air circulation around the unit The installation location allow sufficient space for s...

Page 18: ...connect the indoor unit the outdoor unit and circuit breaker ـ Wall Sleeve ـ Wall Cap ـ Sealer putty To fill the gap between the wall hole and the lump of refrigerant piping lines electrical connection cables and condensate drain line ـ Finishing tape PVC film To tie together the refrigerant piping lines electrical connection cables and condensate drain line ـ Vinyl tape To stick pipe insulation ـ...

Page 19: ... Drilling hole thru the wall 6 Connecting condensate drain line 10 Refrigerant leak test 3 Installing indoor unit 7 Connecting electrical wiring 11 Opening service valves 4 Pipes flaring 8 Finishing outer pipe covering 12 Finishing installation 13 Test Running 14 Description of operation Outdoor unit 9 Air purging with a vacuum pump ...

Page 20: ...ping direction Mark the desired drilling point When making wall hole make sure to drill outwards at a downward angle so that the height difference between the entrance and exit of the hole is at least 5 10 mm Step 2 Cutting Sleeve For Wall Hole Measure the thickness of the wall from the inside edge to the outside edge and cut PVC pipe at a slight angle 6mm shorter than the thickness of the wall St...

Page 21: ...cut off and consolidate the roof beam After the selection of installation location position the refrigerant pipes drain pipes indoor outdoor wires to the connection places before hanging up the machine The installation of hanging screw bolts will be as follows a Installation of hanging screw bolts in the ceiling of wooden construction Put the square timber traversal over the roof beam then install...

Page 22: ...ring Air Inlet 4 When connecting duct use inflammable canvas tie in to prevent vibrations 5 At the points where the duct joins with the unit it is advisable to use a flexible connection which absorbs vibration and prevents the transmission of noise inside the ductwork 6 Bends in duct design should be avoidable they should be as slight as possible and internal deflectors should be used when the duc...

Page 23: ... Preparation of wired controller before installation 1 Confirm that all the following parts are supplied No Name Qty Remarks 1 Wired controller 1 Inside carton box of wired controller 2 Cross round head wood mounting screw 3 GB950 86 M4X20 For Mounting on the Wall 3 Cross round head mounting screw 2 M4X25 GB823 88 For Mounting on the Electrical Switch Box 4 Plastic expansion pipe 3 For Mounting on...

Page 24: ...ler bottom cover in the electric control box through the screw bar Make sure the wire controller bottom cover is on the same level after installation and then install the wire controller back to the bottom cover 6 Over fasten the screw will lead to deformation of back cover CAUTION After adjusting the front cover and then buckle the front cover avoid clamping the communication switching wire durin...

Page 25: ...he temperature setting button and to adjust the second code value After setting the second code value press button to switch the first code to the next value When the first code value is 6 press button again to exit the parameters setting 4 The parameters setting function only under the situation which need to adjust the default functions setting states otherwise there is no need to do the setting...

Page 26: ...o cool with a wind speed of HIGH for 30 minutes The remote controller operation is disabled OFF The OPERATION lamp goes off The air conditioner is OFF while the remote controller operation is enabled 2 OPERATION green led OPERATION green led lights on when the air conditioner operates OPERATION green led lights off when the air conditioner stops 3 TIMER green led TIMER green led lights on when tim...

Page 27: ...L IN CASE OF NOT USING OPTIONAL WIRELESS REMOTE CONTROL For Ducted High Static Pressure Indoor Units Put the display board outside of the electrical control box Put the display board in the electrical control box The display panel mounting on the indoor unit The display panel shows error codes ...

Page 28: ...he display panel shows error codes How to install the display in ceiling 1 Remove the base of the display panel as in the picture 2 Install base of display panel with 2 screws in place to be mounted on the ceiling 3 Install display panel in the base is heard 4 Connect the wires of display panel to indoor unit and wired control Base of display panel where install 2 screws Display panel Display pane...

Page 29: ...ed unit b Lift unit from cardboard c Remove service door item 2 by removing one screw item 1 Detach the cable clamp by removing one screw 16 2 WALL INSTALLATION STEPS FOR SIDE DISCHARGE OUTDOOR UNIT Put outdoor unit on the floor support Floor Installation 1 2 Floor Support Outdoor Unit ...

Page 30: ... cylinder in an upright position 7 R410A refrigerant is only compatible with oils selected by the compressor manufacturer 8 Never expose oil to atmosphere because POE oils absorb moisture rapidly 9 Never open the system to atmosphere while it is under vacuum Filter drier is recommended to be used at installation site 10 Do not vent R410A refrigerant into the atmosphere Use only approved recovery e...

Page 31: ...29 CONNECTING REFRIGERANT PIPING LINES 17 2 REFRIGERANT CONNECTIONS CHART 1 Pipes Flaring 2 Pipes Connections 3 Air Purging 4 Leak Check 5 Pipes Insulation 6 Opening Valves ...

Page 32: ...ed installer according to good refrigeration systems practices Piping materials and insulation materials must be of refrigerant quality Select the pipe diameters to the size of system to be installed All bends must be considered when connecting indoor unit with outdoor unit by required length of refrigerant piping lines Do not remove the protective caps from the couplings until the refrigerant pip...

Page 33: ...ogether When there is excessive tubing it must be coiled horizontally so that the flow of refrigerant is from the top to bottom of the coil and towards the outdoor unit The excessive tubing must not be coiled vertically since the vertical coil affects the oil return to the compressor Avoid disconnecting refrigerant piping connections after they have been tightened to avoid refrigerant leaks Excess...

Page 34: ...chanical parts If height is more than 4 meters more than one oil trap must exist at the suction line the first one will be at the suction line near to the indoor unit and the following one will be 4 meters from the first one and so on C OUTDOOR UNIT ON THE SAME LEVEL AS INDOOR UNIT An oil trap is preferred to be at the suction line at the base of suction riser near the Indoor unit to facilitate oi...

Page 35: ...r 10 meter lines refrigerant added 10 5 x 15 75 grams For 20 meter lines refrigerant added 20 5 x15 225 grams 17 4 1 NOTES Refrigerant overcharge may cause a serious trouble of compressor Refrigerant undercharge may cause reduction of system performance Refrigerant cannot be charged until all field electrical wiring has been completed Refrigerant may only be charged after performing leak testing a...

Page 36: ...ap for liquid port 17 6 DESCRIPTION OF REFRIGERANT CONNECTIONS OF INDOOR UNIT Refrigerant Connections Details 17 7 DESCRIPTION OF REFRIGERANT CONNECTIONS OF REFERIGERANT PIPING LINES 1 Suction piping line 2 Liquid piping line 17 8 CUTTING AND FLARING TOOLS Make sure that have the required tools available before preparing refrigerant piping lines Indoor Unit Half Union Suction Half Union Liquid Pip...

Page 37: ...ny suction leaking out NOTE When reaming hold the pipe end downward and be sure that no copper scraps fall into the pipe STEP 3 Flaring the Piping Use flare tool to flare ends of both suction and liquid piping lines and then slide a flare nut on to the tube and modify the flare NOTES 1 Good flare should have the following properties Inside surface is glossy and smooth Edge is smooth and must not h...

Page 38: ...ve protective plastic nuts from the outdoor unit before being installed on the wall support STEP 6 Mounting flare nuts on the ends of refrigerant piping Mount suction flare nut large nut on the end of suction refrigerant piping line Mount liquid flare nut small nut on the other side of liquid refrigerant piping line STEP 7 Mounting flare nuts on the other ends of refrigerant piping lines Mount Suc...

Page 39: ...e Be careful not to damage the flare nut threads NOTES a Insufficient tightening torque will cause refrigerant leaks b Over tightening the torque will damage the tube flaring and cause refrigerant leaks 17 11 STEPS OF CONNECTING REFRIGERANT PIPING LINES TO OUTDOOR UNIT Connecting the other ends of suction and liquid piping lines respectively with suction and liquid flare valves of the outdoor unit...

Page 40: ... lead to corrosion of parts in the refrigeration system Be sure using a torque wrench to tighten the service port cap after using the service port so that it prevents the suction leakage from the refrigeration cycle No additional refrigerant charge has been provided in outdoor unit for air purge Air purging procedure using vacuum pump Air purging procedure using vacuum pump Connect the vacuum pump...

Page 41: ...erate the system for 10 to 15 minutes 3 Stop operation and wait for 3 minutes then connect the charging set to the service port of the suction valve Connect the charging hose with the push pin to the suction service port 4 Air purging of the charging hose Open the low pressure valve on the charge set slightly to purge air from the charging hose 5 Set the liquid valve to the close position 6 Operat...

Page 42: ...taken to isolate the refrigerant piping lines to minimize sound transmission from the system to the structure The insulation you select must have good insulation characteristic be easy to use resist age and not easily absorb moisture Finally wrap the pipes and pipes joints with insulation and tighten this with tape without exerting too much pressure on the insulation CAUTION After a pipe has been ...

Page 43: ...om yielding Or you can tie the drain pipe with the connecting pipe to fix it In the case of prolonged drain pipe you had better tighten its indoor part with a protection tube to prevent it from loosing The end of the drain pipe should be over 50mm higher than the ground or the bottom of the drainage chute and do not immerse it in water If you discharge the water directly into sewage be sure to mak...

Page 44: ...he lift distance must be less than 200mm otherwise the water will overflow when the air conditioner stops Only available for the unit with pump The end of the drain pipe should be over 50mm higher than the ground or the bottom of the drainage chute and do not immerse it in water If you discharge the water directly into sewage be sure to make a U form aqua seal by bending the pipe up to prevent the...

Page 45: ...air conditioner a separate circuit breaker with its own overload should be installed on the electrical distribution box D Operation On Off Circuit Breaker The installation of two pole automatic circuit breaker is necessary to operate the air conditioner The circuit breaker must be installed to be far away from any flammable materials curtains etc The circuit breaker must be suitable for air condit...

Page 46: ...tension cables If extension cables are needed use terminal block C Electrical Connections a Electrical connections must be performed in compliance with national and local wiring codes and standards b Check that the electrical connections between the terminal blocks of indoor and outdoor units are in accordance with the wiring diagrams and caution field electrical wiring contained in the manual Mis...

Page 47: ...35ºC db outdoor temperature 27 19ºC db wb Indoor Temperature High air flow of indoor unit 43ºC db outdoor temperature 27 19ºC db wb Indoor Temperature High air flow of indoor unit 46ºC db outdoor temperature 29 19ºC db wb Indoor Temperature High air flow of indoor unit 52ºC db outdoor temperature 27 19ºC db wb Indoor Temperature High air flow of indoor unit 19 4 ELECTRICAL CONNECTING TO OUTDOOR UN...

Page 48: ...the indoor unit from the outdoor unit 2 Refer to wiring diagrams and stickers caution field electrical wiring sticked inside the outdoor and indoor units Outdoor Units 38KDHT60N 518 38KDHT72N 518 38KDHT84N 518 38KDHT90N 518 Indoor Unit Outdoor Unit Power supply Single Phase 220 240V 1Ph 50Hz Use 3 core cable 3 x 1 m2 Power supply Three Phase 380 420V 3Ph 50Hz Use 5 core cable 5 x 2 5 m2 Use 3 core...

Page 49: ... is factory used to set the Setting Static Pressure Range of indoor unit as per the unit model Ducted Indoor Unit Model ENC2 Factory Setting Code Setting 42KDHT60N 718 0 42KDHT72N 718 42KDHT84N 718 42KDHT90N 718 1 Example Ducted split system 53KDHT60N 518 Switch ENC2 is factory set at code 0 Static Pressure Range 0 50 Pascal ...

Page 50: ...ump must be of circular shape Fix piping with pipe clamps and check that any pipe vibrations cannot be transmitted to the building structure 2 Fill the gap between the outside wall pipe hole and the piping with sealing wall sleeve wall cap and sealer so that rain and wind cannot enter 3 After completion of electrical wiring to the outdoor unit Fasten the electrical cables with the cable clamp Inst...

Page 51: ...to check correct refrigerant charge See figure table Measure total Amps consumed by the system Measure System working voltage 1 Low Pressure Measuring System Cooling Test Running SYSTEM MODEL 53KDHT60N 518 53KDHT72N 518 AMBIENT TEMP ºC 35 46 52 35 46 52 LOW PRESSURE PSI 146 4 159 5 166 6 139 6 152 3 141 1 TOTAL AMPS 8 5 10 2 11 2 11 1 13 3 14 6 SYSTEM MODEL 53KDHT84N 518 53KDHT90N 518 AMBIENT TEMP...

Page 52: ...p is properly done d The refrigerant piping lines are tested for refrigerant leakage e The suction and liquid service valves in outdoor unit are open f The cap nuts for flare valves are properly tightened 23 4 CONDENSATE DRAIN LINE CONNECTIONS a The condensate drain line from indoor unit is gradually inclined downwards to the outside b The condensate water flow smoothly 23 5 ELECTRICAL CONNECTIONS...

Page 53: ...ise or vibration from the outdoor unit during operation c There is no any abnormal noise or vibration from the indoor unit during operation d The wired controller operates correctly 23 8 CUSTOMER GUIDANCE a The correct operation of the air conditioner has been explained to the customer including the following points Starting and stopping method Operation mode adjustment Temperature adjustment Fan ...

Page 54: ...lict E0 Indoor and Outdoor communication malfunction E1 Room temperature sensor Open or short circuit E2 Indoor coil temperature sensor Open or short circuit E3 Outdoor coil temperature sensor Open or short circuit E4 Indoor PCB EEPROM malfunction E7 Outdoor unit malfunction Phase reversal error or phase loss Ed Water level alarm malfunction with optional drain pump EE NOTES 1 Prior to the malfunc...

Page 55: ...or and Outdoor communication malfunction X X X E1 Room temperature sensor Open or short circuit X X X E2 Indoor coil temperature sensor Open or short circuit X X X E3 Outdoor coil temperature sensor Open or short circuit X X X E4 Fan protection X X X E6 Indoor PCB EEPROM malfunction X X X E7 Outdoor unit malfunction Phase reversal error or phase loss X X X Ed Water level alarm malfunction with opt...

Page 56: ...unction Reason Standby E1 Lack of phase wrong phase E4 Power Error E5 Outdoor coil temperature sensor error open or short circuit P0 High pressure protection P1 Low pressure protection P4 Current protection P6 Outdoor coil temperature sensor failure open or short circuit oN Cool run NOTES 1 Prior to the malfunction repair disconnect the electrical mains supply by moving the circuit breaker to OFF ...

Page 57: ......

Reviews: