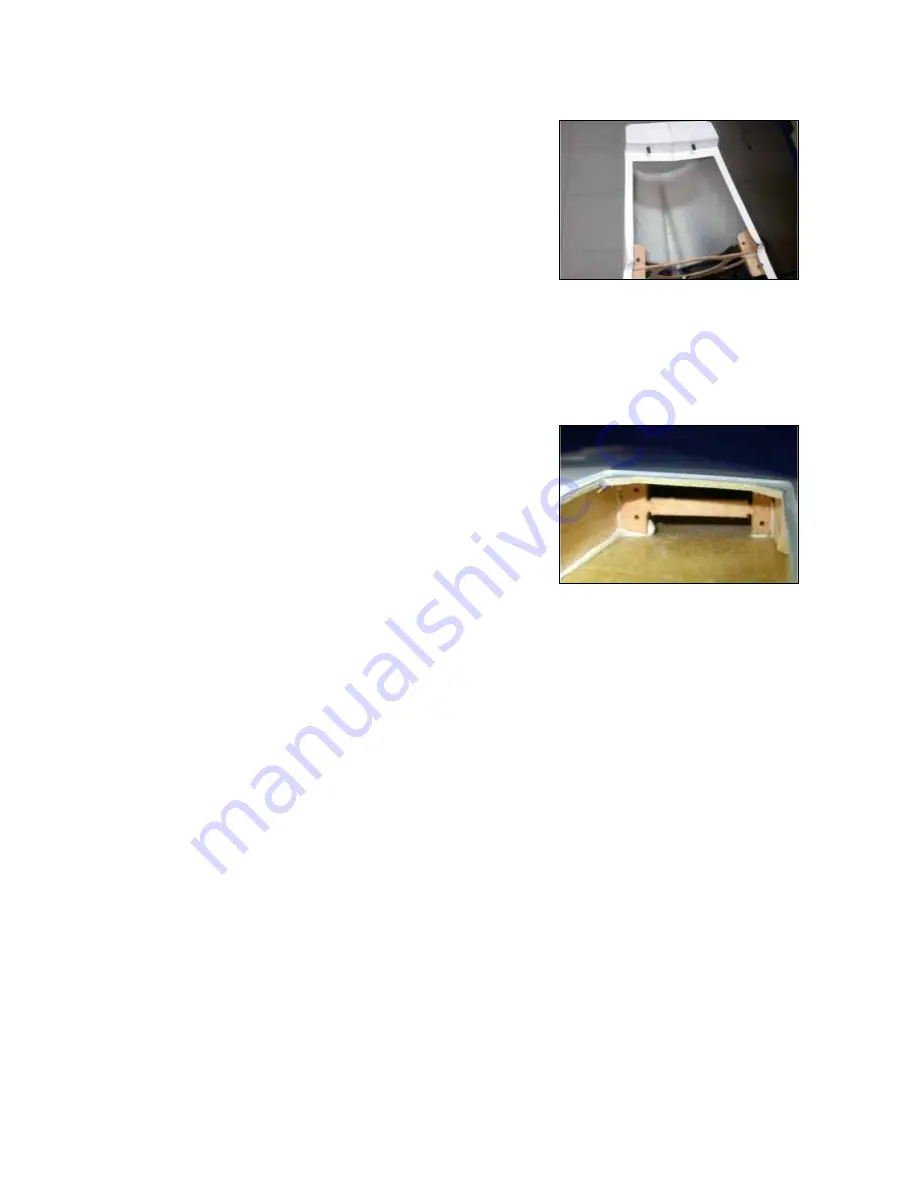
Stabiliser
The stabiliser is 95% completed at the factory. It is held to
the fuselage with a pair of 6mm diameter carbon pins at
the back, and two M4 x 60 bolts at the front into T-nuts in
the fuselage. The dual phenolic elevator horns are also
installed for you, and set at the correct angles with a jig.
Remove the fibreglass servo hatch and you will see the 2
pockets in the 6mm thick plywood root rib for the servos,
which are sized for JR8511/8611 servos, and they already
have milled holes for the servo screws. There is a small
plywood bar that joins the 2 parts of this rib together for the
production process, and these should be cut out. (The lat-
est kits have these removed at the factory for you). Trial fit
your servos, and carefully mark the position in the bottom
skins for the cutouts needed for the servo arms. It is a little
tricky to fit the servos and arms, but they do fit in there!
Make small slots for the servo arms at this stage, exactly
in line between the servo arm and the phenolic elevator
horns, and enlarge to suit your throws later.
The servos are fitted inverted, so the brass eyelets in the
rubber servo grommets should be reversed. Fit the servos
using the 2.9mmØ x 16mm long sheetmetal screws provid-
ed -
not
the standard screws supplied with the servos, as these are too small (and short) for
the milled 2mm Ø holes. It is easiest to use a long X-head screw driver to insert the servo
screws, because of the angle (photo P35).
Make up the linkages from the 120mm long M3 all-threaded rod provided, with an M3 alumini-
um clevise and M3 nut to connect to the 1” SWB servo arm and an M3 ball-link bolted
between the dual phenolic elevator horns with an M3 bolt and M3 lock nut. There are 2 lengths
of 3mm I.D. brass tube in the hardware, which should be fitted over the outside of the all-
thread to further stiffen it - and it is highly recommended that you fit these (photo P36).
IMPORTANT NOTE:
As the pin in the clevise is made from aluminium, and it fits tightly into
the hole in the aluminum servo arm it is imperative that you apply a little grease or light oil to
this joint too make sure that it can swivel smoothly and cannot lock together.
A painted fibreglass servo cover is provided, and this should be fitted in exactly the same way
as the wing servo cover (P32) - using 4 small plywood squares glued under the stab surface
and 4 of the 2.2mmØ x 10mm sheetmetal screws (photos P37 and 38).
As the servo extension wires are quite close to the bottom of the hot exhaust tube, make the
holes for them to exit the servo cover at the outer ends as shown (photo P38), to give the
maximum clearance to the exhaust ducting and protected with ‘spiral-wrap’ or similar. Of
course they should be routed to the sides of the fuselage when the stabiliser is in place, and
secured carefully so that they cannot contact the ducting (photo P47).
Fit the stabiliser, locating it on the 2 short 6mm Ø carbon pins at the back edge that are
installed at the factory, and bolt in place using the supplied M4 x 50mm high-tensile steel bolts
into the factory-fitted T-nuts at the front, tightened firmly.
22
(above) The stabiliser is retained
with two 6mmØ carbon pins at
the back, and two M4 bolts at the
front. All factory-finished.
(below) Cut out the plywood bars
across the servo holes, if not
already done at the factory.


